Windows 10’s next update is the April 2019 Update, which is version 1903 and was codenamed 19H1 during development. It features a light theme, speed improvements, and lots of polish. There are no crazy new features like My People or Timeline.
This article includes everything new as of Insider Preview build 18323, released on January 24, 2019.
Speed Improvements (Thanks to Better Spectre Fixes)

The news of Spectre shook the industry at the start of 2018. Spectre is a design flaw in CPUs, and it allows programs to escape their restrictions and read other programs’ memory spaces. Microsoft patched Windows to help block Spectre attacks, but the resulting patches reduced your PC’s performance in some scenarios—especially on PCs from 2015 and earlier, which don’t have the CPU features needed to speed up the fix.
Now, a change in the April 2019 Update looks set to practically eliminate those performance penalties and speed your PC back up. Specifically, Microsoft is enabling “retpoline” and “import optimization.” All you need to know is your PC should get faster, and you won’t even need to think about it. But here’s a detailed document from Microsoft explaining how these optimizations work if you’re interested in the details.
7 GB of Your PC’s Storage Reserved for Updates

Windows Updates can fail to install properly if your PC doesn’t have enough free disk space. This can be a problem on inexpensive devices with only a small amount of built-in storage.
Microsoft is solving the problem by commandeering about 7 GB of your PC’s storage and making it into “reserved storage.” This space is used for Windows Updates, but programs can also store temporary files here. When Windows needs the space for updates, it deletes the temporary files and performs the update. So space isn’t completely wasted, as files that would have normally used space on your computer will just sit in the reserved storage space.
The exact amount of storage space used depends on the optional features and languages you have installed, but it starts at about 7 GB.
Home Users Can Now Pause Updates, Too!

Microsoft says it’s “[made] the Pause Update feature easier to find” by placing it directly on the main Settings > Update & Security > Windows Update page.
However, that’s not all. Microsoft didn’t announce this officially, but the Pause Updates feature now works on Home editions of Windows 10—at least in Insider builds, so this could easily change. Home users can now pause updates for up to seven days. It’s a great feature if you need a temporary reprieve from updates. However, as in the Professional version of Windows 10, Windows Update will immediately check for and install updates after it unpauses. Windows 10 Professional users can still pause updates for up to 35 days at a time.
A Light Desktop Theme

Windows 10 now has a shiny new light theme. The Start menu, taskbar, notifications, action center sidebar, print dialog, and other interface elements can now be light instead of dark. Windows 10’s latest update even features a new default desktop wallpaper that matches the new theme.
Technically, Windows 10 now has two separate options: Windows mode and app mode. The old default theme, which combined a dark taskbar (dark Windows mode) with light apps (light app mode) is still an option. You can choose any combination of the two settings.
File Explorer’s icon has been tweaked to have some brighter colors, and it now looks better with the new light theme.
Windows Sandbox for Professional Users

Windows 10 now has a built-in “Windows Sandbox.” It’s everything we’ve always wanted: an integrated, isolated desktop environment where you can run software in a container without affecting your host operating system. When you close the Sandbox, all the software and files in the sandbox are deleted. It uses hardware-based virtualization to keep the software confined to a container, just like Microsoft’s Hyper-V.
The Sandbox is only available on Professional, Enterprise, and Education editions of Windows, so Home users will have to pay to upgrade from Home to Pro to install and use the sandbox.
A Less Cluttered Default Start Menu

Microsoft is cleaning up the default Start menu. The default Start menu is now just a single column and is much simpler. Yes, it’s not perfect, and it still has Candy Crush Saga—but at least that game is buried in a “Play” folder.
You won’t see these changes on an existing PC. But, when you start using a new PC or start using a new user account on your current PC, you’ll see a cleaner Start menu.
You can also unpin the default groups of tiles more quickly if you’d rather have a cleaner Start menu. Windows now lets you unpin groups of tiles by right-clicking them and selecting the “Unpin Group From Start” option. You don’t have to remove tiles one by one anymore.
Windows 10 Lets You Uninstall More Built-in Apps

If you want to uninstall more built-in apps completely, now you can. Windows 10 always let you uninstall some built-in apps like Solitaire, My Office, and Skype, but now it also lets you uninstall built-in apps like 3D Viewer, Groove Music, Mail, Paint 3D, and more.
This doesn’t extend to all apps. There’s still no way to remove the Edge browser or Store app, for example. But you can remove most apps.
Cortana and the Search Bar Are Separating

Windows 10 has a search bar that’s integrated with Cortana, but they’re separating. In the April 2019 Update, the search bar functions as a normal search box, and there’s a separate Cortana icon on the Windows taskbar. You can leave the search box on the taskbar and hide the Cortana icon or hide the search box and leave Cortana. Of course, you can also hide both.
The Search interface has a new start design, and it features options like “All,” “Apps,” “Documents,” “Email,” and “Web” after you click it. This is different from previous versions of Windows 10, which showed Cortana whenever you clicked the box and waited for you to type a search to present these options.
Unfortunately, the standard Windows search bar still integrates online search results with Bing, so it doesn’t just search your PC. There are more options, too—you can even disable SafeSearch for results in the search bar, and Windows will show you previews of adult content, for some reason.
But this does point to an interesting way forward and a decrease in the relevance of Cortana—now, you could leave the search bar on the taskbar and disable the Cortana icon, putting Alexa in its place.
The Start Menu Searches All Your PC’s Files

The Start menu’s search box is getting a lot more useful, however! The file search feature in the Start menu can now search for files anywhere on your PC using the Windows search index. In previous versions of Windows 10, it only searched libraries like Documents, Downloads, Music, Pictures, and Videos, and your Desktop. The search will still be quick thanks to the index.
This is an elegant solution and makes a lot of sense. The Windows search indexer has been around for a long time and was always ignored by Windows 10’s Start menu for some reason, but Microsoft has finally seen the light. You can configure which locations are indexed and searched from within the Settings app.
To enable this, head to Settings > Search > Searching Windows and select “Enhanced (Recommended)” to make the indexer search your entire PC. “Classic” indexing mode, which just searches your libraries and desktop, is still available as an option. You can also customize search locations to choose the precise folders indexed by Windows.
Passwordless Login

Microsoft is pursuing “a world without passwords.” You can now create a Microsoft account without a password online. That account is linked to your phone number, and Microsoft will text you a security code whenever you try to sign in.
On the latest version of Windows 10, you can now sign into Windows 10 with these passwordless accounts and set up a PIN or other Windows Hello sign-in feature to secure your computer. The account doesn’t have a password you ever have to type.
Of course, this isn’t mandatory. It’s just a new, optional type of account you don’t have to create.
A System Tray Icon for Windows Update

Windows Update now has a notification (system tray) icon for updates. You can head to Settings > Update & Security > Windows Update > Advanced Options and enable the “Show a notification when your PC requires a restart to finish updating” option to enable it.
After you do, you’ll see a Windows Update icon with an orange dot in your taskbar’s notification area when you need to reboot your PC for updates. It’s a nicer way of getting alerted to a required reboot than a full-screen message; that’s for sure.
A New Update Naming Scheme (For Now)

Microsoft keeps changing Windows 10’s update naming scheme. Windows 10’s October 2018 Update was named Redstone 5 during development, and the previous four were also “Redstone” releases with different numbers. Now, to make things even simpler, the April 2019 update was named 19H1, as it was scheduled for release in the first half of 2019.
This sounds simple, except Microsoft has already abandoned the new naming scheme and is about to change the naming next time around. The releases after 19H1 will reportedly be codenamed “Vanadium” and “Vibranium,” as the Windows 10 team is aligning its naming with the Azure team.
Zoom (and More) in the Console

Windows 10’s console now lets you zoom in and out. Just hold the Ctrl key and scroll with your mouse or trackpad. With the default Consolas font, text in the console scales nicely and doesn’t look pixelated, no matter how much you zoom in. The aspect ratio of the frame stays the same so text won’t overflow onto different lines, either.
There are also some new experimental console features you can adjust. Right-click any console window’s title bar, select “Properties,” and click the “Terminal” tab to find them. For example, you can configure the text entry cursor’s color and shape.
More Automatic Troubleshooting

Windows has had troubleshooters for a while, but you had to know what type of problem your PC was having and then navigate to the correct troubleshooter. Now, you can just navigate to Settings > Update & Security > Troubleshoot. You’ll see a list of recommended troubleshooters that Windows thinks might fix your problem.
In fact, Windows automatically tries to fix some problems in the background now. Here’s what Microsoft says about that:
Microsoft can automatically fix certain critical problems on your Windows device to keep it running smoothly. For example, we may automatically restore default settings for critical services, adjust feature settings to match your hardware configuration, or make other specific changes required for Windows to operate normally. Critical troubleshooting happens automatically and can’t be turned off.
Windows can perform recommended troubleshooting in the background, too. To control whether this happens, head to Settings > Privacy > Diagnostics & Feedback. Under Recommended Troubleshooting, select “Ask me before fixing problems,” “Tell me when problems get fixed,” or “Fix problems for me without asking. By default, Windows 10 is set to ask.
Notifications Hidden in Full-Screen Apps

Windows 10’s next update can also hide notifications while you watch videos or use any other full-screen app thanks to an improvement in Focus Assist. Focus Assist can already hide notifications while you’re playing any full-screen game, but now it can work when you’re using any app, whether that’s a video player, full-screen spreadsheet, or web browser after you pressed F11.
Notepad Improvements, Once Again

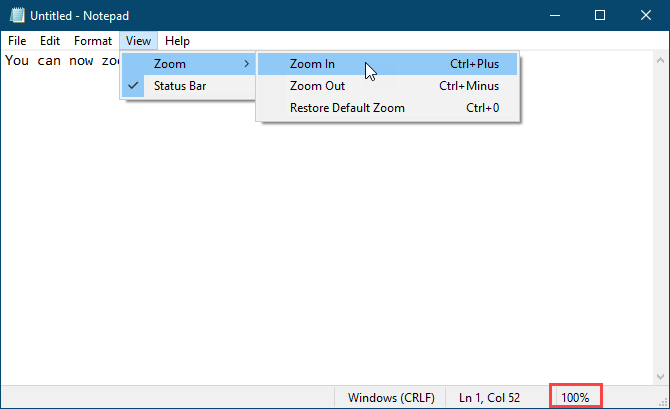
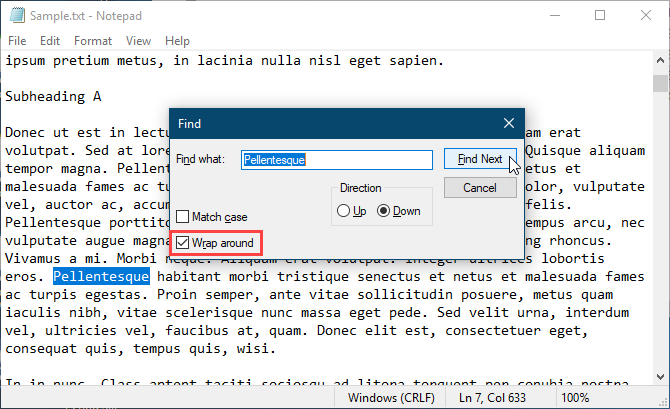
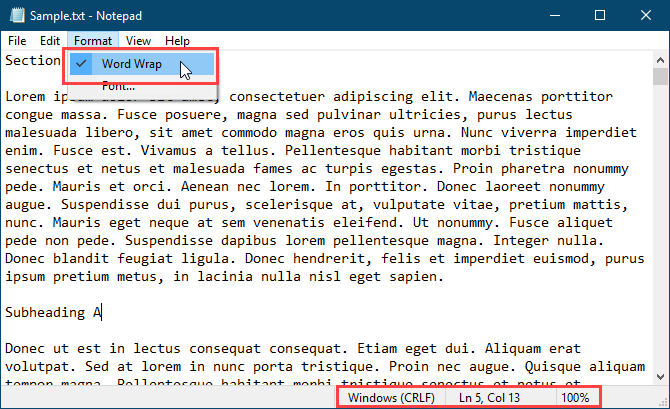
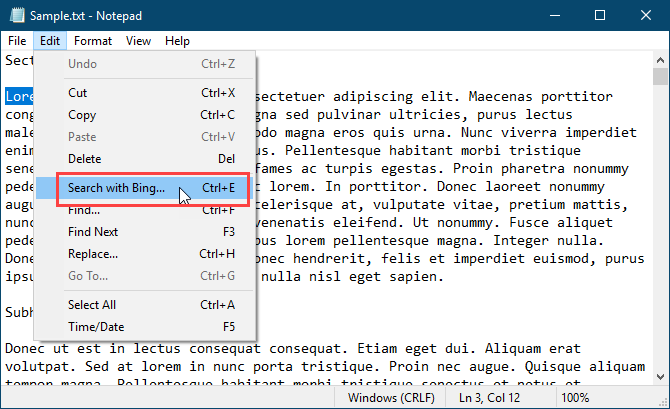
Yes, Microsoft is still working on Notepad—even after all the improvements back in the October 2018 Update.
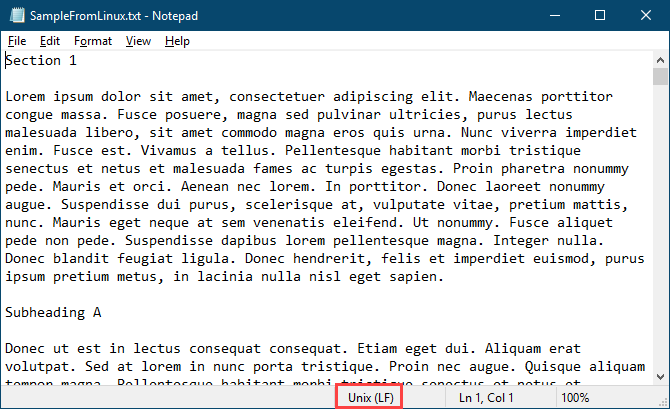
Microsoft has also made changes to the way Notepad handles encodings. The status bar now displays the encoding of the open document. Notepad can now save files in UTF-8 format without a Byte Order Mark, which is now the default. This makes Notepad more compatible with the web, where UTF-8 is the default, and it’s also backward compatible with traditional ASCII.
Notepad will now have an asterisk in the title bar when the current file has been modified and not saved. For example, if you’re working on a file named Example.txt and make some changes, the title bar will say “*Example.txt” until you save the file.
New shortcuts are available, too. Press Ctrl+Shift+N to open a new Notepad window, Ctrl+Shift+S to open the Save As dialog, or Ctrl+W to close the current Notepad window. Notepad can also now save files with a path longer than 260 characters if you set a larger MAX_PATH on your system.
There’s also a new Help > Send Feedback option that will open the Feedback Hub to the Notepad category so you can provide feedback to Microsoft.
More Improvements and Changes

You’ll see a banner at the top of the Settings app’s “home page” with your Microsoft account and links to common tasks like Your Phone, Windows Update—and Microsoft Rewards, for some reason.

The official release of Emoji 12 is coming in March 2019, and Microsoft has added new emoji to Windows 10 in preparation. As always, you can press Windows + . (period) to open the emoji panel anywhere in Windows 10. They’re also available on the touch keyboard.

Windows 10 now supports kaomoji in the emoji picker, too. Kaomoji is a Japanese term that translates to “face characters. For example, (╯°□°)╯︵ ┻━┻ is a popular kaomoji.
And, when you open the emoji panel, you can now click or touch and drag it to move it around.

File Explorer now shows “friendly dates” by default. So, rather than dates like “1/23/2019”, you’ll see dates like “Yesterday,” “Tuesday,” “January 11,” and “February 16, 2016.”
You can disable this by right-clicking the top of the columns in the File Explorer window and unchecking “Use friendly dates.” This will give you the old format back.

The Storage Settings page has been redesigned a bit, too. Head to Settings > System > Storage to see a breakdown of how your space is used. You can click each category to find actions that will help free up space.

The Settings > Time & Language > Date & Time screen gains a “Sync Now” button to immediately synchronize your clock with an internet time server. It also shows you when the time was last synchronized and the address of your system’s current internet time server. This helps if your time is wrong for some reason—like, for example, if Windows doesn’t correctly change your clock for DST.

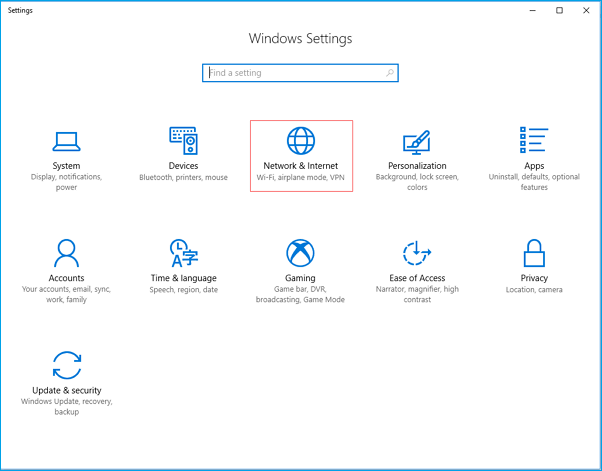
The Settings app can now configure advanced IP settings for Ethernet connections. For example, you can configure a static IP address or set your favorite DNS server. Previously, this required using the Control Panel. Head to Settings > Network & Internet > Ethernet, click your Ethernet connection name, and click “Edit” under IP settings to find these options.

Windows Update has had “Active Hours” since the Anniversary Update. You can tell Windows when you’re using your PC, and it won’t automatically restart your PC during these hours.
In the April 2019 Update, you can enable a new “Automatically adjust active hours for this device based on activity” setting and Windows will automatically set your active hours, so you don’t have to think about them. This option is available at Settings > Update & Security > Windows Update > Change Active Hours.

There’s now a new, globe-shaped icon that appears when your PC doesn’t have any Internet connection. This replaces the previous individual icons for Ethernet, Wi-Fi, and cellular data connections.

Windows now has a microphone status icon, too. This icon appears in your notification when an application is using your microphone. You can mouse over it to see which application is using your mic. Click it to open the Settings > Privacy > Microphone screen.

The Windows Security app—Windows 10’s built-in antivirus and security application—now has a redesigned “Protection History” pane. It shows you more information about detected threats and available actions. For example, in addition to threats detected by the Windows Defender antivirus, it also shows you blocks initiated by Controlled Folder Access.

Windows Security now also has a new “Tamper Protection” option. When enabled, this setting protects important security settings. For example, it limits changes to many of the options controlled by the Windows Security app unless you open the app and make the changes. This prevents programs from changing them in the background. To enable this setting, head to Windows Security > Virus & Threat Protection > Virus & Threat Protection Settings.

You can set a default tab in the Task Manager. This tab will open whenever you launch the Task Manager. To do so, use the Options > Set Default Tab in the Task Manager.

The Task Manager now displays the high DPI awareness of the processes on your system, so you can see more information about which applications will work properly with high DPI displays. To find this option, open the Task Manager, click the Details tab, right-click the headers at the top of the list, click “Select Columns,” check “DPI Awareness” in the list, and click “OK.”
Microsoft is also enabling the “Fix Scaling for Apps” option by default. This will help fix blurry applications on high DPI displays. This was added to Windows 10 back in the April 2018 Update, but Microsoft left it disabled by default to be conservative.

The sign-in screen now has an “acrylic” background to blend in with Microsoft’s new “Fluent Design System. Previously, it had more of a blur—it’s a different visual effect.
Speaking of Fluent Design, Microsoft is also adding shadows to Microsoft Edge’s context menus and other parts of the operating system.

The Start menu’s design has been tweaked a bit, too. It has more “Fluent Design” touches and icons in the menus. For example, the Sleep, Shut Down, and Restart options in the menu now have icons.

The Windows Hello options at Settings > Accounts > Sign-in Options have been redesigned. All available sign-in options are now in a single list, and each option has an explanation under it.
You can also now set up Windows Hello to work with a physical security key (like a YubiKey) directly from the Settings app.

The brightness tile under quick actions in the Action Center is now a slider, which makes it a lot easier to quickly change your display’s brightness level. You can now right-click a quick action tile and select “Edit Quick Actions” to quickly edit your tiles right from the sidebar without opening the Settings app, too.

The touch keyboard now lets you input more symbols. To find them, tap the old “&123” button to see symbols and numbers, and then tap the new “Ω” button see additional symbols. These symbols are integrated into the emoji picker, too.

That same touch keyboard now helps you type more accurately by dynamically adjusting the targets around each key. So, if you frequently mistype a letter by tapping a little to the left or right, it’ll learn. This happens invisibly, under the hood.

Windows now lets you choose a cursor color and size. You can make the cursor larger and change its color, making it easier to see. Head to Settings > Ease of Access > Cursor & Pointer to see available options.
Even More Changes!
There are always tons of new changes in these Windows 10 builds. Even this isn’t a complete list! But here are a few more:
- App Updates: Various apps included with Windows have been updated, as usual. For example, the Snip & Sketch app has more options for working with screenshots, including the ability to add a border to them and print them. It can now take delayed screenshots on a timer and screenshots of individual windows, too. Sticky Notes 3.0 is available, and it finally syncs your notes between computers. The Mail & Calendar app now has a navigation button for opening Microsoft To-Do. The Game Bar has a built-in gallery so you can see view screenshots and videos, right from the Game Bar interface. The Office app has been redesigned to be based on the new Office.com experience. It helps you launch Office apps on your computer, install ones that aren’t, and find recently used Office documents.
- Cortana + Microsoft To Do: Cortana now adds your reminders and tasks to lists in Microsoft To-Do. So, when you tell Cortana to add milk to your grocery list, you’ll see Milk appear on the “Grocery” list in the Microsoft To-Do app.
- Consistent Display Brightness: Your display’s brightness will not change automatically when you plug it into a charger. Previously, you may have lowered your display’s brightness, and it might become brighter when you plug it in. Now, it will automatically remember your preferred brightness—even when you plug it in.
- Download Folder Sorting: Windows 10’s Downloads folder will be sorted by “most recent” by default, which puts your most recently downloaded folders on top. This has always been an option, but it wasn’t the default. If you’ve chosen a default sorting method, your existing setting won’t be changed.
- Disk Cleanup Warning: The Disk Cleanup tool now displays a warning when you click the “Downloads” option, warning that this is your personal downloads folder and all files inside it will be removed.
- Windows Update Reboots: Windows Update can now reboot your PC immediately after installing updates rather than waiting for a more convenient time. This is an optional setting you can enable if you like, and Windows Update will be more considerate by default.
- Start Menu Reliability Improvements: The Start menu is becoming more reliable. Start was previously part of the ShellExperienceHost.exe process but is now its own process: StartMenuExperienceHost.exe. If a problem occurs with the main ShellExperienceHost.exe process, the Start menu should still be responsive. This will also make it easier for Microsoft to debug problems with the Start menu.
- Native RAW Support: Microsoft is adding native support for the RAW image format often used by professional photographers to Windows 10. Open the Microsoft Store and install the “Raw Image Extension” package to use it. This will enable image thumbnails, previews, and metadata of RAW files in File Explorer. You can also view RAW images in apps like Photos after installing the package.
- Font Management in Settings: Font management is improved. You can now drag-and-drop font files into the Settings > Fonts page to install them. You can click a font on this page to view its font faces and details or uninstall a font from here. (This installs the font for a single user. To install it system-wide, right-click a font file normally and select “Install for All Users.”)
- Clipboard History Redesign: The Clipboard History viewer added back in the October 2018 Update has a new, more compact design. Press Windows + V to open it.
- Streamlined PIN Resets: When signing into Windows 10 with a PIN, you can click the “I Forgot My PIN” link, and you’ll see a new, streamlined interface for resetting your PIN right from the welcome screen.
- Colors in the Task Bar’s Jump Lists: If you tell Windows to show your accent color on the taskbar from Settings > Personalization > Colors, the jump lists that appear after you right-click an icon on your taskbar will also be themed with your chosen color.
- Windows Subsystem for Linux: Windows Subsystem for Linux’s wsl command-line toolnow has new options, including the
--importand--exportoptions for importing and exporting Linux distributions using tar archive files. Microsoft is also consolidating things—thewslcommand now includes options from thewslconfigcommand, and Microsoft plans to only update thewslcommand with command-line options in the future. - FLS Slot Limit Increase: Microsoft raised Windows 10’s FLS (Fiber Local Storage) slot allocation limit. This is particularly useful for musicians, who will be able to load more unique plugins into their DAWs (digital audio workstations.) This will also aid any other application that wants to load hundreds or thousands of unique DLL files.
- Narrator Improvements: Narrator has a “Read by Sentence” feature that you can instruct to read the current, next, and previous sentences. The Narrator also works better with Google Chrome, too—which makes sense, as Microsoft Edge will one day be based on Chromium, the open-source software that forms the basis for Google Chrome. Narrator will now even warn you if the Caps Lock key is on when you start typing, too. It also has a new “Narrator Home” interface that appears whenever you turn on Narrator.
- Reset This PC Redesign: The “Reset This PC” interface that resets your PC to its original state was redesigned a bit, and now requires fewer clicks to go through.
- Insider Settings Redesign: The Windows Insider settings at Settings > Update & Security > Windows Insider Program have also been streamlined and simplified, but all the same options are still there.
- Sound in the Notification Area Stays the Same: In earlier Insider builds of 19H1, Microsoft experimented with making the sound icon system tray open the Sound page in the Settings app. This change has been reverted, and the option in the volume icon’s context menu will now open the classic desktop volume mixer window.
- My People: Microsoft may kill Windows 10’s “My People” feature at some point, but this hasn’t been officially confirmed.
Other new features include support for additional languages throughout the operating system. For example, SwiftKey’s typing intelligence now supports languages like English (Canada), French (Canada), Portuguese (Portugal), and Spanish (United States). If you write in Vietnamese, the touch keyboard now supports Vietnamese Telex and Number-key based (VNI) keyboards. Windows now also contains an Ebrima font that supports ADLaM documents and web pages, which is the language of the Fulani people, who predominantly live in West Africa.
Source: https://www.howtogeek.com/402569/everything-new-in-windows-10s-april-2019-update/
Source: https://www.howtogeek.com/402569/everything-new-in-windows-10s-april-2019-update/