Windows 10 users can modify the
operating system's privacy settings manually,
for instance by disabling express setup during installation or upgrade,
or by exploring the Privacy section of the new Settings application.
While it gives them full control over each setting, it requires prior knowledge of these settings and time to make the changes.
Privacy
tools help users in this regard but may limit the control these users
have over what is happening in the background depending on how the tool
works.
The following comparison provides you with an overview of
these privacy tools highlighting the good, the bad and the ugly for each
of them.
Note: We update the listing regularly.
Please let us know about any updates that we may have missed, and about
new programs that you found that are not on it already.
Windows 10 Privacy Tools
The following programs are reviewed:
- Destroy Windows 10 Spying (Open Source)
- Disable Win Tracking (Open Source)
- DoNotSpy 10
- Windows 10 Privacy and Shit (Open Source)
- Windows 10 Privacy Fixer (Open Source)
- W10 Privacy
- Shut Up 10
- Spybot Anti-Beacon for Windows 10
- Ashampoo AntiSpy for Windows 10
- Windows Privacy Tweaker
- Win10 Spy Disable
- Win10 SpyStop
- WinPurify
- Windows 10 Lite (Open Source)
- (new) Privacy Repairer
- (new) Debloat Windows 10 (Open Source)
- (new) Blackbird
- (new) WPD
Please
note that you need to run all programs with elevated privileges as the
majority of tweaks are not applied otherwise. You do that with a
right-click on the program executable and the selection of "run as
administrator" from the options.
Overview of Windows 10 Privacy Tools
| Name | Backup/Restore | Explanation | Privacy Tweaks | Misc | Update |
| Destroy Windows 10 Spying | No/No | No | disable services, remove apps, telemetry, tools | Command line support | 2016 |
| Disable Win Tracking | No/No | No | limit tracking, source |
| 2017 |
| DoNotSpy 10 | Yes/No | Yes | disable services, apps access, telemetry |
| 2017 |
| Windows 10 Privacy and Shit | No/No | No | disable services, telemetry | Batch file | 2015 |
| Windows 10 Privacy Fixer | No/No | No | disable services, apps access, telemetry, remove apps, source code | additional system tweaks | 2015 |
| W10Privacy | Yes/Yes | Yes | disable services and tasks, apps access,telemetry, disable ads | 2017 |
| Shut Up 10 | Yes/No | Yes | disable services, telemetry, access | 2017 |
| Spybot Anti-Beacon for Windows 10 | No/No | No | disable services, telemetry, access, hosts | 2016 |
| Ashampoo AntiSpy for Windows 10 | Yes/Yes | No | telemetry, apps access | 2016 |
| Windows Privacy Tweaker | No/No | No | Services, Task Scheduler, Registry, Telemetry | 2016 |
| Win10 Spy Disabler | Yes/No | No | Services, Task Scheduler, Telemetry, apps | 2016 |
| Win10 SpyStop | Yes/No | Yes | Telemetry, block hosts, Windows Update | 2016 |
| WinPurify | No/No | No | Telemetry, remove apps |
| 2016 |
| Windows 10 Lite | No/No | Yes | Remove apps, Task Scheduler,Telemetry | BlackViper Services support | 2017 |
| Privacy Repairer | No/No | Yes | Telemetry, apps access, remove ads | recommendations | 2017 |
| Debloat Windows 10 | No/No | In code | disable services, remove apps, telemetry, privacy |
| 2017 |
| Blackbird | No/Yes | No | disable services, telemetry, apps, hosts, | supports Windows Vista and up | 2016 |
| WPD | No/No | Yes | disable services, Group Policy, telemetry, block IPs, tweaks |
| 2017 |
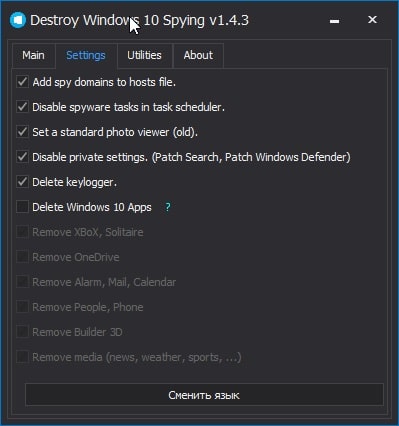
Destroy Windows 10 Spying

Destroy
Windows 10 Spying concentrates on a handful of privacy settings and
tweaks only. You may use it to disable spyware tasks in the Task
Scheduler, block Microsoft domains in the hosts file, to turn Windows
Update on or off, and to remove select applications or all applications
from the operating system.
The program does not support backup and restore functionality, and there are no explanations for the tweaks it offers.
While
some are self-explanatory, others reveal nothing about the task that
gets carried out when they are run. For instance, you don't know which
tasks are disabled in the Task Scheduler when you select the tweak to
disable spyware tasks in it.
You may run the program from the command line. All switches are explained in the readme file it ships with.
Disable Windows 10 Tracking

This
is the smallest tool functionality-wise but the one that is the largest
in size. It displays four options in its interface which all
concentrate on disabling tracking.
Disable Windows 10 Tracking lacks a backup option and explanations of entries.
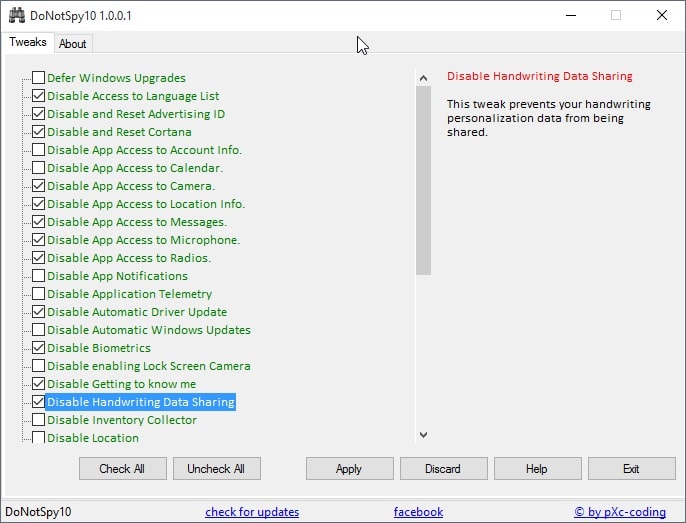
DoNotSyp 10

Note:
The program ships with Open Candy adware offers which are displayed
during installation. Make sure you block those if you are not interested
in those offers.
You may create a system restore point on start of the program so that you can restore it should the need arise to do so.
The
program displays all tweaks as checkboxes in its interface. A detailed
description is provided on the right once you select a tweak from the
list so that you know what it does and what impact it has on system
operations.
You find the usual assortment of tweaks supported by
DoNotSpy 10. This includes disabling application access to sensors or
system features, disabling Cortana or handwriting data sharing.
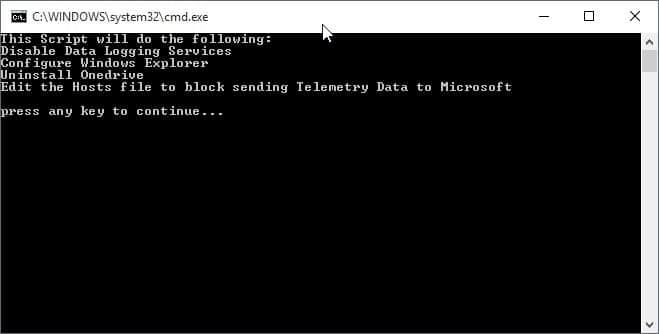
Windows 10 Privacy and Shit

This
is a batch file that you need to download from Pastebin. Create a new
.bat file on your system and paste the contents of it into the newly
created file.
When you run it afterwards, it will execute select
privacy related tasks including disabling data logging services,
uninstalling OneDrive and adding domains to the hosts file to block
Telemetry data sending.
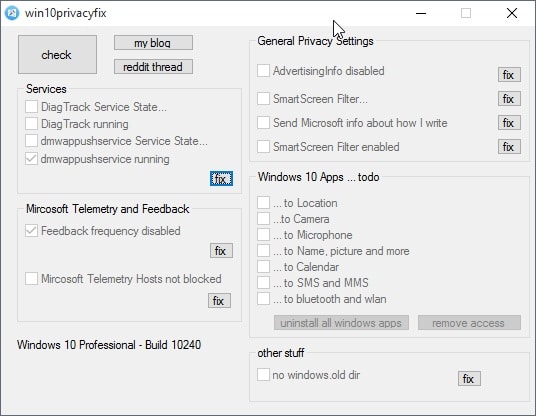
Windows 10 Privacy Fixer

The
program ships with a compact interface to modify important privacy
settings on Windows 10. You do need to click on check first to retrieve
information about tweaks that are already set, but even if you do, some
settings are listed as unchecked even though they are checked.
Windows
10 Privacy Fixer lets you disable four core services related to
telemetry and feedback, block Telemetry hosts, disable application
access to system features such as location or calendar, and make general
privacy changes, for instance by disabling the unique advertising ID.
You may use it furthermore to uninstall all Windows apps.
A backup is not created and there is no restore option available as well because of it.
Lastly,
there are no explanations provided for features. While most are
self-explanatory, additional information about some tweaks are necessary
to make sense of them or reveal what they actually do when run.
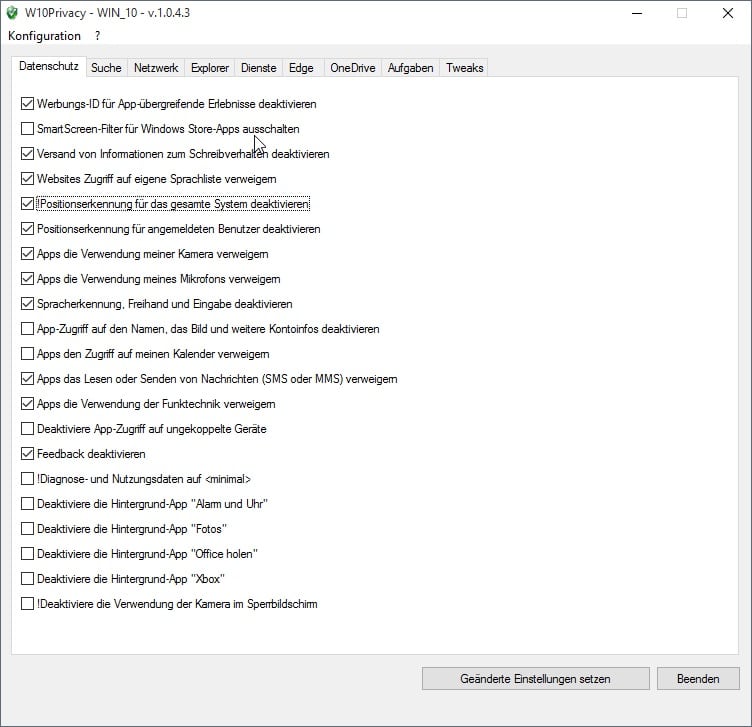
W10 Privacy

The program is
onlyavailable with a German and English interface
which makes it unusable for most Windows 10 users.
The
application displays privacy settings and general tweaks in its
interface on launch. The first tab, Datenschutz (German word for
privacy), lists privacy-related tweaks you can make.
The tweaks
are mostly self-explanatory but when you hover over an entry additional
information about it and its impact are revealed by the app.
W10
Privacy offers no backup and restore functionality. This means that you
need to create a System Restore point or other type of backup manually
before you use it to modify system settings.
What you can do
however is save the program's own configuration. If you do that you may
load them again at a later point in time.
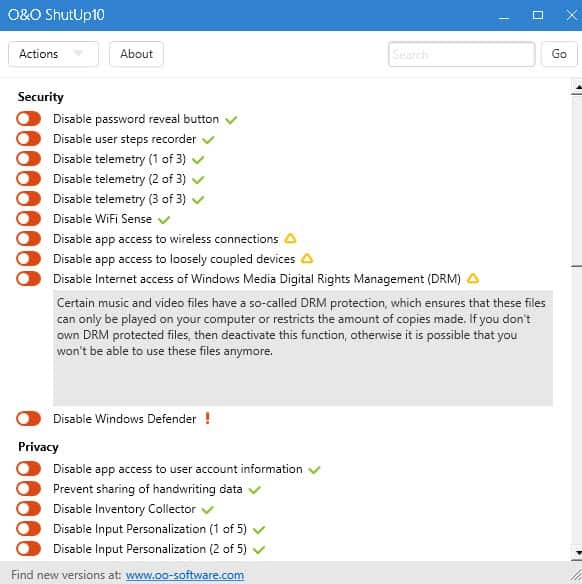
Shut Up 10

Shut
Up 10 displays a list of tweaks in its interface on launch. A click on a
tweak name displays a detailed description underneath it that explains
what it does if the title on its own is not sufficient for that.
The program suggests to you to create a system restore point once you start modifying settings.
The
settings concentrate mostly on privacy and security, but contain
several important other settings such as controlling Windows Update or
feedback.
Spybot Anti-Beacon for Windows 10

Anti-Beacon has been created by the authors of Spybot Search & Destroy, a popular anti-spyware program for Windows.
It
enables you to block Telemetry data and hosts, the Steps Recorder, the
use of advertising ID by applications, P2P Windows Updates and WiFi
Sense.
The program checks the current settings of the system on start and displays its findings in the interface afterwards.
Select immunize to make all changes, or undo to restore defaults.
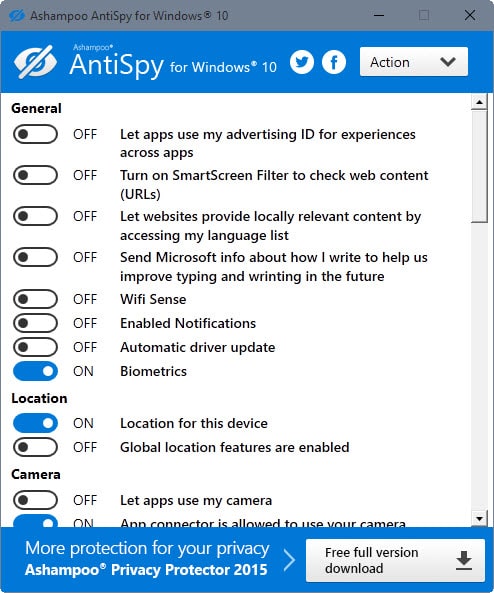
Ashampoo AntiSpy for Windows 10

AntiSpy
for Windows 10 is a free program that you can run from any location. It
suggests to create a System Restore point on start, good.
The
program lists all tweaks in list form on start. All privacy related
settings are sorted into groups and changeable with a click on the
switch displays in front of them.
The actions menu lists options
to apply recommended tweaks right away which may be useful to some users
as it turns off most features and permissions when applied.
AntiSpy lacks descriptions which is problematic especially for inexperienced users.
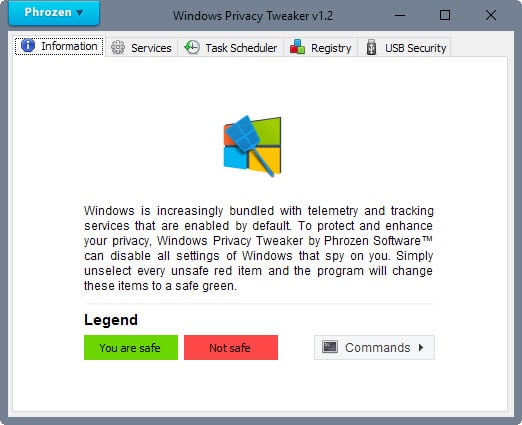
Windows Privacy Tweaker

This
is another program that scans the settings on start and displays those
as safe or unsafe right away so that you know which ones you have not
modified yet.
It displays all tweaks in the four tabs Services,
Task Scheduler, Registry and USB Security. The first three display
tweaks that are directly related to privacy in Windows 10 while the last
provides you with options to change the USB Mode.
It shares some
tweaks with other applications listed here but also offers some that
offers don't offer at all. Especially Services and Registry hold tweaks
that you may not find listed in other privacy applications for the
operating system.
One downside is that it won't create a system
restore point or other form of backup by default so that you need to
take care of that manually before you make any changes using it.
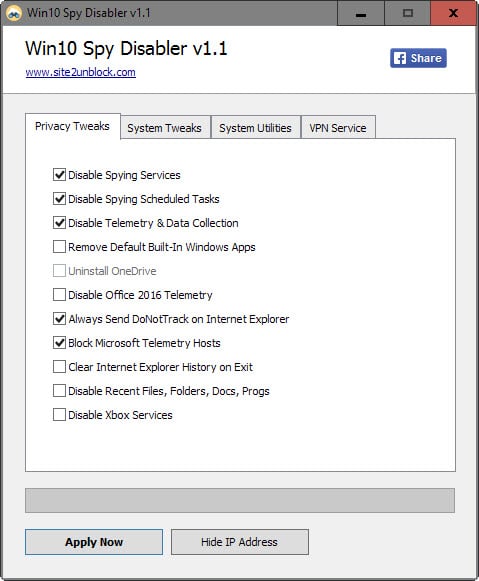
Win10 Spy Disabler

The
program is offered as a portable version and installer which, apart
from the one requiring to be installed before it can be run are
identical.
Win10 Spy Disabler displays the list of tweaks right on
start in its interface. They are listed under the tabs privacy tweaks
and system tweaks.
Unlike the majority of Windows 10 privacy
tools, it is bundling tweaks together in single entries. Disable spying
services, spying scheduled tasks or "remove default built-in Windows
apps" perform multiple operations on the system.
While that is
handy, no information are provided on the nature of what is being
changed on the system giving you less control over the functionality.
The program prompts for the creation of a restore point before changes are applied.
System
Tweaks are non-privacy tweaks only, and System Utilities, the third tab
in the interface, links to core Windows tools. The last tab, VPN
Service, is an ad for the Hide Your Ass service.
Win10 SpyStop

Win10 SpyStop checks privacy settings of Windows 10 on start and informs you whether your privacy is threatened or not by them.
The
program offers only a couple of options when compared to other privacy
apps for Windows 10. You may use it to disable telemetry, remote access
and diagnostics, block hosts files used for that purpose by Microsoft,
or disable the advertising ID.
It furthermore lets you disable
automatic and/or manual Windows Updates, automatic web searches, and
blocks application access to Windows Store account information.
The program creates a system restore point during installation.
WinPurify

WinPurify
is a free program for Windows 10 that you can run right after download.
It displays the options that it makes available on start, with most of
them selected by default.
It allows you to remove universal apps
or the Store app, disable Telemetry and Windows Update, and run some
clean up operations to free up space as well.
Additionally, it
wants to install a small helper app on the system that checks RAM and
performance, and notifies you if usage is too high.
Windows 10 Lite (Better Privacy)

Windows
10 Lite is a command line script that is best run right after setup of
Windows 10. It displays a couple of prompts to you on execution giving
you some choice in regards to which tweaks you want applied and which
you don't.
You may optimize Services using BlackViper's services
listing, and let it handle the usual things like removing system apps,
tweaking settings for privacy, or removing scheduled tasks used for
Telemetry.
It comes without options to create a backup or restore it. So, make sure you create a backup first before you run it.
Privacy Repairer
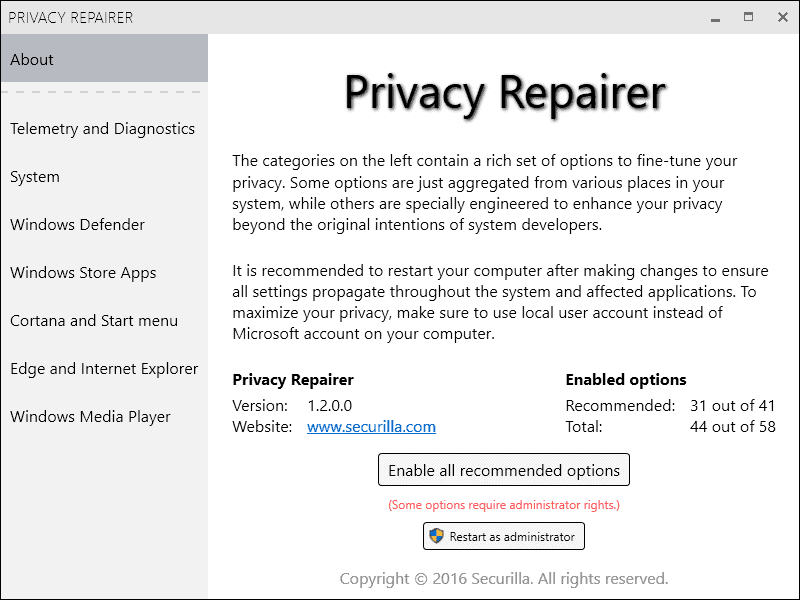
Privacy
Repairer ships with a total of 58 privacy tweaks for Windows 10 in the
version that we reviewed. The program offers a recommendation on start
on what to enable but without going into detail as to what will be
enabled when you press the button.
Tweaks are listed in categories
such as Telemetry and Diagnostics, Windows Defender, Edge and Internet
Explorer, or Cortana and Start menu.
Each tweak is listed with its
name, a toggle to enable or disable it, an option to display additional
information, and information on whether it is recommended or not.
One interesting tidbit here is that the program lists Registry keys in the description for each of the tweaks.
Some
tweaks are marked for experts only or dangerous, which is useful as it
may prevent users from making certain changes without knowing what a
change actually does to the system.
There is no system restore or backup option however.
Debloat Windows 10
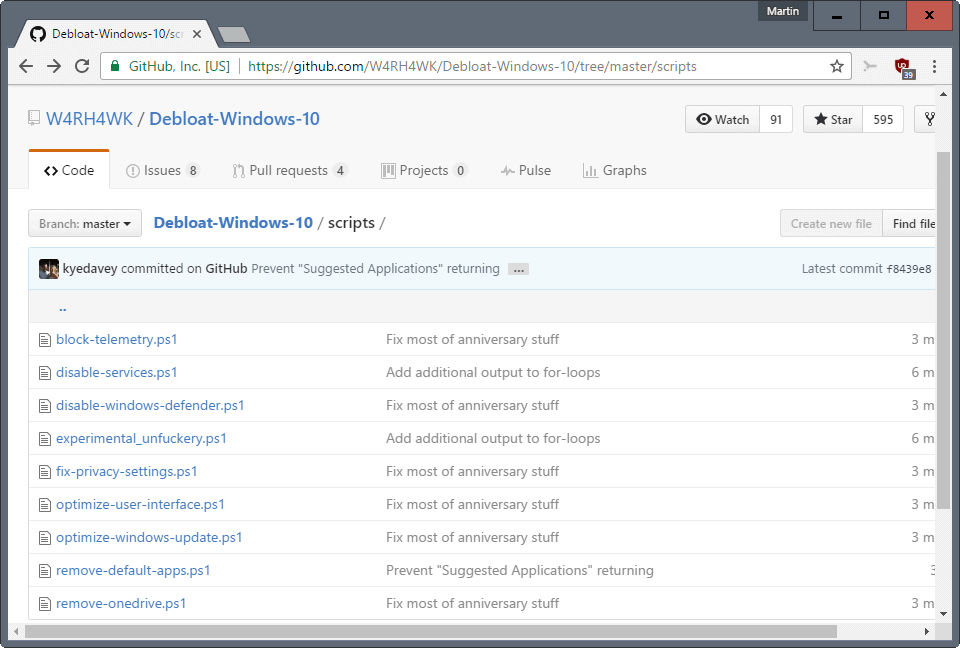
Debloat
windows 10 is a collection of Powershell scripts designed for specific
tasks related to privacy and annoyances in regards to Windows 10.
There
is a script to remove most of the default apps, another to block
Telemetry hosts and services, and yet another to make dozens of privacy
related adjustments to the operating system.
You can audit the
scripts using a text editor so that you know exactly what they do.
Downside to this is that you need some experience to understand what is
going on, and that there is no backup or restore option.
Blackbird

Blackbird
is a program for Windows Vista and up that supports two modes of
operation. You can run it right away to apply all of its tweaks and
changes to the Windows machine, or run it from the command line with
parameters that provide you with control in regards to the changes that
are made.
The list of tweaks is very extensive; changes range from
removing apps, blocking telemetry and ad servers, and disabling Windows
services and tasks, to apply network tweaks, and blocking automatic
updates.
WPD

WPD
is a free portable program for Windows 10 to make adjustments to
privacy related settings and features of the operating system.
The program divides all options into four different groups:
- Privacy -- Lets you make tweaks to privacy related Group Policy settings, manage Windows Services, and Windows Tasks.
- Firewall
-- Add Telemetry, Windows Update, and third-party application IP
addresses to Windows Firewall for communication blocking.
- Apps -- Remove applications that ship with Windows 10 by default.
- Tweaks -- Configure application access to certain data sets and hardware such as the camera or contacts.
The
application is easy to use, and descriptions are provided for all
options that you have. These are helpful if you require more information
before you make a decision on whether to keep a feature enabled, or to
disable it.
Closing Words
All tools
discussed in the comparison provide you with options to modify settings
of Windows 10 systems to improve privacy. Some offer more tweaks than
others, and only one suggests to create a system restore point before
making any changes to the underlying system.
It comes down to your
personal preference in the end and what you want to achieve. All tools
disable most of the phone home functionality of the operating system
while others go further and let you uninstall apps or make other tweaks
that are not necessarily privacy related.
Source: https://www.ghacks.net/2015/08/14/comparison-of-windows-10-privacy-tools/