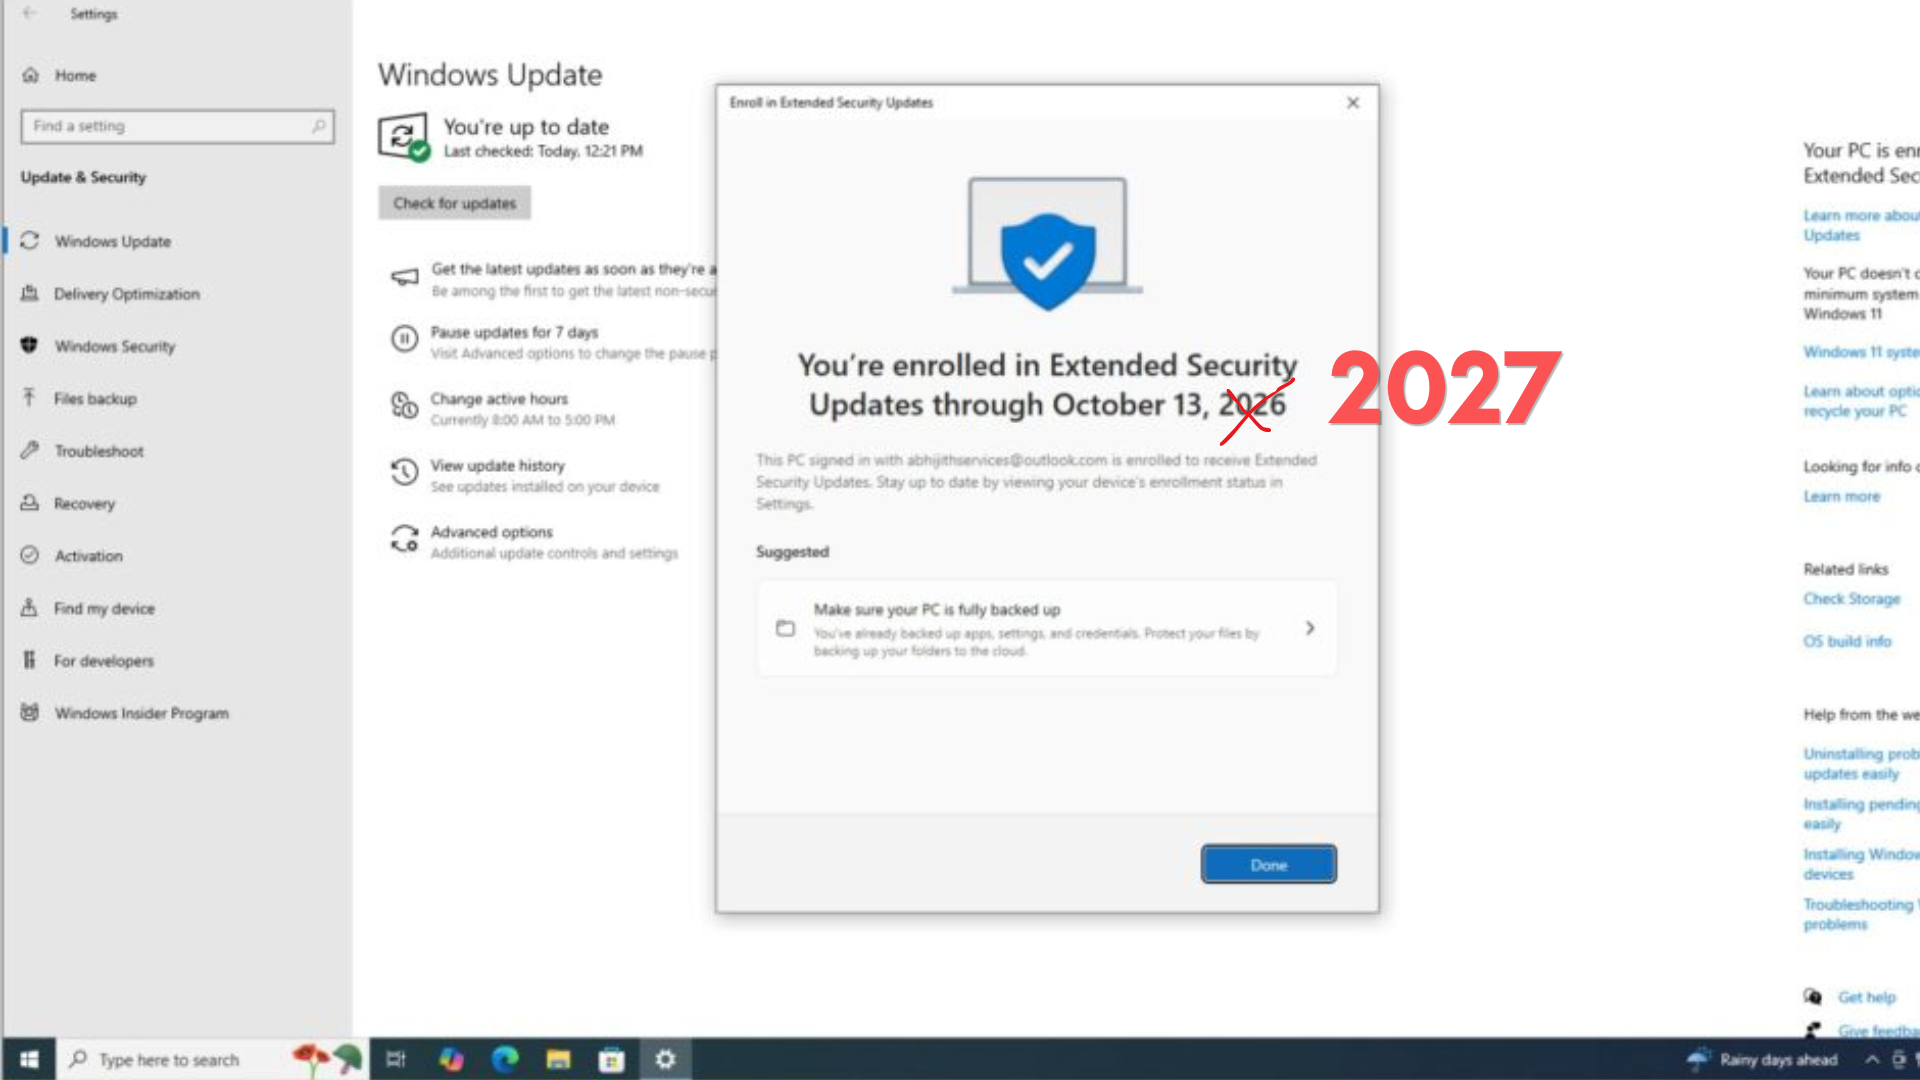
In a surprising move, Microsoft has quietly confirmed that it’s extending Windows 10 support until October 12, 2027, which is one full year beyond the October 2026 cutoff that home users had been planning around.
First spotted by Windows Latest, Microsoft now says it has extended both the enrollment deadline and coverage period, meaning Windows 10 users who have not yet signed up still have time to get covered, and those already enrolled do not need to do anything.
“Windows 10 support has ended. You can enroll in ESU any time until the programme ends on 12 October, 2027,” Microsoft noted in a support document first spotted by Windows Latest. “If you’re already enrolled, your coverage will automatically continue through that date—no action needed.”
In a statement to Windows Latest, Microsoft confirmed Windows 10’s new October 2027 deadline isn’t an error in its documentation, and it’s a real change to help consumers transition to Windows 11 PCs.
“Windows 10 Extended Security Updates (ESU) program for personal use devices is being provided for an additional year, with coverage now available through Oct. 12, 2027,” Microsoft told Windows Latest. “This extension provides customers with more time to transition to a new Windows 11 PC while continuing to receive critical security updates.”
For the hundreds of millions of PCs still running Windows 10, another year of monthly security patches just became available.
As the RAM apocalypse continues to plague all of us, it’s only fair for users to continue using the more efficient Windows 10, instead of the memory-hogging Windows 11.
Just this week, we reported that Microsoft’s own budget Surface laptops arrived at $849 with older chips and just 8GB of RAM. The company also walked back years of pushing 16GB as the baseline and said 8GB is fine for everyday use. Well, it is fine if you’re on Windows 10!
Microsoft extends Windows 10 ESU consumer program by one year to October 2027
Until now, the consumer ESU program was a one-year extension. Home users on Windows 10 version 22H2 could receive critical and important security updates through October 13, 2026, with no renewal option beyond that. Businesses on volume licensing had the option to pay for up to three years of extended updates at escalating prices starting at $61 per device, but home users were cut off at 2026.
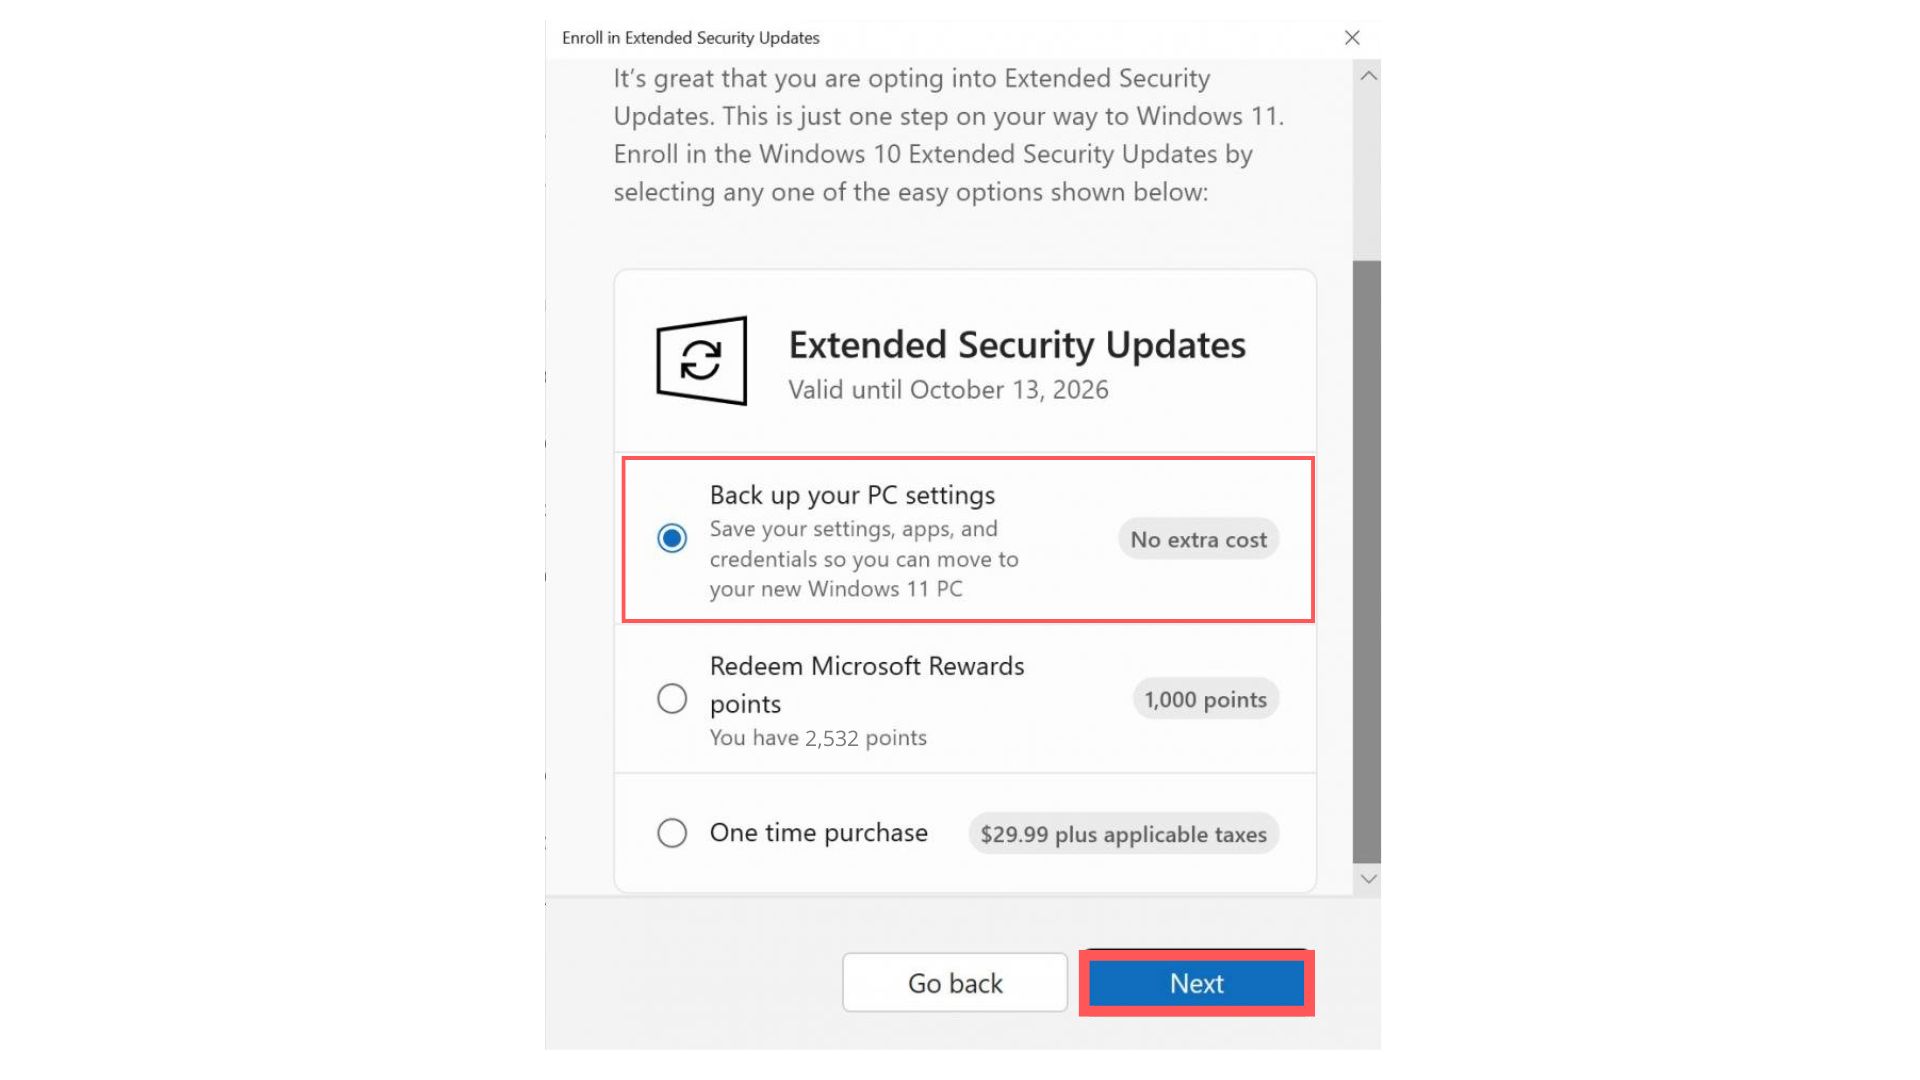
The Microsoft page now shows coverage running through October 12, 2027. Users already enrolled will have their coverage extended automatically. Enrollment remains free for anyone syncing PC Settings through a Microsoft account.
You can also redeem 1,000 Microsoft Rewards points, or pay a one-time fee of $30 USD. One license covers up to 10 devices.
Microsoft says, “ You can enroll in ESU any time until the programme ends on 12 October, 2027; however, devices will be more vulnerable and susceptible to viruses and malware before enrollment. If you’re already enrolled, your coverage will automatically continue through that date—no action needed. “
What is Windows 10 ESU, cost, and how to enroll
Windows 10 reached end of support on October 14, 2025, and stopped receiving free security updates. The Extended Security Updates program lets home users on Windows 10 22H2 (Home, Pro, Pro Education, or Workstation editions) continue getting critical security patches after that date.
The program does not include new features, bug fixes beyond security, or technical support.

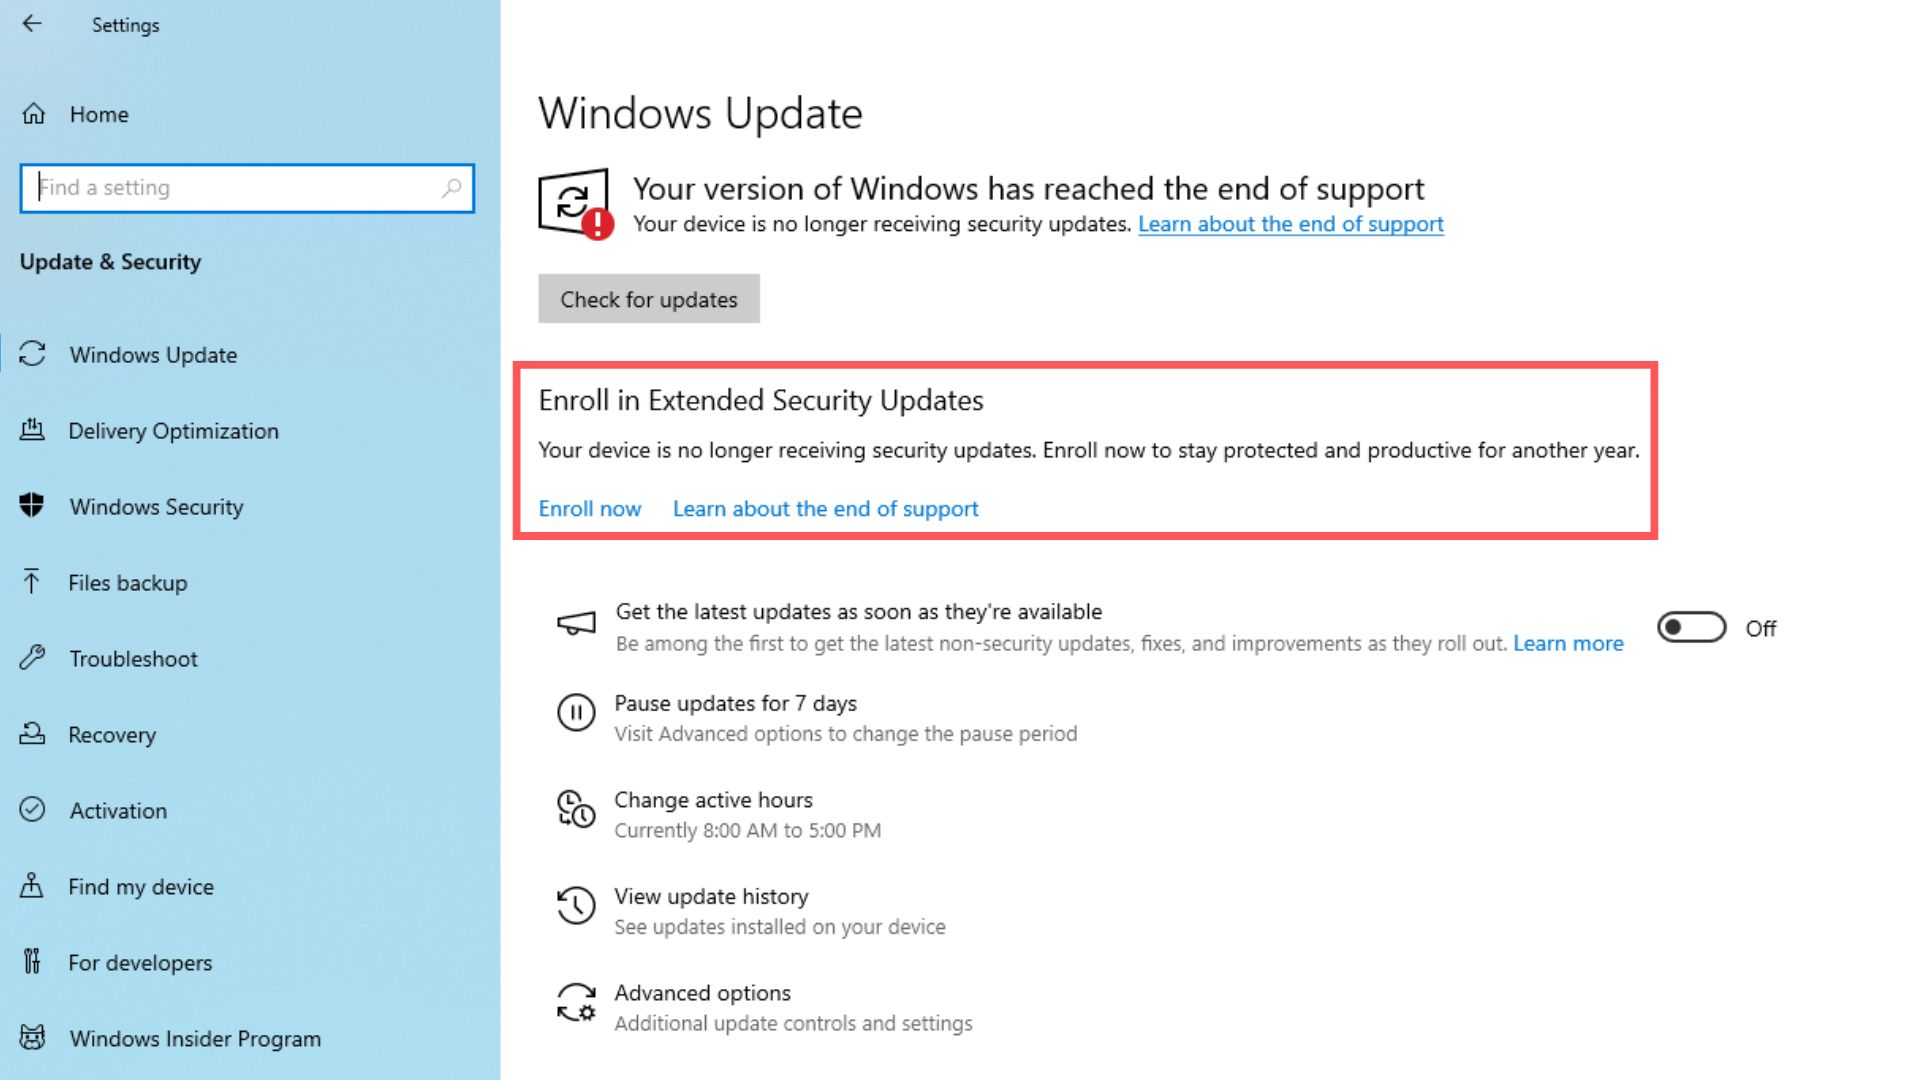
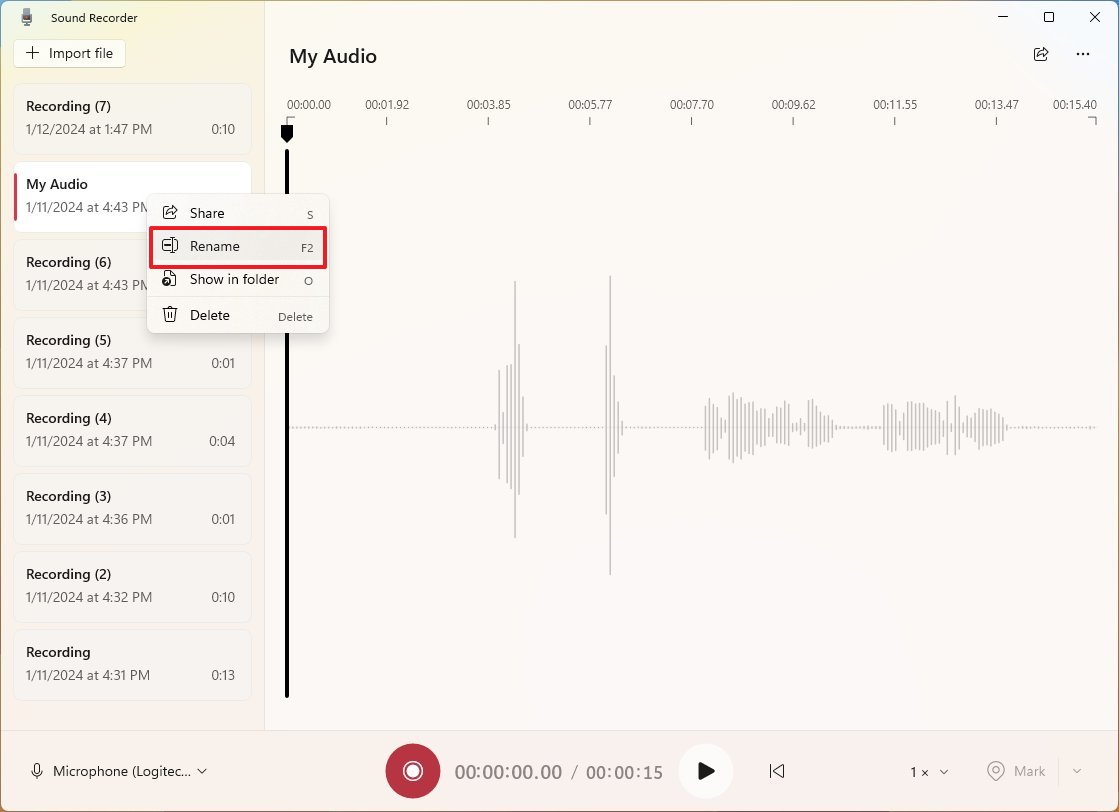
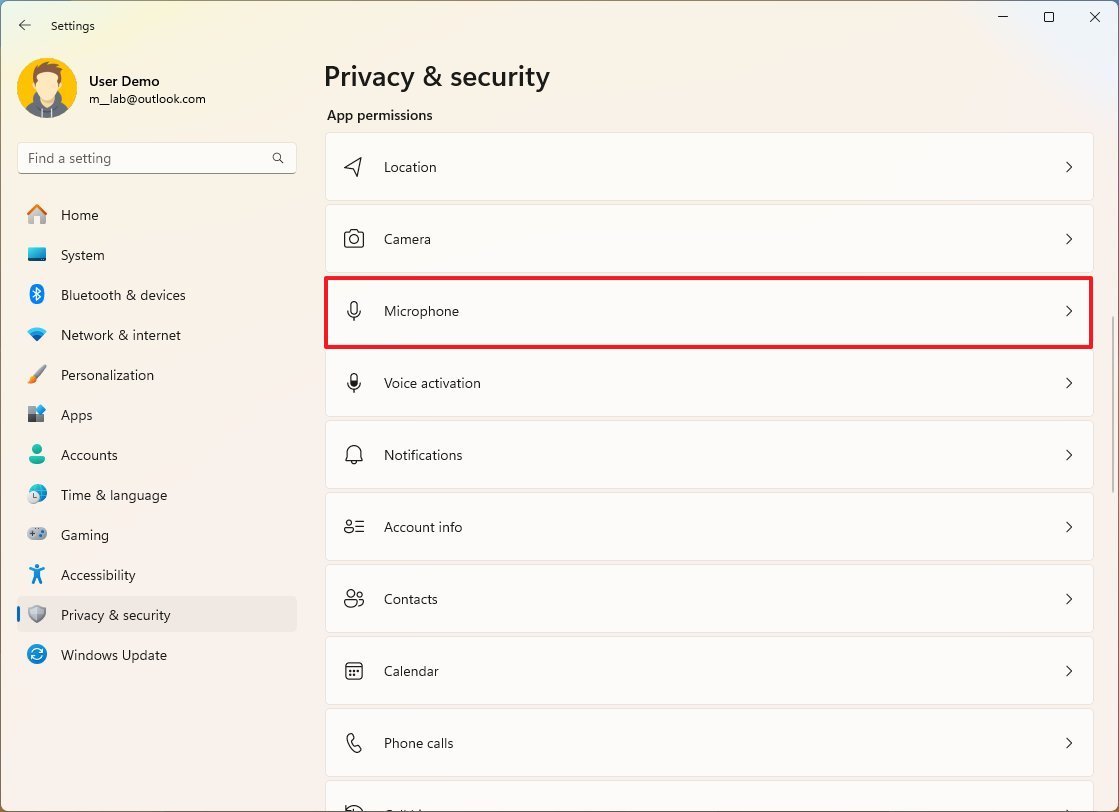
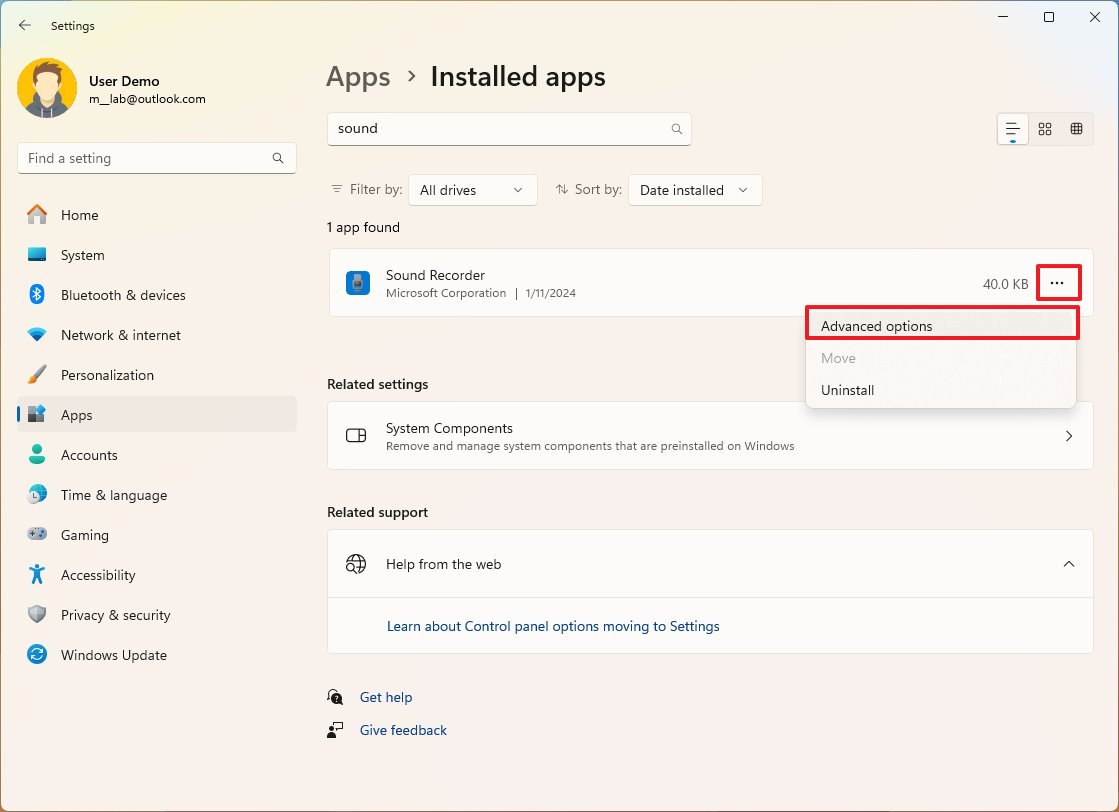
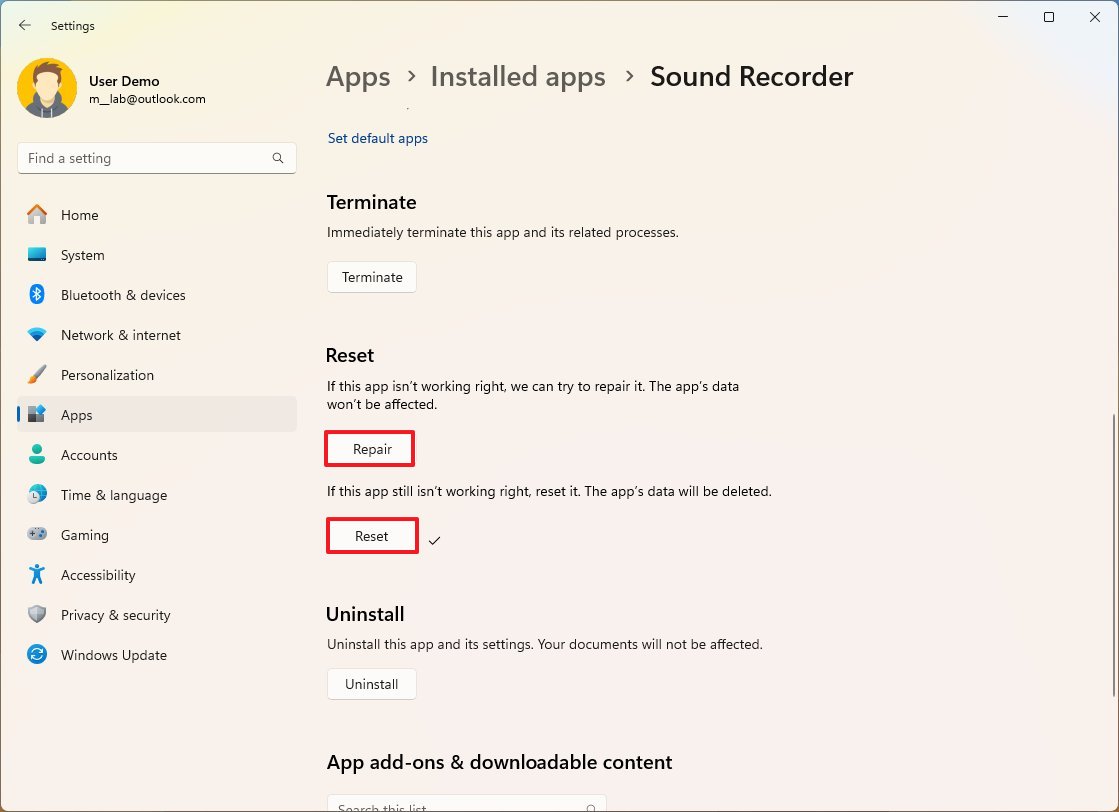
To enroll, go to Settings > Update and Security > Windows Update and select Enroll now. If you are signed into a Microsoft account that has already backed up PC settings on another device, you qualify for free ESU automatically. Otherwise, you can redeem Rewards points or pay $30.
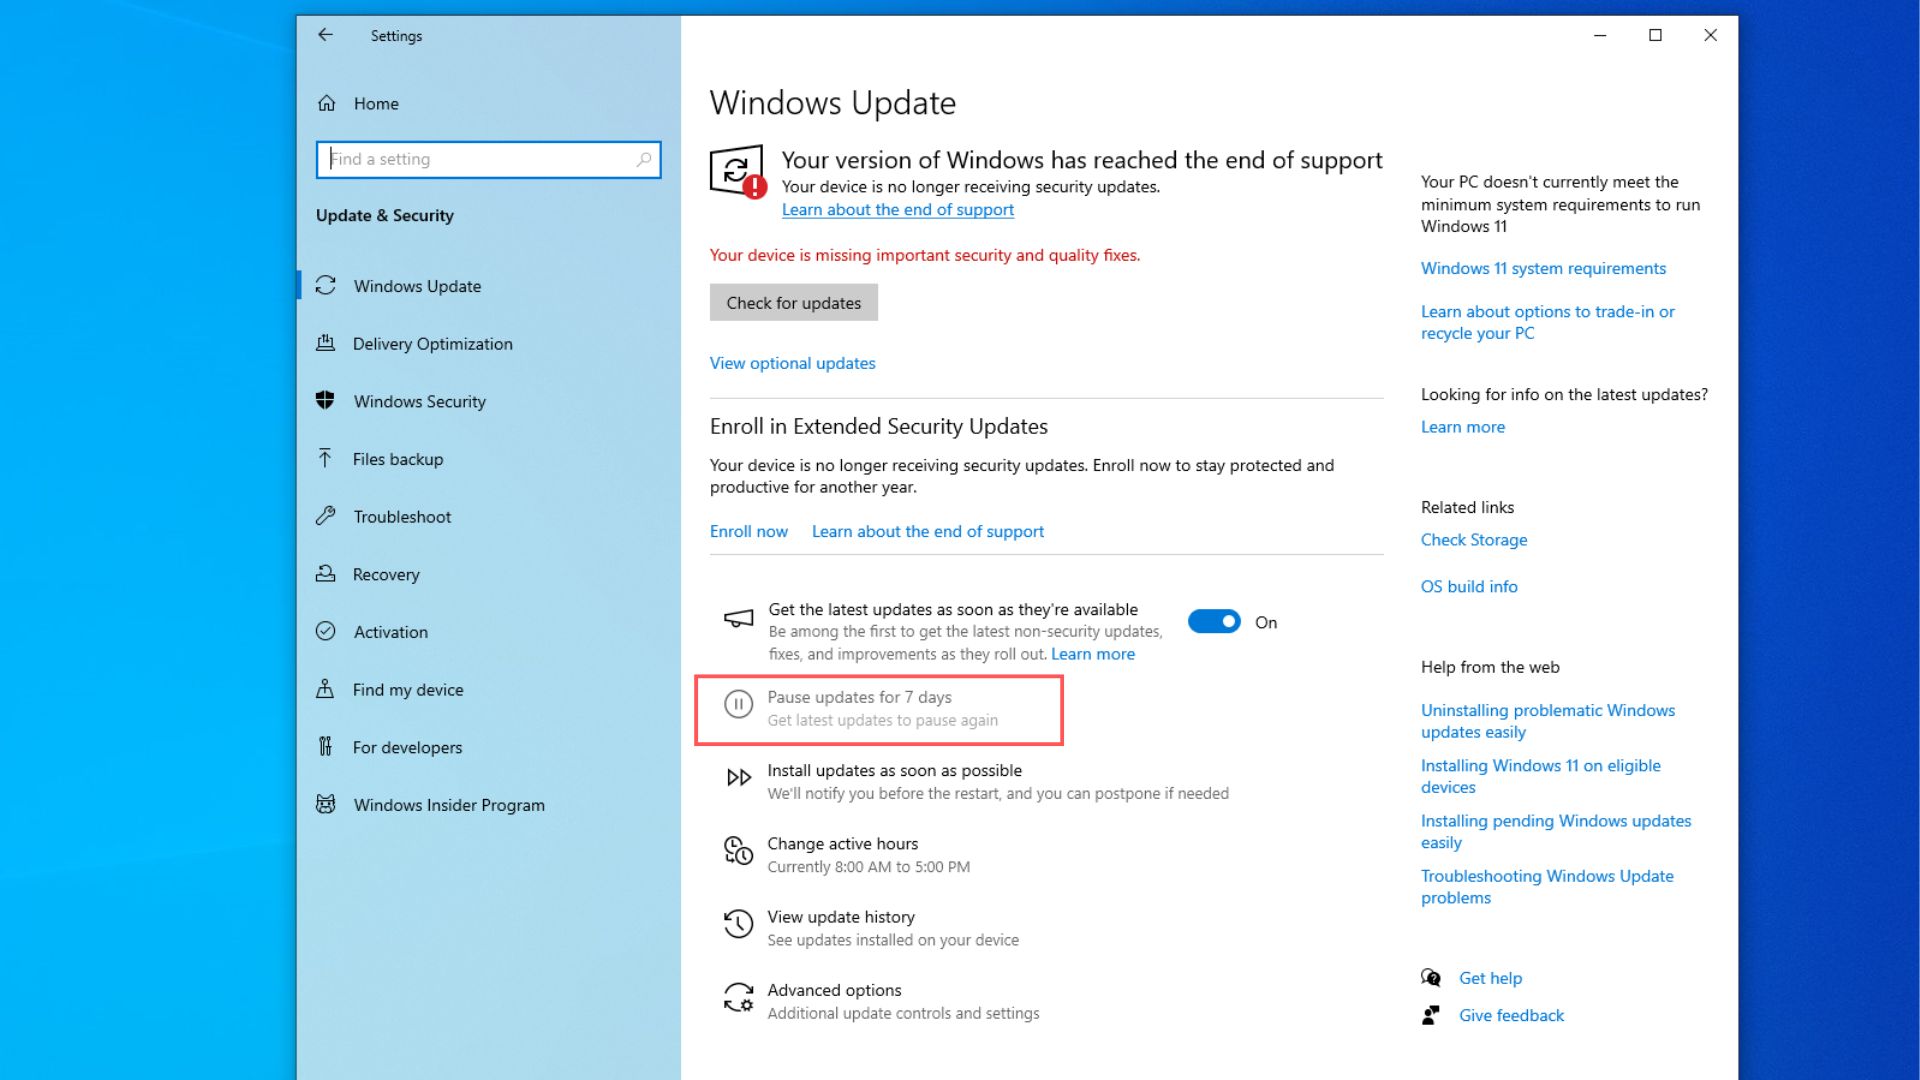
We have a full guide covering all three enrollment paths. Note that devices joined to a work domain or managed by MDM are not eligible for the consumer program. Also, non-ESU Windows 10 PCs can no longer pause updates, and some ended up installing Windows 11 without intending to.
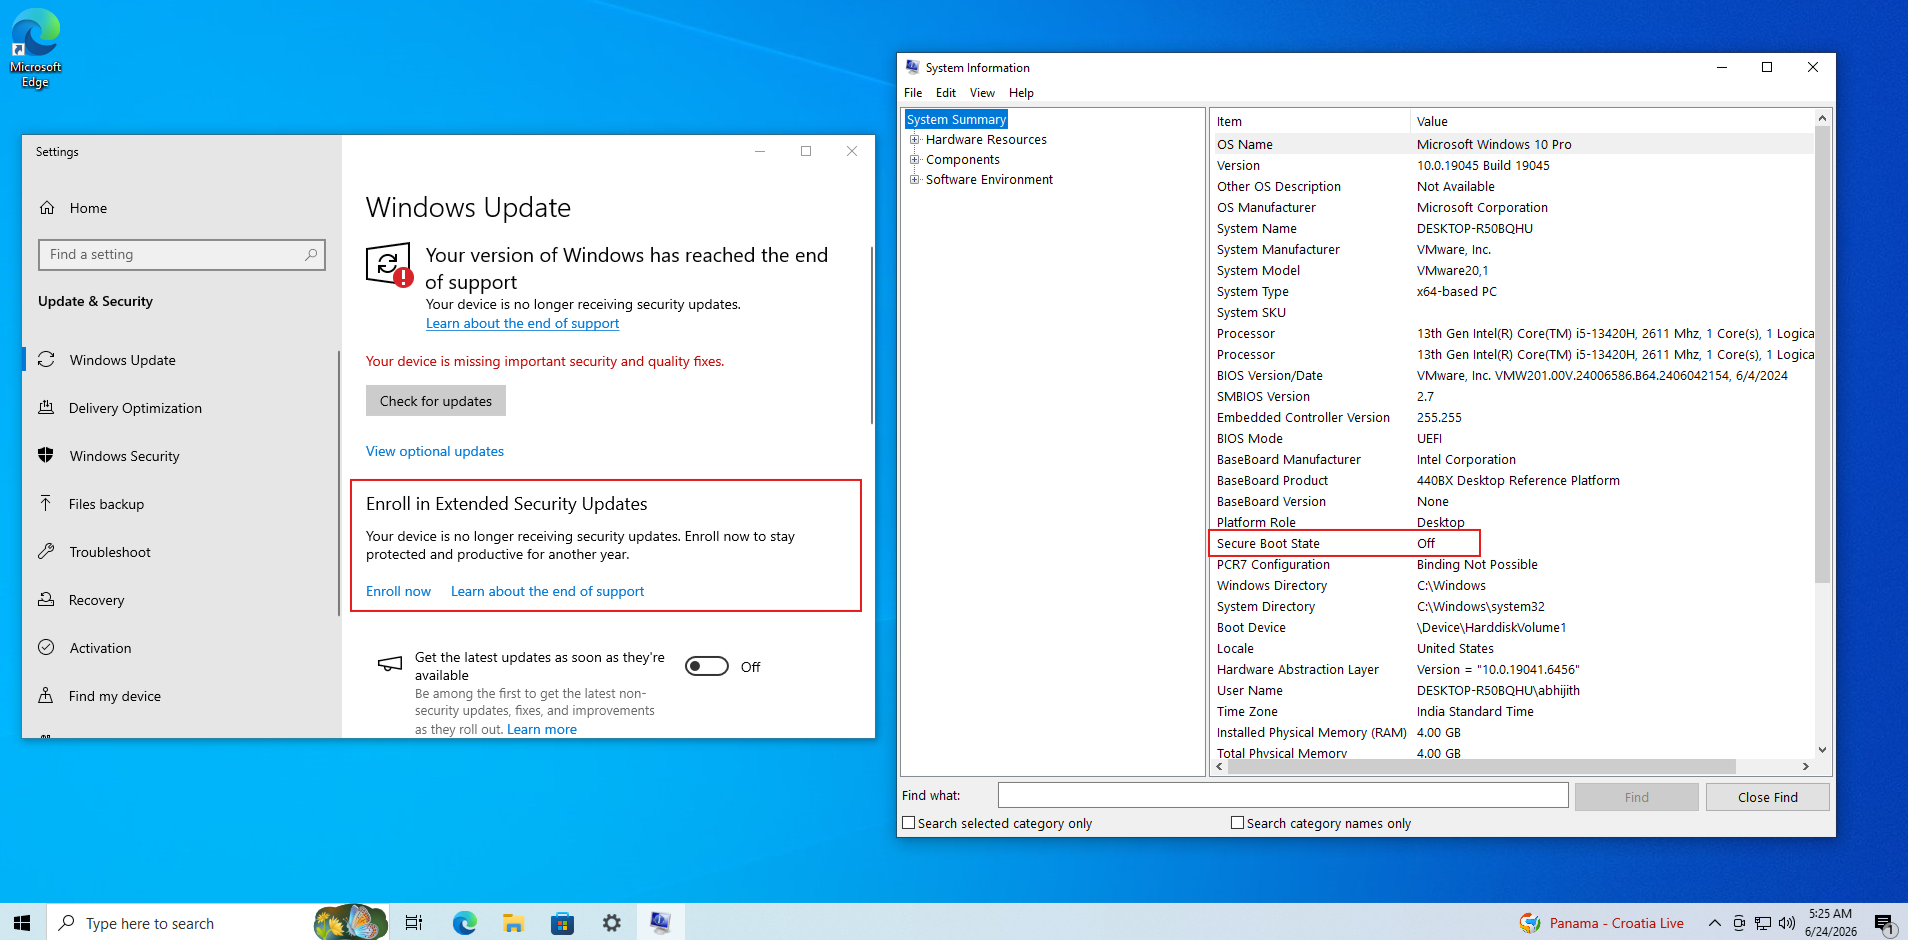
Secure Boot is another reason ESU-enrolled PCs are better off
The original 2011 Secure Boot certificates that most Windows devices use are now expiring. Microsoft has been pushing updated 2023 certificates through its update pipeline, and ESU-enrolled Windows 10 PCs receive them as part of the monthly security update.
We covered Windows 10 KB5087544, which included a Secure Boot status update in May. Devices not enrolled in ESU missed this, and outdated Secure Boot certificates can lead to startup validation problems on some hardware.
Microsoft has delivered a Windows 10 security update every single month since ESU launched
Since October 2025, Microsoft has not missed a single monthly Patch Tuesday for Windows 10 ESU-enrolled devices. For a retired OS, that is a consistent commitment. Windows 11 adoption in countries like Germany has been slow, and Microsoft is clearly not ready to cut off the users who are holding out.
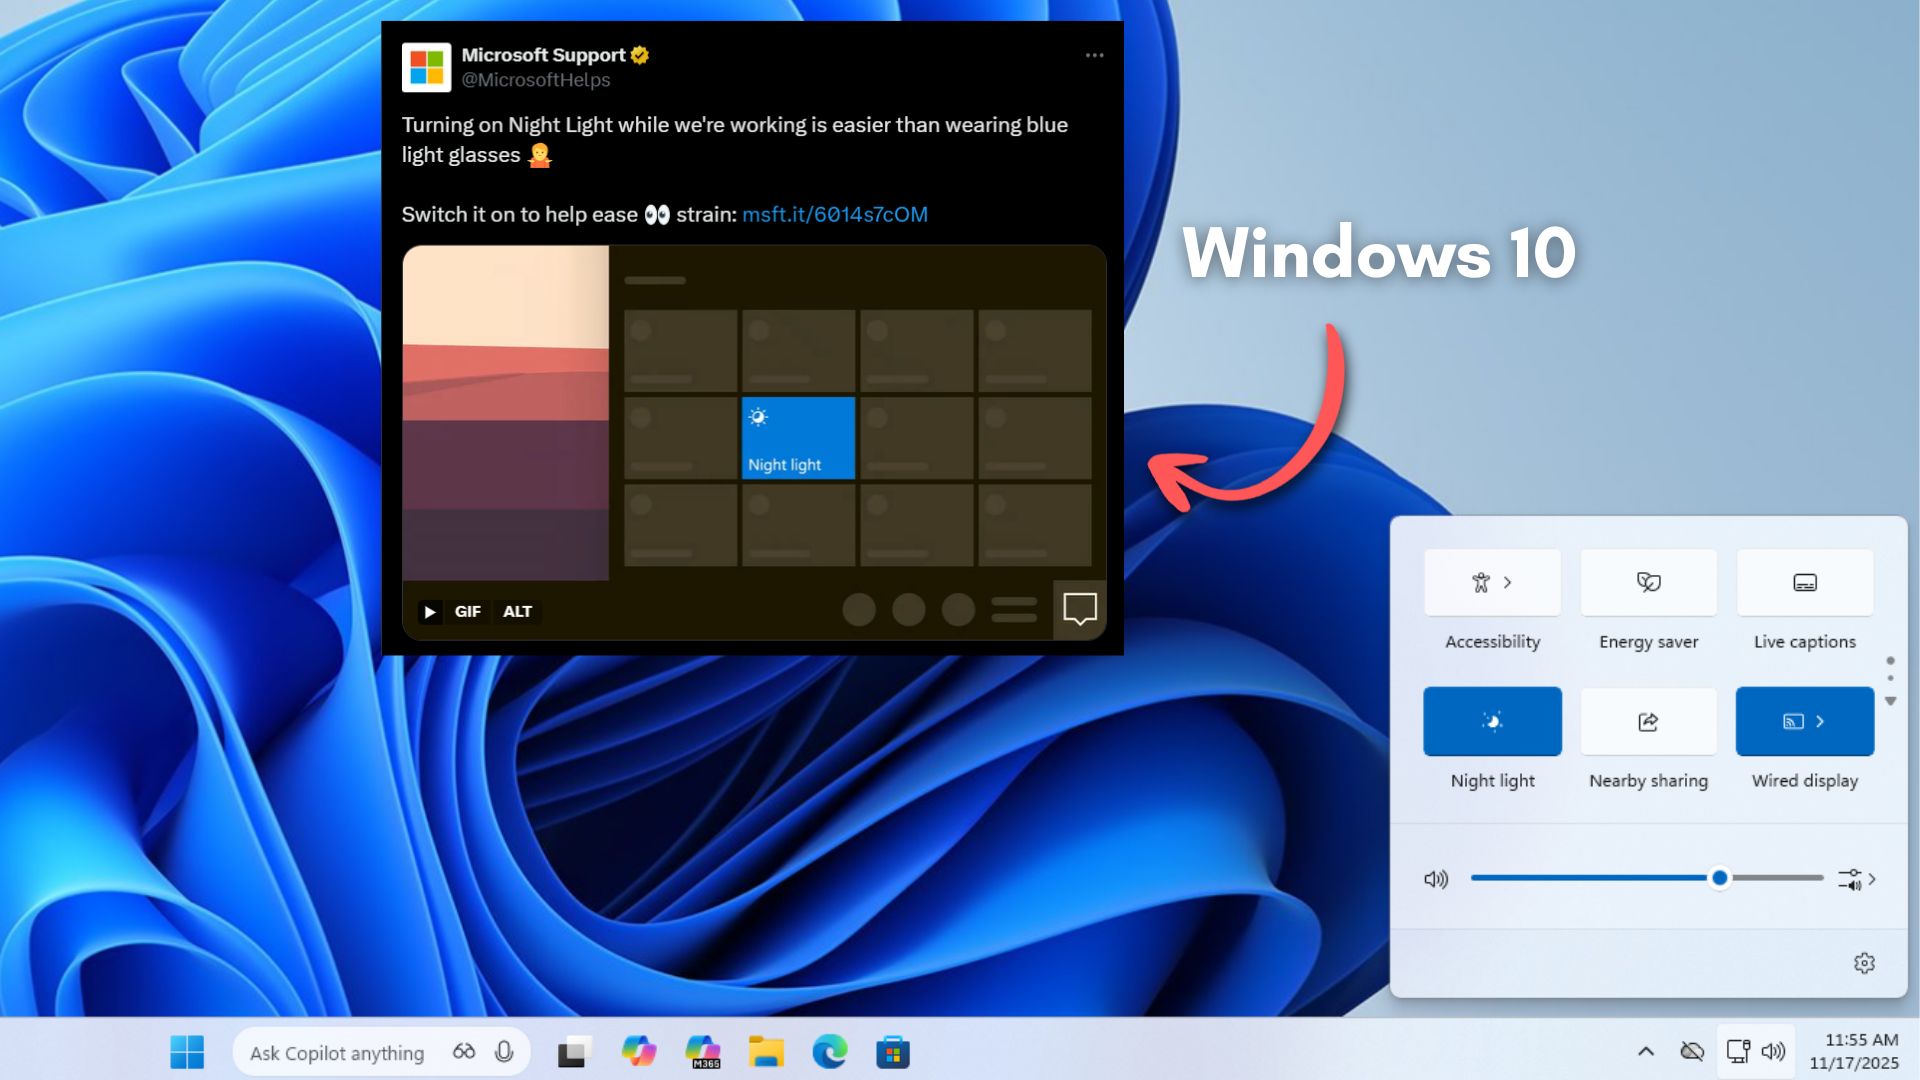
It even helps explain why, back in November, we found Microsoft still using Windows 10 imagery to promote Windows 11.
2026 is one of the best years for Windows 11, but Microsoft is giving Windows 10 users one more year
Windows 11 in 2026 has been delivering some of the most requested features the OS has ever seen, including a movable taskbar, indefinite update pause control, and a Low Latency CPU profile that makes app launches noticeably faster.
Microsoft also has five more features arriving in the next 30 days, none of which require a Copilot+ PC or an AI subscription. Performance and stability, after a rough 2025, have noticeably improved.
Still, Microsoft is giving Windows 10 users one more year, and the message is clear enough that the upgrade will happen on the user’s timeline, not Redmond’s. If you have not enrolled in ESU yet, now is the time. Head to Settings > Update and Security > Windows Update and click Enroll now for coverage through October 2027.
Update: Article has been updated to include the official statement from Microsoft.
Source: https://www.windowslatest.com/2026/06/25/windows-10-support-quietly-extended-until-oct-2027-as-users-reject-windows-11/


