Notepad finally got some much-needed attention in Windows 10 1809. It’s been around since the first version of Windows and has always been a very basic text editor.
Well, Notepad is still a basic editor, and the interface is pretty much the same. But Microsoft added new features, made performance improvements, and fixed some bugs in Windows 10 1809 to give it a long overdue boost.
Prior to Windows 10 1809, if you wanted to view bigger text in Notepad, you had to change the font size of the text.
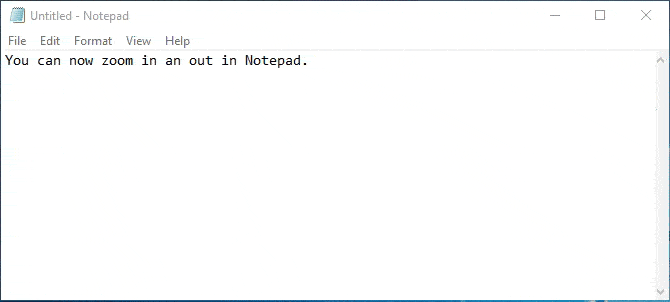
Now, you can zoom in and out on the text without changing the font size.
Go to
View > Zoom and select
Zoom In or
Zoom Out.
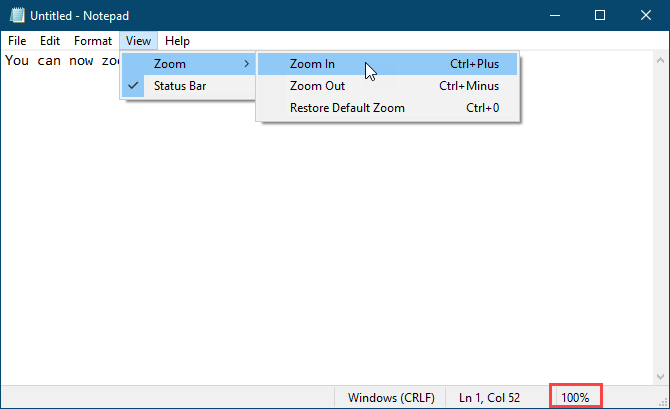
You can also use the
Ctrl + + (plus sign) and
Ctrl + – (minus sign) keyboard shortcuts to zoom in and out, respectively. To go back to the default 100% zoom level, press
Ctrl + 0 (zero).
You can also use a combination of the keyboard and the mouse to quickly zoom in and out. Press and hold the
Ctrl key and scroll up with the scroll wheel on your mouse to zoom in or scroll down to zoom out.
Wrap Around, Find and Replace, and Search AutoFill
Previously, when you started searching in the middle of a text file in Notepad, the search would go to the end of the file or the beginning of the file (depending on the selected direction), but not search the whole file.
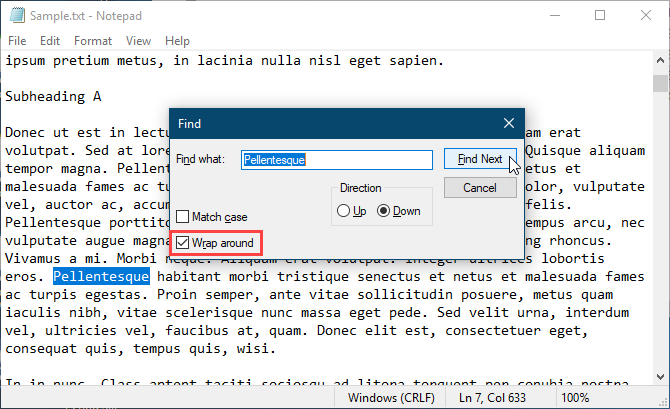
In the new improved Notepad, Microsoft added an option to wrap the search around so you can search the whole text file from wherever the cursor is in the file.
When you press
Ctrl + F and enter a word or phrase in the
Find what box, check the
Wrap around box to search the whole file.
Notepad also remembers the options you select now, so when you check the
Wrap around box, it will stay checked the next time you use the
Find dialog box to search.
Microsoft also added another handy feature—
Search Autofill.
Say you want to find other occurrences of specific text in your file. Select the text you want to find and press
Ctrl + F. Notepad automatically inserts the selected text into the
Find what box on the
Find dialog box, allowing you to quickly start your search.
Display the Status Bar with Word Wrap Enabled
Previously, when you enabled
Word Wrap on the
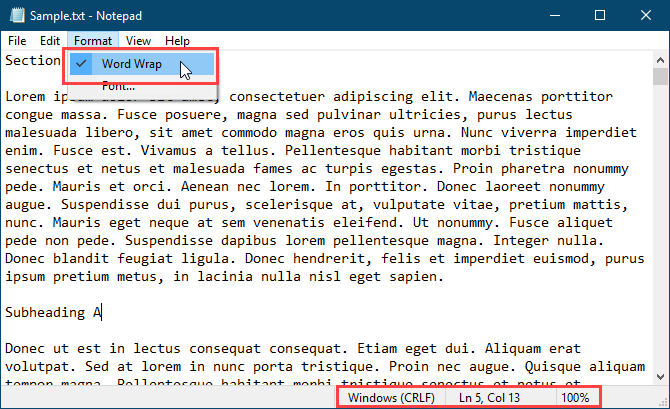
Format menu in Notepad, the status bar would disappear if you had it enabled. You couldn’t display both at the same time. When
Word Wrap was enabled, the
Status Bar option on the
Viewmenu was grayed out and unavailable.
Now you can enable
Word Wrap and display the
Status Bar at the same time. And you can disable both if you want.
![Word wrap enabled with Status Bar showing in Notepad]()
Support for Text Files from Linux and Mac
Before Windows 10 1809, Notepad only supported Windows Carriage Return (CR) and Line Feed (LF) (CRLF) line endings for text files. When you opened text files created on Unix, Linux, or Mac, the line endings wouldn’t display correctly. The file would be a mess and line endings occurred in unexpected places. You had to open the file in WordPad, save it there, and then reopen the file in Notepad.
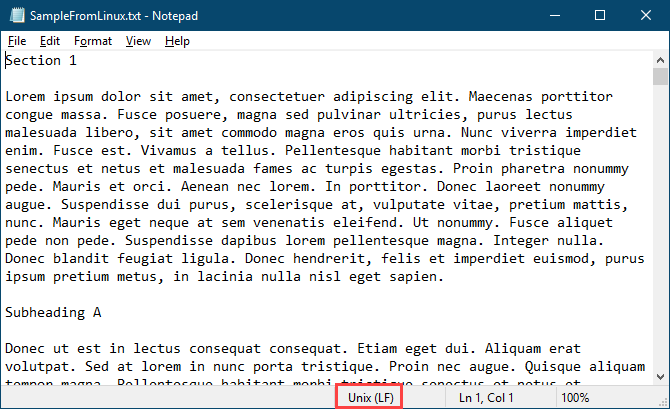
Notepad still uses Windows Carriage Return (CR) and Line Feed (LF) (CRLF) line endings by default. But Microsoft finally added support in Notepad in Windows 10 1809 for line endings in Unix and Linux (LF) and Mac (CR). So text files created on Unix, Linux, or Mac will now display correctly when opened in Notepad.
When you edit and save text files created on Unix, Linux, or Mac, Notepad preserves the type of line breaks from the operating system it was created in.
![Text file from Linux open in Notepad]()
Search Bing Directly From Notepad
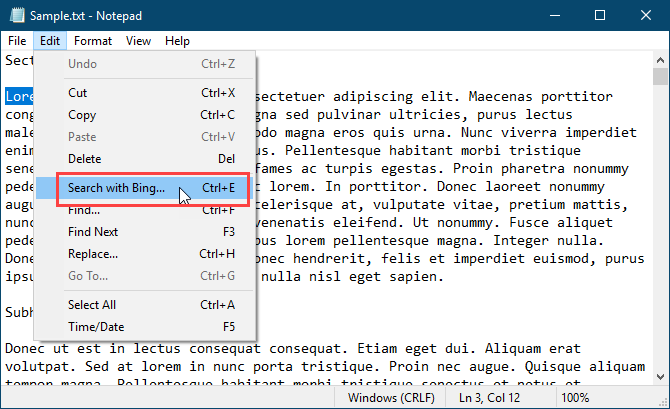
Notepad now allows you to search Bing directly from a text file.
Simply select a word or phrase and select
Search with Bing from the
Edit menu or press
Ctrl + E. Notepad searches the web using Bing and opens the results in Microsoft Edge.
Unfortunately, you can only do searches from Notepad using Bing and Edge. There is no way to change to a different search engine or browser.
![Search with Bing in Notepad]()
Other Changes, Improvements, and Bug Fixes
Microsoft made other small changes and improvements to Notepad. And they fixed some bugs.
Use a Keyboard Shortcut to Delete the Previous Word
Notepad already supports the
Ctrl + left arrow and
Ctrl + right arrow keyboard shortcuts to move through whole words at a time. You can also use the
Shift + Ctrl + left arrow and
Shift + Ctrl + right arrow keyboard shortcuts to select whole words at a time.
Now you can also use
Ctrl + Backspace to delete the previous word.
Using Arrow Keys on Selected Text
Previously, when you had some text selected and you used the left or right arrow key to move the cursor and deselect the text, the cursor would jump ahead or back one character.
Now, when you move the cursor with the arrow keys while some text is selected, the first key press deselects the text and puts the cursor right after or before where the selection was. The cursor is not advanced an additional character away from the selected text.
Improved Performance When Opening Large Text Files
If you often work with large text files, you’ll be glad to know that Microsoft promises improved performance when opening large files in Notepad.
Some Display Bugs Fixed
Microsoft also fixed some display bugs.
Although we haven’t noticed this bug, Notepad now correctly displays lines that don’t fit entirely on the screen.
Also, when saving a file, the line and column numbers on that status bar don’t reset to
1. They continue showing the correct position of the cursor in the text file.
Increase Your Productivity With the New Notepad
Although there are good Notepad alternatives out there with many more features, Notepad is there by default and still useful for tasks like taking quick notes, editing configuration files, writing scripts and code, and more. There are also some
cool tricks you can do with Notepad. And now, with the new features and improvements, you can be
more productive in Notepad.
If you still want a text editor with more features than even the improved version of Notepad has, we offer a list of
Windows Notepad alternatives.
The 6 Best Windows Notepad Alternatives The 6 Best Windows Notepad Alternatives Windows Notepad is too simple, but Microsoft Office is overkill? If you're looking for a Notepad replacement, here are the leading alternatives. One will be perfect for you.
Read MoreSource: https://www.makeuseof.com/tag/new-improved-windows-10-notepad/