Pages

8/15/2022

How to Restore Default Fonts in Windows 10 and 11?

 If you accidentally deleted or replaced one or more system fonts in Windows, you can try to restore the default fonts. The issue of missing fonts can appear as follows: in system dialog boxes (and some other windows) instead of normal characters, you can see strange or unreadable symbols. In our example, these are hieroglyphs and squares. This problem can occur after a third-party app is uninstalled, which also deleted several system default font files (up to complete cleaning the font files folder C:\Windows\Fonts). Also, the problem with fonts can occur when a certain program replaces one of the default fonts with its own one during installation.

In this article, we’ll discuss ways to restore corrupted system fonts in Windows 10 and Windows 11 to a clean system state.

How to Restore Default System Font Settings in Windows?

Firstly, you should try to restore the default fonts in Windows 10 or 11 using the built-in feature. To do it:

  1. Go to the  Control Panel -> Appearance and Personalization -> Fonts. This Control Panel item can be opened by running the command: control fonts
  2. Select Font settings in the left pane;


  3. In the next window click the Restore default font settings button.  


This option allows you to remove all third-party fonts, leaving only the standard Windows fonts. However, if the desired font file (*.fon or *.ttf) was deleted or replaced, the reset feature won’t help.

The Segoe UI font family is used by default in Windows to display the system interface. Make sure it is in the font list in Control Panel.

To restore the needed font, you can copy the specific font file from the Windows distribution (or from another computer), or download and install the font file manually or through the GPO  (note that Windows 10 has a feature that blocks the installation of third-party fonts, which may prevent new fonts from being installed).

Tip. The installation of a large number of fonts in Windows can lead to problems with system performance and some apps, usually related to graphics and layouts.

Extract Default Font Files from a Windows 10 or 11 Installation Image

The font files in Windows are stored in the C:\Windows\Fonts directory. Try to open this folder in File Explorer. If you see only a few font files with the *.FON and *.TTF extensions in this directory, then the default font files have been deleted and reset by the built-in tools (as described above) won’t help.


The missing font files can be copied from any computer running the same OS version or extracted from the installation disk or an ISO/WIM image of Windows 10 (11 or 8.1).

Let’s consider the second case. To do this, we need a Windows 10/11 installation media. The easiest way to create a Windows installation ISO image using the Media Creation Tool. Mount the ISO image into a virtual drive (suppose letter H: is assigned to it).

Open the PowerShell command prompt as an administrator and copy the H:\sources\install.wim or H:\sources\install.esd file into the C:\Distr\ directory:

Copy-Item H:\sources\install.wim  C:\Distr\

Tip. If your Windows image contains only the install.esd file, you can convert the ESD file to WIM format using the command:

dism /export-image /SourceImageFile:c:\distr\install.esd /SourceIndex:1 /DestinationImageFile: c:\distr\install.wim /Compress:max /CheckIntegrity

Mount the Windows 10 installation image file (install.wim) to the C:\Distr\wim directory:

dism /mount-wim /wimfile:c:\Distr\install.wim /index:1 /mountdir:C:\Distr\wim

Tip. In our example, the installation wim image contains only one Windows edition with the index 1 (/index:1), other editions are removed from the image. Your installation ISO image or WIM file can contain multiple versions and editions of Windows. The list of available editions can be displayed with the command:

Dism /Get-WimInfo /WimFile:C:\Distr\install.wim


Copy the original fonts files from the C:\Distr\wim\Windows\Fonts to the C:\Windows\Fonts directory with the replacement of files in the target directory. Use this PowerShell command:

Copy-Item -path C:\Distr\wim\Windows\Fonts -Destination C:\Windows -recurse –container -force

The font files will be replaced with the original ones. Some system fonts that are currently used won’t be replaced; a number of errors in the console window will indicate this.

Now you can unmount the source Windows image:

dism /unmount-wim /mountdir:C:\Distr\wim /discard

Restart your computer and check if the font problem persists.

Clear Font Cache in Windows

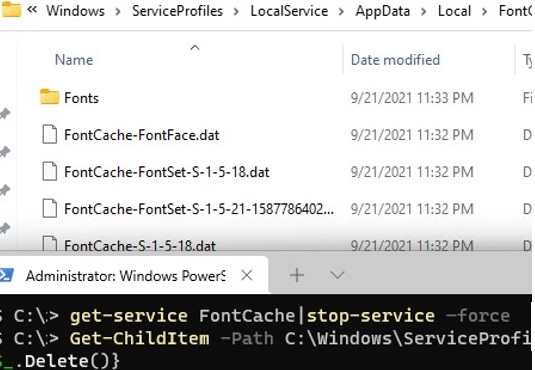
Windows font caching is enabled by default (similar to icon caching). This allows loading fonts faster in Windows apps and dialogs. The font cache is located in the %WinDir%\ServiceProfiles\LocalService\AppData\Local\FontCache folder. If the font cache is corrupted, it can also cause font display issues in Windows. We recommend that you manually reset the current Windows font cache. For this you need:

  1. Open the service management console (services.msc);
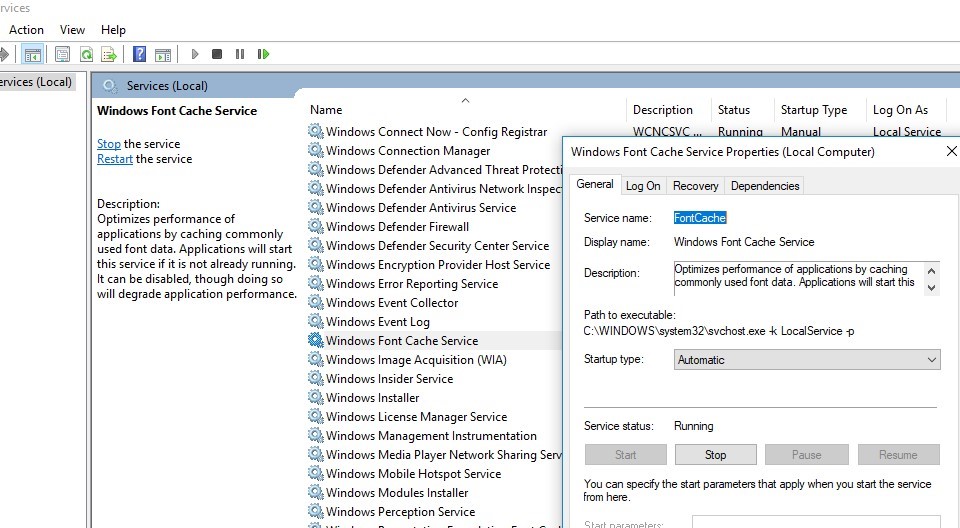
  2. Stop the Windows Font Cache Service in the console or using a PowerShell command: Get-Service FontCache|Stop-Service –forceWindows Font Cache Service
  3. Clean up the font cache folder: Get-ChildItem -Path C:\Windows\ServiceProfiles\LocalService\AppData\Local\FontCache -File  | foreach { $_.Delete()}
  4. Delete the file FNTCACHE.DAT: Remove-Item c:\Windows\System32\FNTCACHE.DAT clear font cache on windows 10 or 11 with powershell script
  5. Run the FontCache service and reboot your device.

Download and Restore Default Fonts on Windows 10 and 11

If you don’t have a Windows 10 (Windows 11 or Windows 8.1) installation image, you can copy the directory with the original font files from another computer running the same OS version, or use ready font archives that can be downloaded from the links below:

Download and unzip the archive for your Windows version. Copy the archive contents to the C:\Windows\Fonts folder with the replacement.

Then download and apply registry files with default font settings for your version of Windows:

Each archive contains three REG files:

  • win_10_fonts.reg – contains a list of default fonts registered in the system registry (HKLM\SOFTWARE\Microsoft\Windows NT\CurrentVersion\Fonts);
  • win_10_FontSubstitutes.reg – contains font association settings (HKLM\SOFTWARE\Microsoft\Windows NT\CurrentVersion\FontSubstitutes);
  • win_restore_default_user_font_settings.reg – restores default font settings in user registry hive (HKCU\Software\Microsoft\Windows NT\CurrentVersion\Font Management).

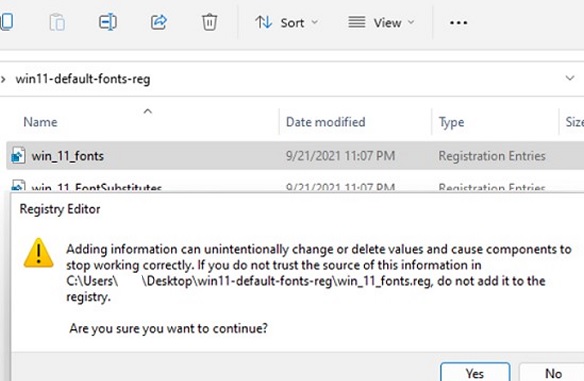
Unzip the archive and apply (double click) each reg file.

repair font registry settings on windows 10 or 11 using ready-made reg files

Restart your computer. The problem with the fonts should be gone!

Tip. If the problem with fonts is caused by the installation of a new font file, you can reset the contents of C:\Windows\Fonts before replacement (the fonts you are currently using won’t be replaced). This operation can be performed using the Restore button in the Control Panel we talked about above.

If all else fails and the fonts are displayed incorrectly, try to check and repair your Windows image using the commands:

sfc /scannow
DISM /Online /Cleanup-Image /RestoreHealth

Source: https://woshub.com/how-to-restore-default-fonts-in-windows-8-1/

7/11/2022

Windows 11: The Pros and Cons Everyone Is Talking About

 Let's talk about what you will love and hate about Windows 11.


Close to a decade ago, Microsoft revealed Windows 10 as the last version of their OS ever. And yet, Microsoft decided it was time for a new version of Windows. A version that, was implied, wouldn't be possible as yet another Windows 10 update. A new OS that would, eventually, end up replacing Windows 10. It would bring significant updates, new features, a cleaner desktop, and...

...and a collection of annoyances that could make you reminisce about the glorious days of Windows 98 SE. So, between 2021 and 2022, Windows 11 officially hit the market. And just like with its ancestors, users all around the world wondered: should we upgrade? Let's find out.

The Pros of Windows 11

Windows 11 isn't just Windows 10 with a new collection of wallpapers. Thankfully, many other tweaks and improvements make an upgrade to the latest OS seem enticing.

That said, the new OS's wallpapers are, indeed, beautiful!

1. Beautiful Glass

Windows 11's new desktop aesthetics try to mimic the look of glass. As a result, there's a lot of transparency on many desktop elements, from windows to menus.

This transparency goes hand-in-hand with related effects like a background blur, drop shadows, and rounded corners. All GPU-accelerated for a buttery-smooth user experience.

Still, it's not radically different compared to Windows 10, which also used the GPU to "accelerate" its desktop. It also seems that Microsoft toned down the semi-transparent effects of its new OS after some updates to increase text legibility.

2. Bar to Dock

Like Mac OS and many Linux Desktop Environments, Windows 11's taskbar can turn into a dock. The icons on it can be centered, which helps when using Windows 11 on a touch-enabled device.

Fans of the classic taskbar can still align the Start button and app icons to the left.

Note that if you like Windows 11's looks, and especially its centered taskbar, we've looked at how you can make your Windows 10 desktop look like Windows 11.

In action, Windows 11's new taskbar looks cleaner, sleeker, and more welcoming to new users. Combined with the streamlined Start menu, it renders Windows 11 one of the most user-friendly versions of Microsoft's OS.


3. Return of the Widgets

Did you prefer widgets, the little floating informational windows in Windows Vista and 7, to the Live Tiles of Windows 10?

The new widgets in Windows 11 appear by default in a dedicated pane, which slides in from the left of the screen. They're also more geared towards presenting information instead of working as mini-apps.

Still, that's not a groundbreaking feature—and earlier, we've covered how you can bring widgets back on Windows 10's desktop.

Most people are still not using Windows 11's widgets, just like they didn't use Windows Vista's gadgets or Windows 8-to-10's tile panels. One of the reasons is that there are still only a handful available, and they don't offer anything not found elsewhere.


4. Easily-Accessible Snap Layouts and Groups

Windows already supported snapping windows to the sides or corners of the screen in rudimentary arrangements. Originally "borrowed" from other OSes, the feature was further expanded with Windows PowerToys' FancyZones feature.

Now, a new and improved version in Windows 11 brings the feature to everyone, placing it in a quick menu hovering over the maximize button.

We'd love to say that everybody's using both Snap Layouts and Groups in Windows 11. Still, it seems those features have flown under the radar for many people.

Those who do use them, though, seem to have only positive things to say about them. And it looks like more users find out about them and incorporate them into their workflow daily.

Nobody would argue that as far as "juggling multiple windows" goes, Windows 11 fares far better than its precursors.


5. Android Apps on Windows 11

Up to Windows 10, if you wanted to run an Android app or game, you could either remote control your smartphone or run an emulator. Windows 11 comes with support for Android apps baked in. But it's far from ideal.

When finding out about the feature, you'd expect to be able to install almost any Android app or game, click on it, and have it pop up on the screen. Not unlike native Windows software.

Practically, Windows 11's "compatibility with Android apps" is restricted to Amazon's store. Worse, it's only compatible with a fraction of the software available there.

In action, it feels more like another marketing bullet point instead of a useful feature. Still, it's nice to have (or, as pessimists would say, "better than nothing").


6. Next-Gen Gaming

One of the most touted features of the new Xbox and PlayStation is how their CPU, GPU, and storage subsystems are interconnected. DirectStorage is the equivalent for PCs.

DirectStorage was expected to eventually lead to massive boosts in performance for applications that juggle vast amounts of data. Usually, that translates primarily to "games." For more information on this new and exciting tech, dive into its details to discover what is DirectStorage and how it can make gaming faster.

Auto HDR also made the jump from the latest Xbox consoles to PCs. It can upgrade the looks of older games by expanding their brightness levels automatically, taking advantage of the entire brightness range of modern monitors.

Still, although Windows 11 supports those features, most users' hardware doesn't.

The vast majority of monitors still don't support HDR. Most of those that do lag behind TV technology and don't offer the high-nits brightness or ultra-dark greys demanded by HDR to look good.

As for DirectStorage, it demands a combination of hardware and software that can take advantage of it. Windows 11 might support it, but most games don't. Neither do most gamers' PCs—which translates to "anything older than the last two hardware generations".

But that's now, and both hardware and software are quickly catching up. Despite HDR and DirectStorage looking like gimmicks today, they're future-proof features we'll surely put to good use. Eventually.

7. Teams for Everyone

A single click on Windows 11's taskbar is all it takes to chat with text, voice, or video with friends and contacts.

That's thanks to Microsoft Teams, which Microsoft placed front and center as Windows 11's primary solution for communicating with family, friends, and colleagues.

A default videoconferencing solution baked into the OS could be an excellent addition for many users. In practice, as some rush to point out, better alternatives are available.

Have you already got many contacts on Skype? Have you been using another alternative for years? Then, you probably won't see a reason to switch.

Teams is excellent at what it does, but its usefulness depends on if you have contacts who also use it.


The Cons of Windows 11

Not everything is rosy with Microsoft's latest version of Windows. You might find many changes and tweaks questionable and reason enough to stick with Windows 10.

1. Accelerated Desktop

Thanks to hardware shortages, finding a new GPU at a reasonable price is still impossible for many. The situation seems to be stabilizing in the USA as people leave the cryptocurrency boat. However, elsewhere hardware prices are still eye-wateringly high. Thus, many still postpone a GPU upgrade for the distant future.

Thankfully, although Microsoft's new OS requires a GPU at least compatible with DirectX 12, with a WDDM 2.0 driver, in reality, it's not much more demanding than Windows 10. You can run it on older hardware even if, when officially unsupported, you have to "get your hands dirty" (by applying unofficial and unsupported tweaks).

However, Windows 11's desktop is also "simplified" in some ways that may irk longtime Windows users. The right-click menu is much more restricted, hiding the "true" classic menu behind yet another click.

Also, the transparency and shadow effects initially felt "too much" and hurt what matters more: the clarity of other on-screen elements, like text, menus, and buttons. Thankfully, such effects are (somewhat) toned down in the latest versions.

2. Where Is Skype?

Skype was the first application to popularize peer-to-peer video calling. Today, Skype seems lost in a sea of similar and sometimes better video calling alternatives.

That's probably why Microsoft all but replaced it with Teams in Windows 11.

Teams might be a better solution than Skype in almost all regards, but we believe Microsoft didn't have to present it as a full-on replacement. Or try to "hide" Skype to promote Teams.

In the end, it's as if nothing has changed. Those already using Skype, or any other similar solution, can simply reinstall their preferred communications apps on Windows 11. Then, keep ignoring Teams, as before.

3. Less Taskbar

Windows 11's taskbar might look great, but it's more of a downgrade from a usability perspective.

The ability to move the taskbar to any side of the screen you wish was initially gone. Now it's back but still comes with annoying restrictions. Gone are the "drag it where you want it" days of all previous versions of Windows.

Even Microsoft acknowledged Windows 11's taskbar wasn't as great as it could be and proceeded to tweak it in subsequent updates after Windows 11's release.

It feels as if there's no concrete vision of how it should look or work, and it's a perpetual Work-In-Progress where Microsoft tries things out to see "what will stick" with users.

4. A Forgotten Timeline

Do you remember how Microsoft presented Timeline as another visual way to stay organized? Keeping tabs on how we used the computer, Timeline could display the apps and docs we accessed, the sites we visited, etc., in chronological order.

It was a good idea on paper but rarely used by anyone. If you were among those who liked it, stick with Windows 10 for Timeline's gone in Windows 11.

Still, its removal proved that, in some cases, less is indeed more. Some (like us) might have used it in the past, but nobody would ever regard it as a must-have feature.


5. Bye-Bye Cortana

Cortana is Microsoft's take on A.I.-powered helpers, like Google's Assistant and Amazon's Alexa, with which you interact by voice.

However, it might be more appropriate to say "was" since Cortana isn't baked in the OS anymore. If you consider yourself a fan, check our guide on downloading, installing, and using Cortana on Windows 11 as a separate app.

6. Fewer Layouts, More Delays

With Windows 11, you can quickly snap any window on the screen based on predefined window layouts. However, if you installed Microsoft's own PowerToys in Windows 10, you could also create your layouts. It wasn't as straightforward, but it was much more versatile.

On Windows 11 implementation of windows layouts, the default way to snap windows around is by hovering the mouse cursor over a window's maximize button. "Hovering the cursor" translates to keeping it steady over a desktop element and waiting for the OS to detect you want to access the layouts quick pop-up. This "waiting" might not be annoyingly long, but it takes longer than the press of a hotkey or clicking on a hotspot on the screen.


7. Let Microsoft Know You

We can safely speculate that Windows 11 also sends more information to Microsoft about our computers and how we use them. We can't say for sure since we haven't tried analyzing everything Microsoft's latest OS sends or receives through our network connections.

It feels that way, though, since Windows 11 expects you to log in with a Microsoft account before you even get to use it, during its installation. Even more so after its installation completes, if you want to take full advantage of all features it has to offer, no matter the edition.

Add to this how Windows 11's desktop widgets supposedly use AI to present tailored information (and advertisements) to you by monitoring your interests, and fans of George Orwell's 1984 might want to skip upgrading.

8. You Can't Run It

The major con of Windows 11, though, is that you might not be able to run it. Even if you have a GPU capable of accelerating its brand-new desktop, the rest of your PC might not be up to the task.

Microsoft reasons that you need great hardware to have great experiences. As a new, modern OS, Windows 11 also requires relatively new, modern PCs.

If your PC's CPU is older than Intel's 7th generation Core or AMD's Zen 2 processors, you're out of luck.

An even bigger problem, though, is TPM 2.0 compatibility. Although you may find TPM modules in most laptops and many prebuilt PCs, they're non-existent in most older DIY PCs. And no TPM 2.0 support means no Windows 11. At least, "officially".

Unofficially many people have already installed Windows 11, even on outdated hardware, by "tweaking" the OS's installation to bypass its hardware requirements. Some even managed to run it on dual-core CPUs with only one or two GBs of RAM. However, "run it" might be overselling things.

Officially, though, Windows 11's hardware compatibility is still a mess. The unwritten rule seems to be that it will (probably) run on any PC bought within the last year (but no guarantees). For anything older, it's a bet.

Is Windows 11 an Improvement or a Step Back?

Despite its pros and cons, like it or not, Windows 11 is here, and it will eventually replace Windows 10. Like with all previous versions of Windows, as we get more used to it...

  • We'll appreciate some of its new features and tweaks on the established desktop formula.
  • We'll need even more time to get used to others.
  • We'll end up using third-party tools to "fix" the ones that end up as annoying.

Windows 11 is a strange beast. It is better than Windows 10 in many regards. It does support modern technologies and is more future-proof.

However, it also doesn't feel as complete as what most users regard as the best versions of Microsoft's past versions of Windows: XP, 7, and 10.

Windows 11 somehow managed to break the "meme-cycle" of previous Windows releases where "a bad one follows every good version of Windows". Microsoft's latest version of Windows is neither bad nor good. Neither better nor worse. It's a mixed bag, and how one perceives it depends on their priorities and preferences.

Windows 11: "When" Rather Than "If"

An upgrade to Windows 11 is, indeed, inevitable. But maybe not yet, as millions still use Windows 10 without feeling left behind or out.


Source: https://www.makeuseof.com/windows-11-pros-and-cons/?utm_source=MUO-NL-RP&utm_medium=newsletter


7/09/2022

Is Windows antivirus software still necessary in 2022?

For years, I’ve assumed that most people don’t need third-party antivirus tools and have cheerily passed this suggestion along to others.

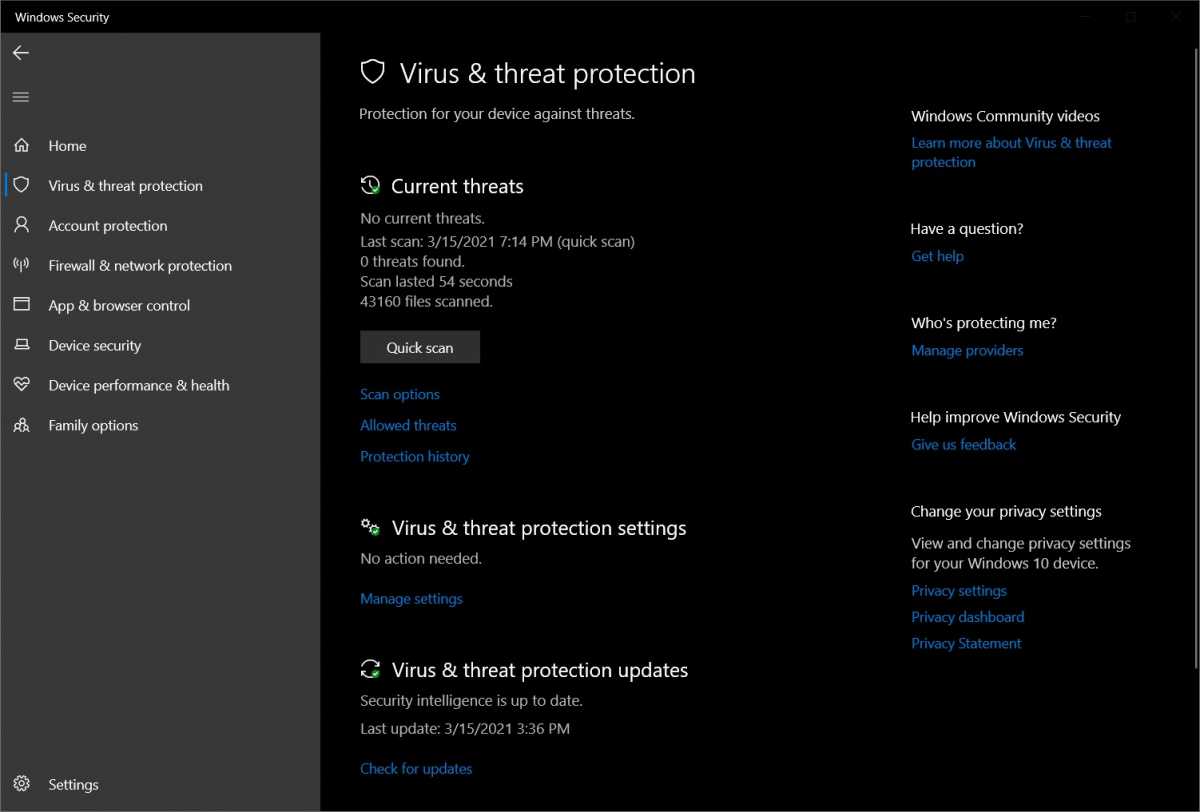
After all, Microsoft’s Windows Security suite (also known as Windows Defender or Microsoft Defender) provides built-in virus protection for your PC, and it doesn’t cost a dime. I’ve been using it for years, and the last time I can recall having virus problems on my PC was well over a decade ago.

And yet, looking around for confirmation of this long-held belief quickly turns up an alternate universe, full of experts who insist that everyone should be paying for antivirus software. This advice comes not just from the companies that sell antivirus suites, but from reputable sites that perform antivirus software reviews (PCWorld included).

On top of that, nearly every laptop I’ve reviewed for PCWorld has come with some form of antivirus trialware from companies like McAfee and Norton. Those companies pay PC makers for placement, which wouldn’t make sense if no one bought the products, right?

At this point, I’ve heard enough questions from readers—and family members—that I decided to dig a little deeper. What I’ve learned is that my initial assumptions were mostly correct: Most people can indeed skate by without extra antivirus software. But that doesn’t mean everyone should, or that you shouldn’t take any extra precautions to stay safe.

As an initial sanity check on my antivirus assumptions, I did the most obvious thing possible and put out the question on Twitter: Does Microsoft’s built-in Windows Security software provide enough protection for typical PC users?

The consensus answer was yes, with caveats.


Jared Newman / Foundry

Justin Duino of How-To Geek pointed to his site’s helpful article on the subject, which recommended Windows Security in conjunction with Malwarebytes’ free malware scanner. My fellow freelance journalist Rob Pegoraro also called out a Wirecutter article that came to the same conclusion. Another writer chimed in with a similar recommendation.

The reasoning is simple: Windows Security rivals other programs at sniffing out viruses. While this wasn’t always the case, Microsoft’s detection has improved considerably in recent years, to the point that the independent AV-TEST Institute regularly awards it a perfect 6 out 6 in protection, usability, and performance, beating industry averages.

Perhaps more importantly, security is decentralized now, so a single virus scanner is no longer your only line of protection. Some examples:Major web browsers can detect and block malicious websites on their own, thanks to tools like Google Safe Browsing.
Those browsers may also warn you if you’re about to download an unrecognized program.
Major email providers, such as Gmail and Yahoo, scan attachments for viruses before you can even download them.
Those same email providers’ spam filters do a great job at keeping malicious emails out of your inbox and warning you of potential phishing schemes.
The SmartScreen filter built into Windows will warn you if you’re attempting to install unrecognized software.

Antivirus, in the end, is just another line of defense. For most people, Microsoft’s built-in defenses should be strong enough.
Getting a second opinion
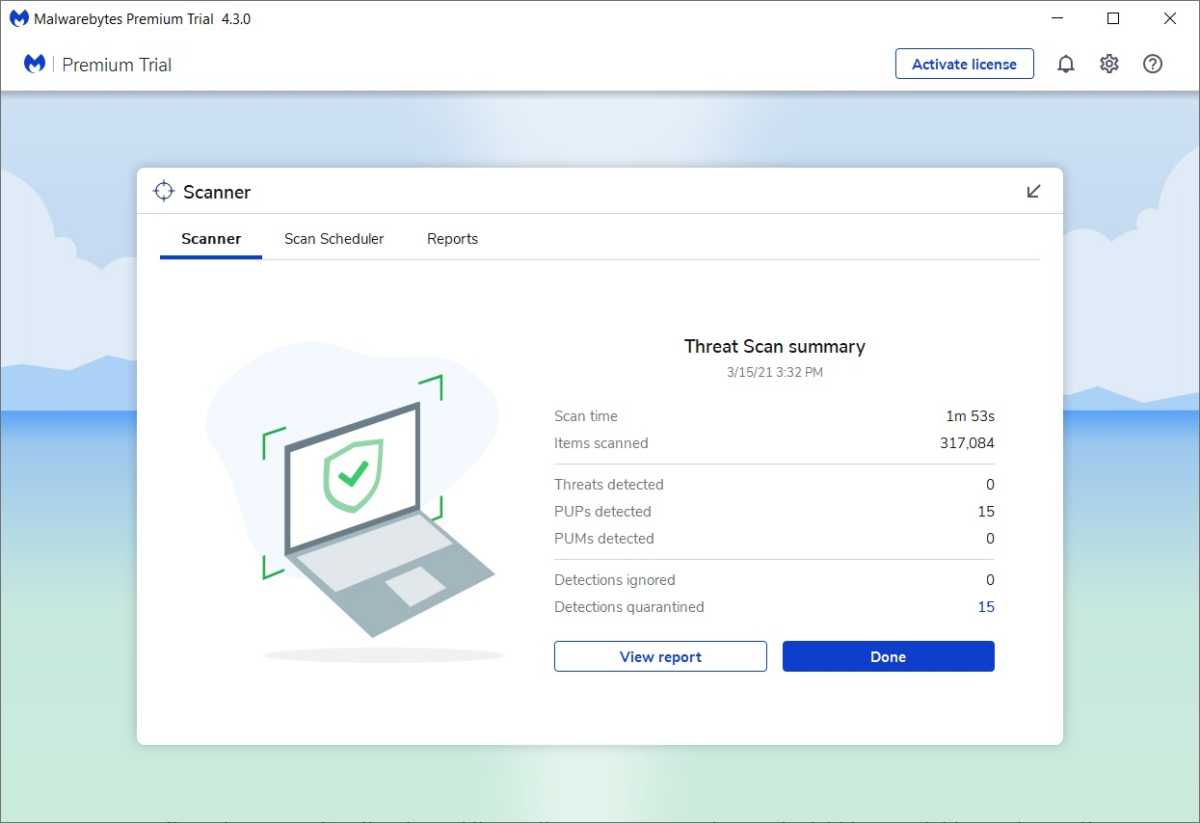
Malwarebytes might find some potential threats that Windows Security misses.
Jared Newman / Foundry

So why to do some folks recommend Malwarebytes as an additional layer of protection? Mainly because it’s nice to have another set of eyes on your computer.

Last year, for instance, I ran a scan in Malwarebytes, and picked up a set of potentially unwanted programs tied to my installation of Chrome. While my Chrome installation seemed to be working fine—with no sketchy toolbars or search redirects that I could see—this did convince me to delete my sync data from Chrome, reset its settings, and perform a fresh Chrome install. (I suspect it was a browser extension behaving badly.)

But Malwarebytes has its downsides as well. If you’re not careful during installation, it will automatically install its own extension in all your browsers, and the free version routinely nags you with upgrade prompts. Also, unless you disable its real-time protections (which are only available as a 14-day trial for free users), they’ll override Microsoft’s own virus scanner.

I may still occasionally install Malwarebytes to get a second opinion on my computer’s health, but for now, I’m leaving it off my PC as well.


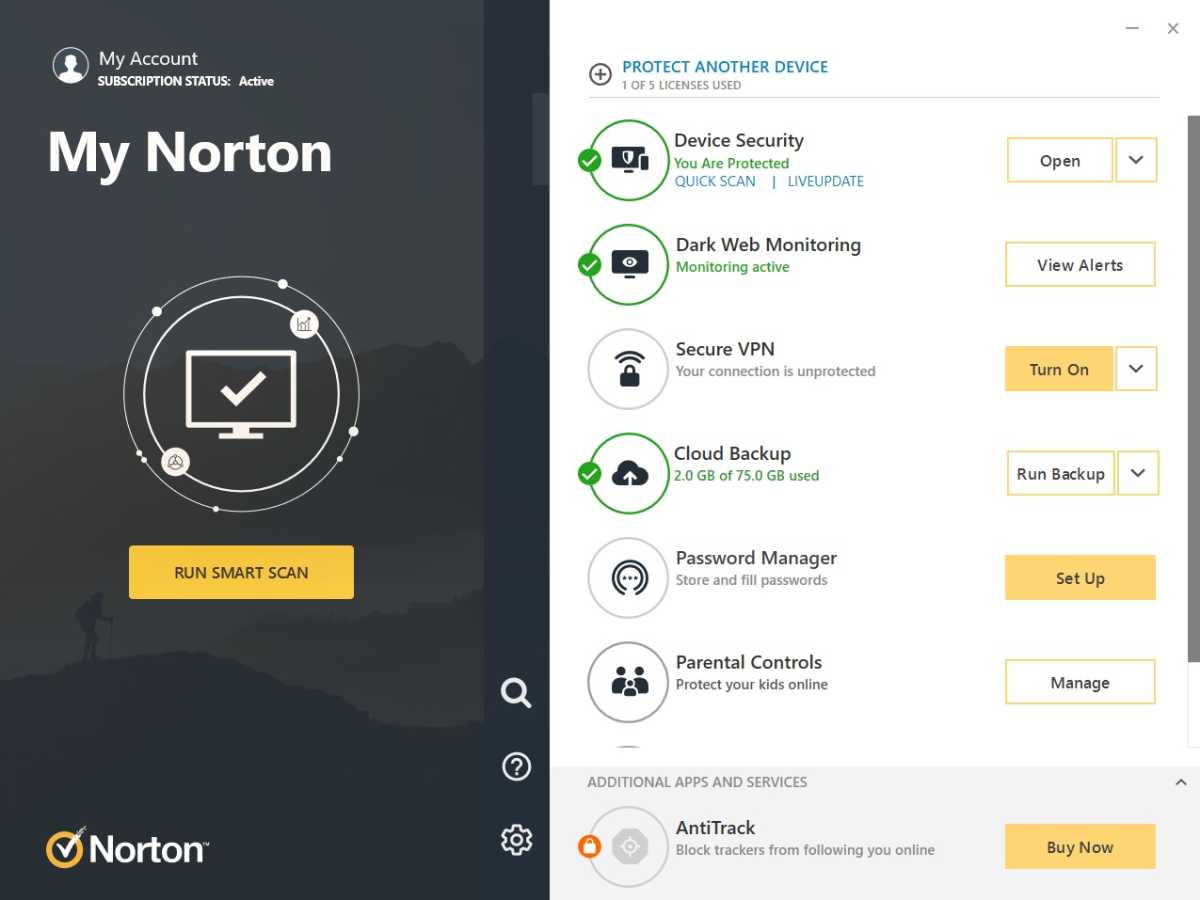
Tools like Norton 360 provide more than just virus scanning.

Ian Paul / Foundry

To be clear, third-party antivirus software isn’t a grift with no actual utility behind it. While most people don’t need to pay for antivirus software, there are still some reasons to consider doing so:You need more help with security: Some antivirus programs offer extra security features beyond the realm of traditional virus scanning. Avast, for instance, can monitor webcam use and let you block untrusted apps from capturing video, and it can also alert you if any of your online passwords are involved in a security breach.
You’re looking to bundle: In addition to extra security features, some antivirus programs offer tools that you might otherwise purchase separately. Norton 360 Deluxe, for instance, includes its own password manager and cloud storage service. Avast One has a built-in VPN and a temporary file cleaner.
You want more kinds of protection: Some third-party tools offer additional methods of protection that aren’t built into Windows. AVG’s “Behavior Shield,” for instance, can look for patterns of malicious behavior even when it hasn’t detected a virus, while Avast One has ransomware protection that prevents apps from encrypting your files without permission. (Windows offers this as well, but not by default.) Antivirus suites also typically provide protection for mobile devices as well as personal computers.

All of these extra features, however, can bloat up your computer, affecting performance and getting in your way, and they might not even be the best tools for the job. I’d much rather use a dedicated password manager than one that’s bundled with antivirus software, and if I needed a VPN, I’d want to choose the provider myself.

While extra antivirus software was essential in the early days of personal computing, these days it’s just one potential tool in the broader security arsenal, which should also include strong passwords, two-factor authentication, robust data backups, and a healthy dose of common sense. On that, at least, the experts seem to be in total harmony.

Want more tech advice like this? Sign up for my Advisorator newsletter, where a version of this column originally appeared.

Source: Is Windows antivirus software still necessary in 2022? | PCWorld

3/26/2022

How to Bypass Windows 11 Minimum Installation Requirements

Try these alternative solutions when your device does not meet Windows 11 minimum system requirements to install the latest OS. By Zainab Falak, Published Feb 08, 2022

The Windows 11 release has proceeded at a lightning pace. The new version includes many changes, which means there will be compatibility issues you previously did not face in Windows 10.

For Windows 11, your PC must meet some strict requirements from Microsoft, which has caused plenty of confusion and frustration among the users. Fortunately, there are several ways to bypass the installation requirements and install Windows 11 on incompatible PCs, so all is not lost. So let's jump in to see how we can eliminate the Windows 11 compatibility checks!

What Are Windows 11 Installation Requirements?

It is essential to understand that the minimum specifications required to install the new operating system version are different from the recommended specifications. Here is what is absolutely necessary:

  • Intel, AMD, or Qualcomm dual-core 64-bit processor running at 1 GHz or faster
  • At least 4GB of RAM
  • At least 64GB of storage
  • Supported and enabled UEFI Secure Boot
  • A Trusted Platform Module (TPM), version 2.0
  • Supports DirectX 12 or later, using WDDM 2.0 drivers
  • High definition (720p) display, 9" or greater monitor, 8 bits per color channel

Windows 11's stringent compatibility checks are most restrictive for the processor requirements, and older hardware is less likely to pass them. See our guide to Windows 11's requirements for more info, which is especially useful if you want to run Windows 11 on a Virtual Machine.

Use the Windows11Upgrade Tool From GitHub

It is easiest to bypass the Windows 11 installation requirements with the Windows11Upgrade tool, which provides the option of an in-place upgrade as well as a clean installation.

Here is how you can install and use it:

  1. Visit the Windows11Upgrade tool's official GitHub page.
  2. Click on the file named Windows11Upgrade_EN.zip and wait for the download to complete.
     
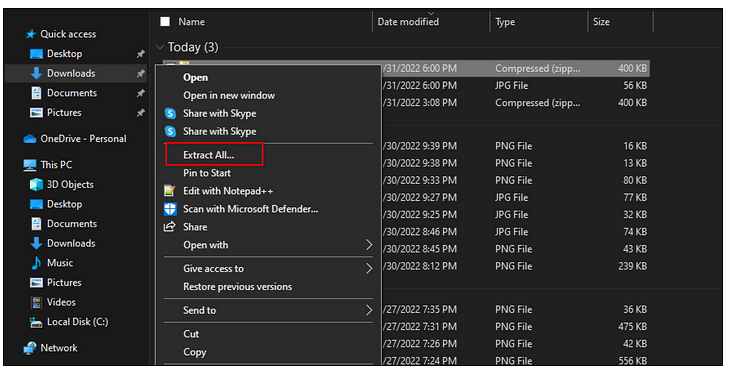
  3. The downloaded file should be in ZIP format. Navigate to the download location and right-click on the file.
  4. Select Extract All from the context menu.
     
  5. Once done, access the extracted folder, right-click on the Windows11Upgrade file, and select Run as administrator from the context menu.
     
  6. You should now see a pop-up window with two options. Click on Select Windows 11 ISO File if you already have an ISO file. If you do not have an ISO file of Windows 11, click on the Download Windows 11 ISO file option.
     
    Locate and select the ISO file.

    It should now give you three options; Upgrade, Data Only, and Clean Install.


    Choose your preferred option and then click on Install System.

    Then, follow the on-screen instructions to install Windows 11.


    Bypass the TPM 2.0 and Secure Boot Requirements

    Trusted Module Platform (TPM) protects data against hacking and other threats at the hardware level. On the other hand, UEFI-level Secure Boot prevents any operating system from starting that is not authorized by the user.

    Below we have listed two ways to bypass TMP 2.0 and Secure Boot requirements for Windows 11. Proceed with the one that suits you the best.

    Use Rufus

    In this method, we will be using a third-party program called Rufus to bypass the TPM 2.0 and Secure Boot requirements.

    Here is what you need to do:

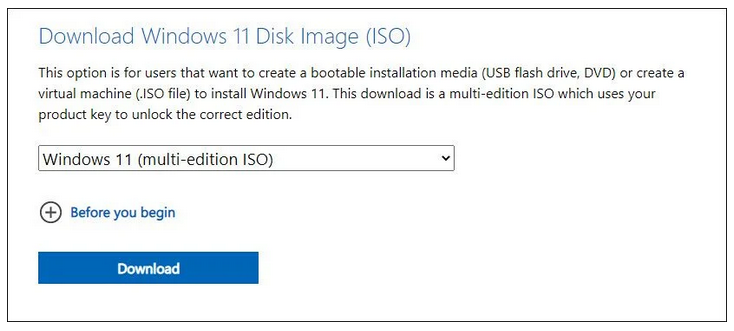
    If you do not already have the Windows 11 ISO file, head over to the Windows 11 download page.

    Under the Download Windows 11 Disk Image (ISO) section, select Windows 11 and hit Download.

    Confirm your choice of language to proceed.

    Click on the 64-bit Download link to download the ISO file.

    Once done, download Rufus Version 3.16 Beta 2.

    To run Rufus, double-click the downloaded exe file.

    Then connect the USB drive to your computer.

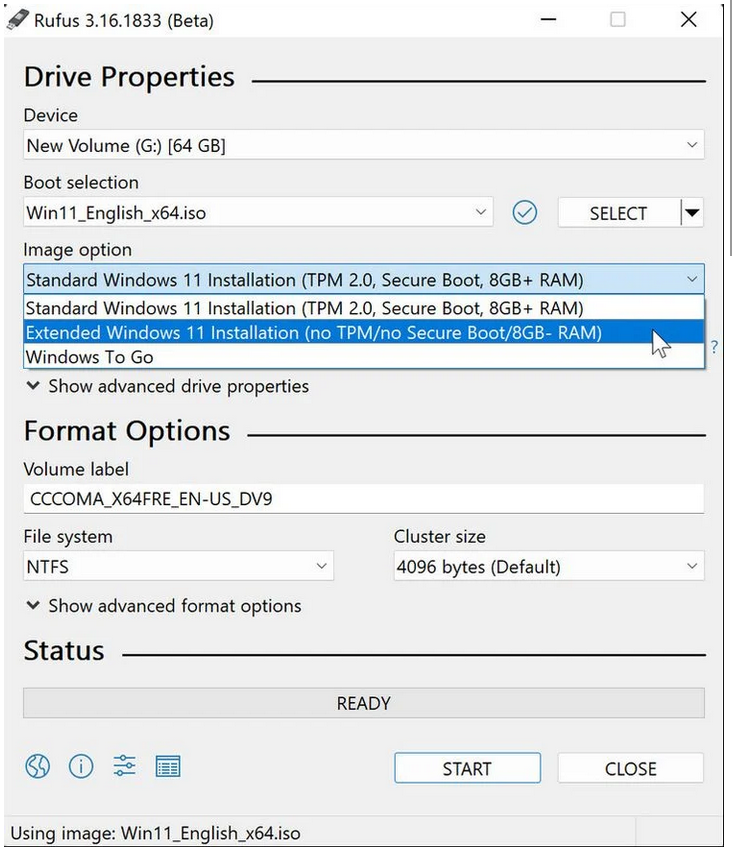
    Click SELECT to select the ISO file that you downloaded.

    In the Rufus dialog, expand the dropdown menu under Image and select the Extended Windows 11 Installation (No TPM/no Secure Boot/8GB- RAM) option. By choosing this option, you will skip Windows 11's secure boot and TPM 2.0 requirements, along with the minimum demand for 8GB of RAM.


    Finally, to create Windows 11 installation media, click START.

    Use the Media Creation Tool

    In the second method, we will be using the Media Creation Tool to bypass the requirements of TPM 2.0 and Secure Boot. Note, however, that this method will only work for NTFS formatted OS partitions.

    Related: NTFS, FAT, exFAT: Windows 10 File Systems Explained

    If you are using FAT32 instead, jump to the next method below. Else, follow the steps mentioned below to proceed:

    Begin by creating a bootable Windows 10 USB disk by using the Media Creation Tool.

    Once the process is completed, open the directory containing the Windows 10 USB disk and delete the install.esd or install.wim files. You are likely to find only one of these files inside the directory.

    After you remove the file, mount the Windows 11 ISO.

    Now head over to the same directory again and copy the install.wim file to your clipboard.

    You can now paste the install.wim file you previously copied from Windows 11 ISO to the Windows 10 USB stick.

    In the final step, boot from the modified Windows 10 USB stick and install Windows 11.

    Modify Windows Registry

    Lastly, we have the option of editing the Windows Registry to bypass Windows 11 installation requirements.


    How to Make an Unsupported Windows 11 PC Compatible by Editing the Registry

    Own an older PC? Don't worry, there's still a chance you can get Windows 11 running on it. Here's how.

    Microsoft has enforced strict hardware requirements for Windows 11. The company has not backtracked over the TPM 2.0 and CPU model/family requirements, which means millions of people will be left out of the Windows 11 upgrade process.

    In a display of consumer friendliness, Microsoft has shared a way to bypass the TPM and CPU model/family check for people who want to manually install Windows 11 on unsupported PCs. So, let’s take a look at how you can use the registry to circumvent the Windows 11 check.

    Editing the Registry to Circumvent the Windows 11 Requirement Check

    Before we discuss how to edit Windows 10’s registry, you have to understand that editing the Windows Registry can do irreparable damage to your machine if you fail to do it right.

    In other words, strictly follow the instructions laid out in this article and don’t touch anything else in the registry. if you mess up, you might have to install Windows all over again.

    Related: Windows 10 Registry Tweaks to Improve & Unlock Features

    Moreover, the following method will only bypass the check for TPM 2.0 and CPU model/family. Your computer still needs to have TPM 1.2 at the very least. If it doesn’t, then your PC is too old and you should buy a new PC.

    1. Open up the Registry Editor by pressing Win + R, type regedit, and press Enter.
    2. In the Registry Editor, navigate to HKEY_LOCAL_MACHINE > SYSTEM > Setup > MoSetup in the left panel of the Registry Editor.
    3. Left-click on the MoSetup key and select New > DWORD (32-bit) value. Give it the name AllowUpgradesWithUnsupportedTPMOrCPU.
    4. Double-click on the newly created entity, enter 1 in the Value Data field, and press OK.
    5. Finally, close the Registry Editor and reboot your computer.
    Your computer is now ready to install Windows 11 even if it doesn’t meet the minimum requirements. However, if you do intend to use Windows 11 for a long time, it might be worth shelling out for a new PC.


    You can bypass the TPM 2.0 and CPU model check using this method. At the very least, your computer should have TPM 1.2 to proceed. It is also important to note that Windows Registry is an advanced-level utility, which is why we highly recommend creating a Registry backup before proceeding with the instructions. Creating a backup will help you restore the current version of Windows Registry if anything goes wrong.

    Successful Installation of Windows 11 on an Incompatible PC

    We hope one of the methods listed above did the trick for you. It's worth noting that Microsoft has paid great attention to developing new security features for Windows 11, which are in large part reliant on the processing power of the latest processors.

    If you've made it this far and think that Windows 10 is more suitable for you until you switch to compatible hardware, you should know that you can use it for another three years (till 2025).

    Source: https://www.makeuseof.com/bypass-windows-11-minimum-installation-requirements/