Pages

2/03/2026

How to Make Windows 11 Look Like macOS for free

Both Windows 11 and ChromeOS have imitated the MAC OS silver theme. But to go even further, you can add a free MAC OS Theme to Windows 11. Below is an article how to do this, and my own results. Enjoy.

Do you love the sleek design of macOS but prefer using Windows 11? You’re not alone! Many users appreciate the functionality of Windows but want to enjoy the elegance of macOS. In this guide, we’ll show you how to completely transform your Windows 11 interface into a macOS look-alike.

By the end of this tutorial, your Windows PC will resemble macOS with a familiar dock, icons, and menu bars. The best part? Everything you need is included in one handy zip file, except for one tool, Ultra UX Theme Patcher, which must be downloaded separately.

So, let’s dive in!

Why Customize Windows to Look Like macOS?

Before we begin, let’s understand why you’d want to customize Windows 11 to mimic macOS.

  • Aesthetic Appeal: macOS is known for its clean, modern, and minimalist design. Many people find it more visually pleasing than Windows’ default interface.
  • Familiarity: If you’re used to macOS but need to work on Windows, making Windows look like macOS can help bridge the gap.
  • Enhanced Productivity: With the macOS-like dock and layout, you might find it easier to navigate, boosting your productivity.

Now that we know why, let’s move on to the tools you’ll need to achieve this transformation.

Tools You’ll Need

Here’s a list of tools we’ll be using to give your Windows 11 a complete macOS makeover:

  1. 7TSP Icon Theme – Replaces default Windows icons with macOS-style icons.
  2. StartAllBack – Customizes the start menu and taskbar to match macOS.
  3. MicaForEveryone – Adds macOS-like transparency effects.
  4. OldNewExplorer – Modifies File Explorer to resemble Finder in macOS.
  5. macOS Themes – Applies macOS themes to your system.
  6. Ultra UX Theme Patcher – Allows third-party themes to be applied to Windows.
  7. macOS Cursor – Adds the macOS pointer.

Everything except Ultra UX Theme Patcher is included in the zip file, which you can download via the button provided. Ultra UX Theme Patcher will need to be downloaded manually.

also download Ultra UX Theme Patcher

Step 1: Backup Your System

Before making any changes, create a system restore point. This will help you revert your system in case something doesn’t go as planned.

Here’s how to create a restore point:

  1. Go to the search bar and type “Create a restore point.”
  2. Select your system drive (usually C:), then click on “Configure.”
  3. Enable “Turn on system protection” and set the max usage slider to around 5%.
  4. Click “Apply” and then “OK.”
  5. Now, click “Create” to name and save your restore point.

Step 2: Install Ultra UX Theme Patcher

This is the only tool you’ll need to download separately. Ultra UX Theme Patcher allows you to install third-party themes on Windows, which is essential for applying the macOS themes.

  1. Head over to Ultra UX Theme Patcher’s official website and download the latest version.
  2. Run the installer and follow the instructions to patch your system.
  3. Restart your computer once the patching is complete.

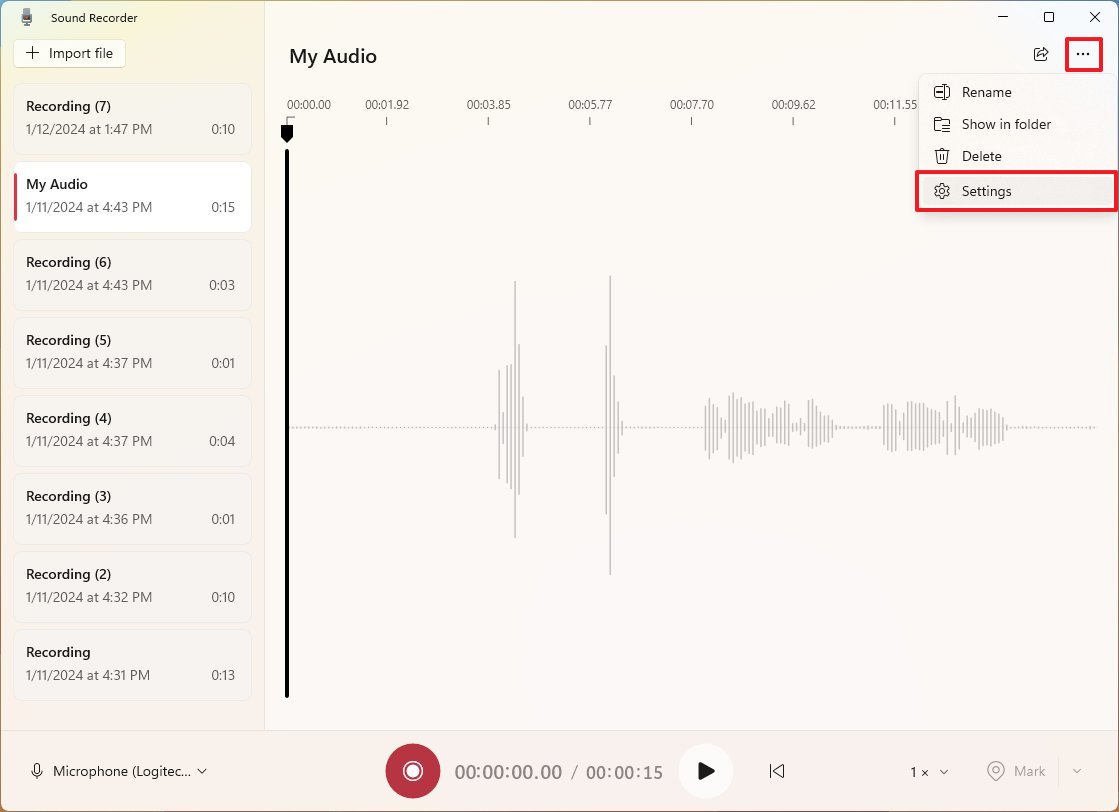
Step 3: Apply macOS Themes

With Ultra UX Theme Patcher installed, you can now apply third-party themes to your system. The macOS themes included in the zip file mimic the look and feel of macOS Monterey or Big Sur.

  1. Unzip the provided files.
  2. Navigate to the “Themes” folder.
  3. Copy the theme files into C:\Windows\Resources\Themes.
  4. Right-click on the desktop and select “Personalize.”
  5. In the Themes section, you’ll find the new macOS themes. Apply the one you prefer.

This will give Windows 11 the general appearance of macOS, but we’re not done yet!

Step 4: Use StartAllBack for Taskbar and Start Menu Customization

Windows 11’s taskbar and start menu differ quite a bit from macOS’s dock and menu bar. We’ll use StartAllBack to fix that.

  1. Install StartAllBack from the zip file.
  2. Once installed, launch the program.
  3. In the settings, select the “Dock” style for the taskbar to make it look like macOS’s dock.
  4. Adjust the Start menu layout to resemble the macOS top menu bar.

Now, your taskbar and Start menu should closely resemble those on macOS!

Step 5: Replace Icons with 7TSP Icon Theme

To complete the look, you’ll need to change the default Windows icons to macOS-style icons using 7TSP Icon Theme.

  1. Open 7TSP from the zip file.
  2. Select “Add a custom icon pack” and choose the macOS icons file.
  3. Apply the changes and wait for the process to complete.

Once done, you’ll see that all system icons now look like those from macOS.

Step 6: Use MicaForEveryone for Transparency Effects

macOS is known for its sleek transparency effects, especially in windows and menus. MicaForEveryone allows you to add similar effects to Windows 11.

  1. Run MicaForEveryone from the zip file.
  2. Enable transparency effects and customize the intensity to your preference.
  3. You can apply these effects to the Start menu, File Explorer, and even individual windows.

Now, your Windows 11 will have the signature transparent design that makes macOS so visually appealing.

Step 7: Modify File Explorer with OldNewExplorer

Windows 11’s File Explorer differs quite a bit from macOS’s Finder. To make it look more like Finder, we’ll use OldNewExplorer.

  1. Install OldNewExplorer from the zip file.
  2. In the settings, enable options to hide the ribbon and change the navigation pane to match macOS Finder.
  3. Customize the folder icons and layout for a closer resemblance.

With these changes, your File Explorer should now look like macOS’s Finder.

Step 8: Add macOS Cursor

The final touch is to change your mouse cursor to the macOS style.

  1. Open the “macOS Cursor” folder from the zip file.
  2. Right-click the .inf file and select “Install.”
  3. Open the Mouse Settings by typing “Mouse” into the search bar.
  4. Go to the “Pointers” tab and choose the macOS cursor scheme from the list.

Apply the changes, and your cursor will now look like the one in macOS.

Final Steps: Reboot and Enjoy!

After completing all these steps, restart your computer to ensure all changes take effect.

Now, when your system boots up, you should be greeted with a beautifully transformed Windows 11 that looks and feels like macOS! You’ll enjoy the iconic macOS dock, icons, transparency effects, and the streamlined elegance of macOS right on your PC.

Source: https://techrifle.com/how-to-make-windows-11-look-like-macos-2024/


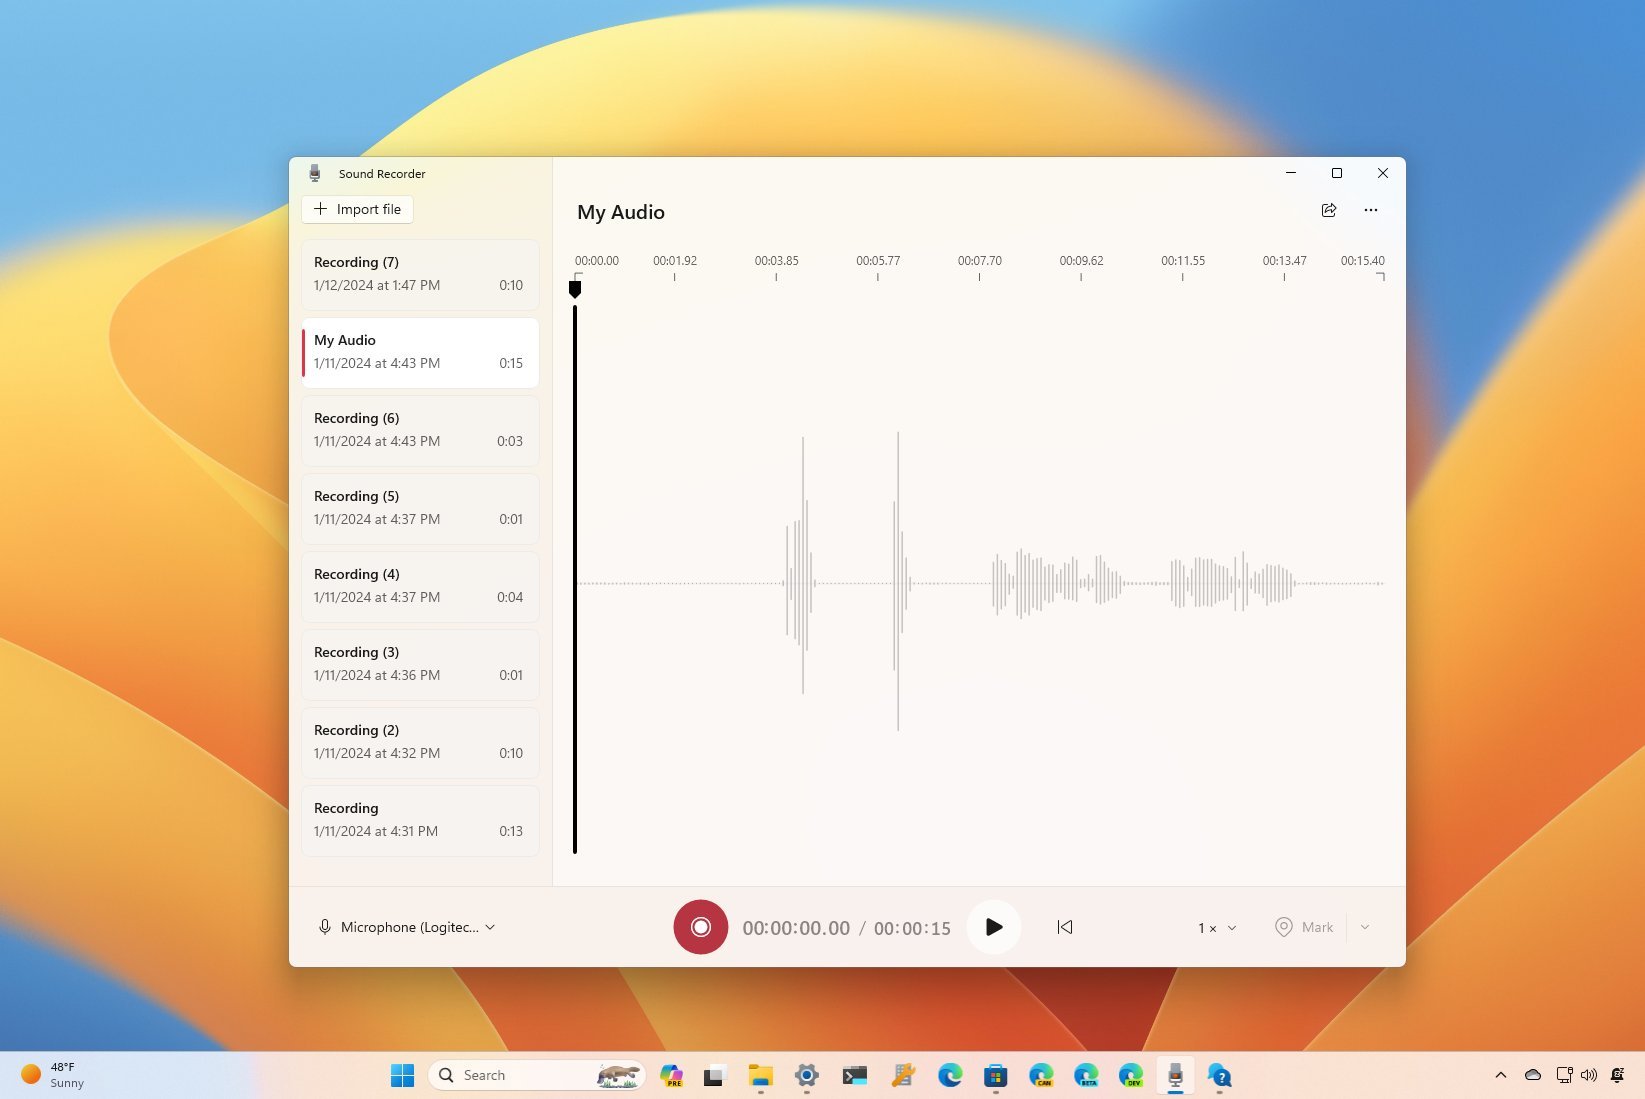
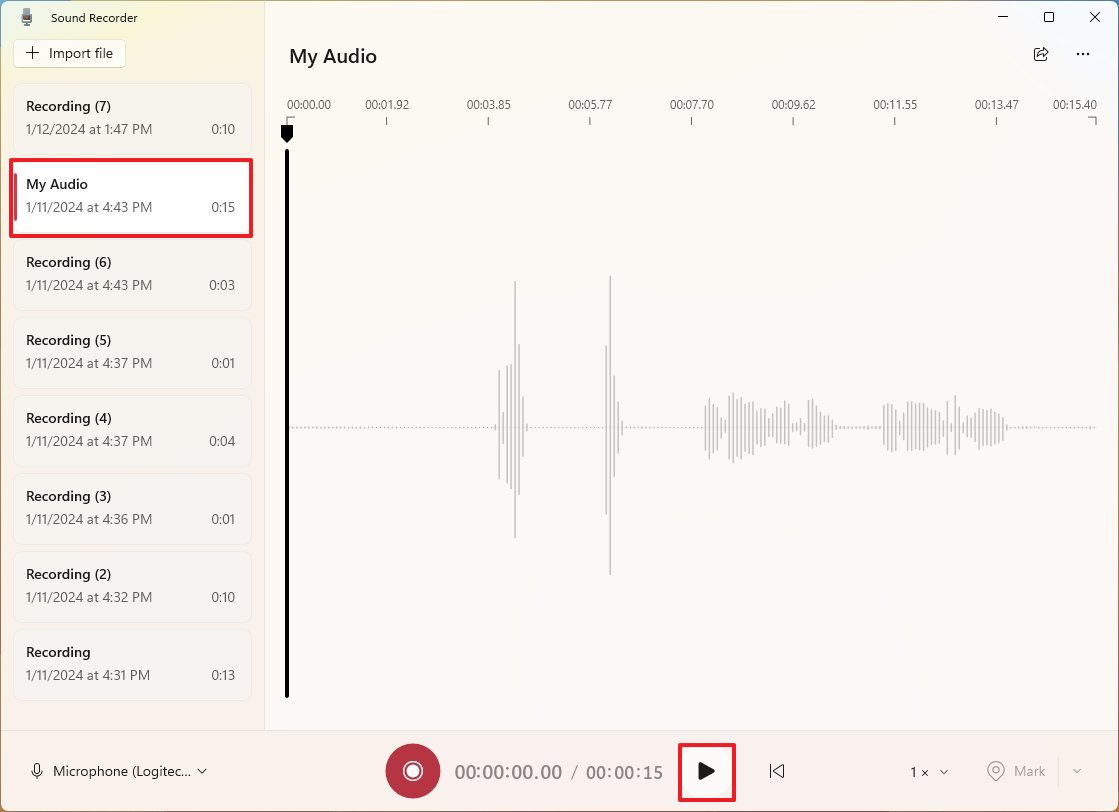
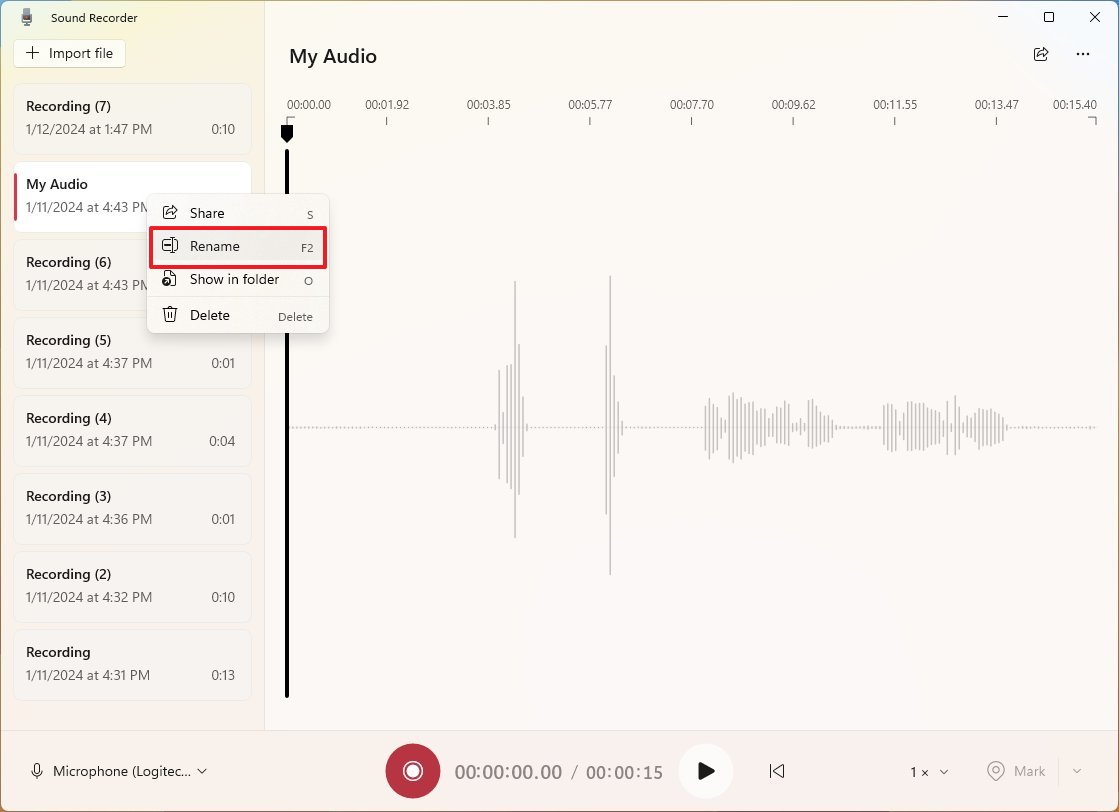
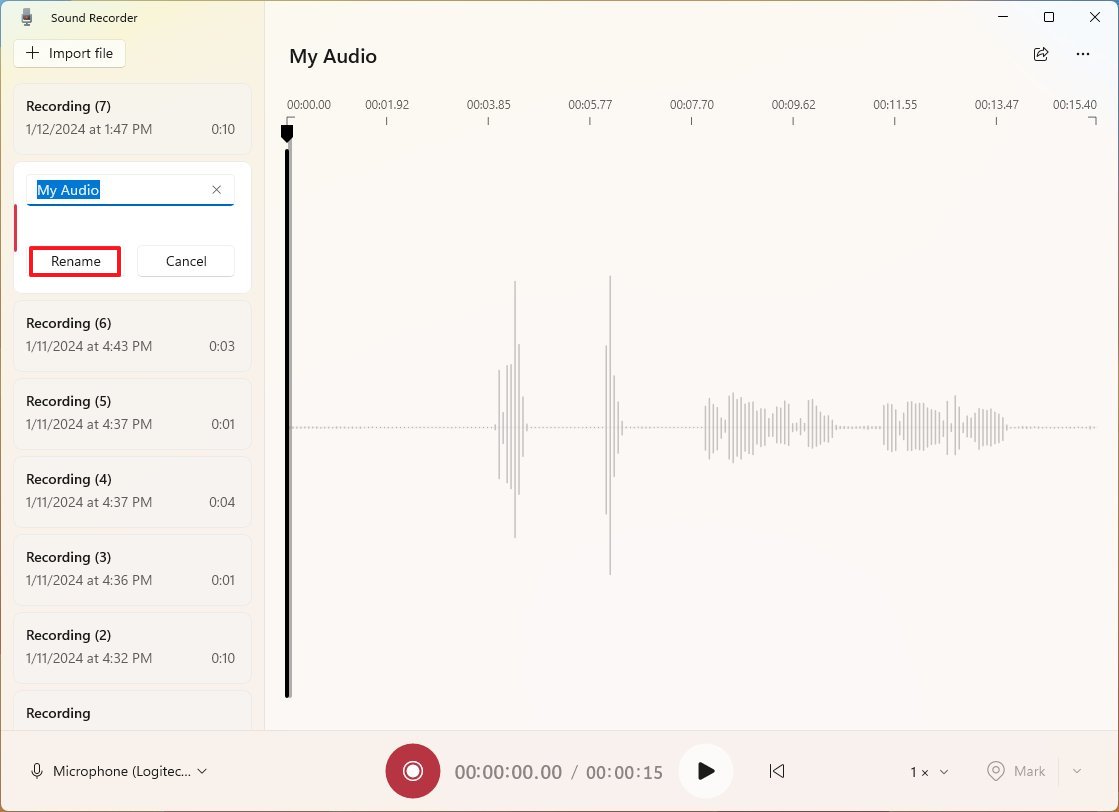
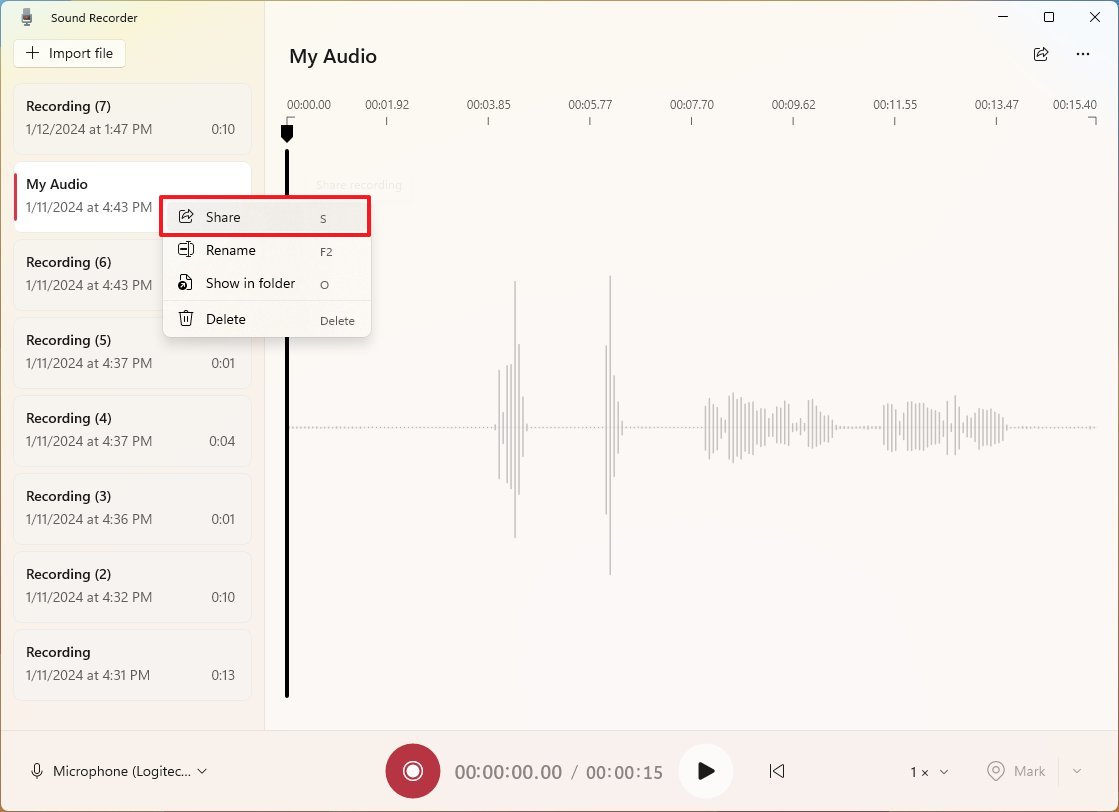
Below are my own results:


Other add-ons:
Open Shell Menu: https://open-shell.github.io/Open-Shell-Menu/

Explorer Patcher: https://github.com/valinet/ExplorerPatcher/releases

Chrome White Theme: Classic with white Omnibox:

https://chromewebstore.google.com/detail/classic-with-white-omnibo/lfjbdknljkihdgnabcdofiabofedjjkh?pli=1

Desktop Gadgets: https://gadgetpack.net/

MAC OS Sierra Mountains Wallpaper: https://wallpaperaccess.com/mac-4k


2/01/2026

How to get started using Sound Recorder app on Windows 11

By Mauro Huculak published January 13, 2024

Do you need to record sound on Windows 11? Here's how without third-party software required. Windows 11 Sound Recorder

Windows 11 Sound Recorder (Image credit: Mauro Huculak)

On Windows 11, you can use the Sound Recorder app to quickly record audio in any situation, such as conversations, interviews, lectures, and podcasts. 

In the Microsoft Store and across the web, you can find many different audio recording apps, but the Sound Recorder app is easy to use with the basic features that you may need, and it comes already built into the operating system.

The Sound Recorder app should be installed on your computer, but if not, you can download it directly from this Microsoft Store page by clicking the "Get (or Install)" button.

How to use Sound Recorder on Windows 11

Once you connect a microphone, you can continue with the instructions to start recording audio on Windows 11 without third-party tools.

Record audio 

To record audio on Windows 11, use these steps:

  1. Open Start.
  2. Search for Sound Recorder and click the top result to open the app.
  3. (Optional) Click the mic button in the bottom-left corner and choose the recording device you want to use if you have multiple microphones.
  4. Click the Record button ("Ctrl + R"). 

(Image credit: Mauro Huculak)
  1. Click the Mark button ("Ctrl + M") to mark a point in the recording. 

(Image credit: Mauro Huculak)
  • Quick note: This option won't interrupt the recording, but you can quickly jump to important parts of the file when listening to the track. The setting is available while recording or listening to the audio file.
  1. Click the Pause button ("Alt + P" or "Space key") to stop the recording without separating the track to keep everything in one file.
  2. Click the Stop button ("Escape" or "Enter key") to finish the recording. 

(Image credit: Mauro Huculak)

After you complete the steps, the file with the audio will be saved in the "Sound Recordings" folder available through the "Documents" folder.

Playback audio

To playback audio from the Sound Recorder, use these steps:

  1. Open Start.
  2. Search for Sound Recorder and click the top result to open the app.
  3. Choose the file from the left pane.
  4. Click the Play button ("Space key"). 

(Image credit: Mauro Huculak)

Once you complete the steps, the recording will play, and you can click the "Pause" button to control the audio.

Rename audio 

To change the name of an audio file, use these steps:

  1. Open Start.
  2. Search for Sound Recorder and click the top result to open the app.
  3. Right-click the file and choose the Rename option. 

(Image credit: Mauro Huculak)
  1. Confirm the new name.
  2. Click the Rename button. 

(Image credit: Mauro Huculak)

After you complete the steps, the new name will apply in the app and the file. If the file is selected, you can also access the option to change the name from the "More options for recordings" menu in the top-right corner.

If you want to delete a file, right-click the item from the left side and choose the "Delete" option.

Share audio

To share an audio file with other people from within the Sound Recorder app, use these steps:

  1. Open Start.
  2. Search for Sound Recorder and click the top result to open the app.
  3. Right-click the file and choose the Share option. 

(Image credit: Mauro Huculak)
  1. Choose the sharing method, including email, app, or through the Nearby Sharing feature.
  2. Continue with the on-screen direction to complete the process.

Alternatively, you can always use the "Show in folder" option from the Sound Recorder context menu to access the folder containing your recordings to grab the file manually for sharing.

Change settings

To change the audio format or recording quality on Windows 11, use these steps:

  1. Open Start.
  2. Search for Sound Recorder and click the top result to open the app.
  3. Click the "More options for recordings" menu from the top-right corner and choose the Settings option. 

(Image credit: Mauro Huculak)
  1. Click the Recording format setting.
  2. Select the audio format you want to use, including AAC, MP3, MWA, FLAC, or WAV.

(Image credit: Mauro Huculak)
  1. Click the Audio quality setting.
  2. Select the quality option for your recording, including Auto, Best, High, or Medium

(Image credit: Mauro Huculak)

Once you complete the steps, the new configuration will apply, and the app will use these settings on your next recording.

Import audio 

To import an audio file to the Sound Recorder app, use these steps :

  1. Open Start.
  2. Search for Sound Recorder and click the top result to open the app.
  3. Click the Import file button. 

(Image credit: Mauro Huculak)
  1. Select the audio file.
  2. Click the Open button.

After you complete the steps, the file will appear in the left navigation pane, ready for playback.

How to fix Sound Recorder on Windows 11

If the app doesn't seem to work, the problem could be related to the microphone or privacy settings.

Fix microphone access

To fix app access to the microphone on Windows 11, use these steps:

  1. Open Settings.
  2. Click on Privacy & security.
  3. Click the Microphone page on the right side. 

(Image credit: Mauro Huculak)
  1. Turn on the Microphone access toggle switch (if applicable).
  2. Turn on the Sound Recorder toggle switch. 

(Image credit: Mauro Huculak)

Once you complete the steps, you should be able to use the microphone with the Sound Recorder app.

Fix microphone issues

To troubleshoot and resolve issues with the microphone, use these steps:

  1. Open Settings.
  2. Click on System.
  3. Click the Troubleshoot page on the right side.
  4. Click the Other troubleshooters setting. 

(Image credit: Mauro Huculak)
  1. Click the Run button for the Audio troubleshooter. 

(Image credit: Mauro Huculak)
  1. Click the Yes button in the Get Help app. 

(Image credit: Mauro Huculak)
  1. Continue with the on-screen directions to complete the process.

After you complete the steps, the system will scan and fix the problem with the microphone, and it should now work with the Sound Recorder app.

Fix Sound Recorder problems

To fix problems with the Sound Recorder app on Windows 11, use these steps:

  1. Open Settings.
  2. Click on Apps.
  3. Click the Installed apps page on the right side.
  4. Click the menu button (three dots) on the right side for Sound Recorder and click on Advanced options

(Image credit: Mauro Huculak)
  1. Under the "Reset" section, click the Repair button. 

(Image credit: Mauro Huculak)
  1. (Optional) Click the Reset button.

These options won't delete your recordings, but the reset option will delete the app's data, meaning that the next time you open the app, the files won't appear in the left pane. However, you can use the import option to add them again.

Although the Sound Recorder app is similar to the Voice Recorder app on Windows 10, one of the biggest differences is that the app for Windows 11 doesn't include the audio trimming feature.

More resources

For more helpful articles, coverage, and answers to common questions about Windows 10 and Windows 11, visit the following resources: