Pages

12/29/2018

How to install Windows 10 from a USB drive

Here's how to create a bootable Windows installation USB drive starting with a Windows .iso file or a Windows Setup DVD.
 Note
For new Windows 10 installations, we've got a tool that does this for you. See Download Windows 10.
What you need
  • Windows 10 install .iso or DVD
  • USB flash drive with at least 5GB free space. This drive will be formatted, so make sure it doesn't have any important files on it.
  • Technician PC - Windows PC that you'll use to format the USB flash drive
  • Destination PC - A PC that you'll install Windows on

Step 1 - Format the drive and set the primary partition as active

  1. Connect the USB flash drive to your technician PC.
  2. Open Disk Management: Right-click on Start and choose Disk Management.
  3. Format the partition: Right-click the USB drive partition and choose Format. Select the FAT32 file system to be able to boot either BIOS-based or UEFI-based PCs.
  4. Set the partition as active: Right-click the USB drive partition and click Mark Partition as Active.
     Note
    If Mark Partition as Active isn't available, you can instead use diskpart to select the partition and mark it active.

Step 2 - Copy Windows Setup to the USB flash drive

  1. Use File Explorer to copy and paste the entire contents of the Windows product DVD or ISO to the USB flash drive.
  2. Optional: add an unattend file to automate the installation process. For more information, see Automate Windows Setup.

Step 3 - Install Windows to the new PC

  1. Connect the USB flash drive to a new PC.
  2. Turn on the PC and press the key that opens the boot-device selection menu for the computer, such as the Esc/F10/F12 keys. Select the option that boots the PC from the USB flash drive.
    Windows Setup starts. Follow the instructions to install Windows.

    3. Remove the USB flash drive.


Troubleshooting: file copy fails

This can happen when the Windows image file is over the FAT32 file size limit of 4GB. When this happens:
  1. Copy everything except the Windows image file (sources\install.wim) to the USB drive (either drag and drop, or use this command, where D: is the mounted ISO and E: is the USB flash drive.)
    robocopy D: E: /s /max:3800000000
    
  2. Split the Windows image file into smaller files, and put the smaller files onto the USB drive:
    Dism /Split-Image /ImageFile:D:\sources\install.wim /SWMFile:E:\sources\install.swm /FileSize:3800
    
    Note, Windows Setup automatically installs from this file, so long as you name it install.swm.


    Source: https://docs.microsoft.com/en-us/windows-hardware/manufacture/desktop/install-windows-from-a-usb-flash-drive

12/28/2018

Fix: The USB Disk Is Write Protected in Windows 10/8/7


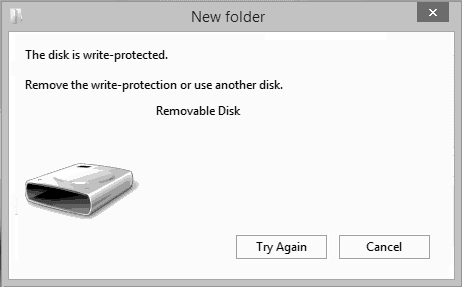
Receive error "the disk is write protected" when trying to format a removable disk (such as USB flash drive, SD card, CD, or pen drive)? The disk is write protected error in Windows 10/8/7 that stops operation of formatting, writing data, i.e. copy & paste files to the generic USB stick. It's imperative to remove write protection on the drive. Learn the how-to guide step by step to fix the "disk is write protected, remove the write-protection or use another disk, removable disk" now.
the disk is write protected

HOW TO FIX THE WRITE-PROTECTED ERROR

We use removable storage devices a lot on a Windows computer, and some of you may encounter the issue of the disk malfunction, which is mostly about "the disk is write protected". When Windows starts to write protect your disk, for example, a SanDisk 4GB USB flash drive, you can no longer use it anymore until you remove the write protection. The fixes are as follows.

Method 1: Diskpart command

Step 1: Open administrative Command Prompt.
Step 2: Type these commands one by one and press Enter key after each:
  • diskpart
  • list disk
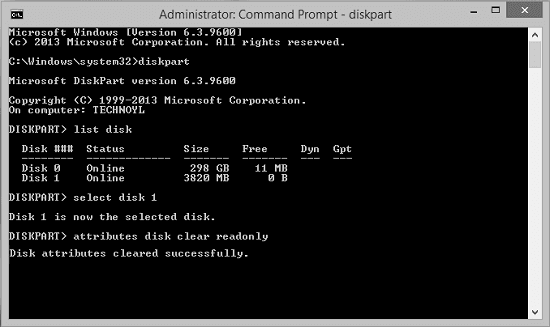
  • select disk # (# is the number of USB drive with which you're getting the write-protected error and is plugged in, see screenshot below)
  • attributes disk clear readonly
use diskpart to remove write-protection usb
Step 3: You may now close Command Prompt and re-plug the USB drive and check if the issue is resolved, by dragging a file to the drive or trying to format in Windows Disk Management or EaseUS Partition Master coming in the later part.

Method 2: Regedit.exe

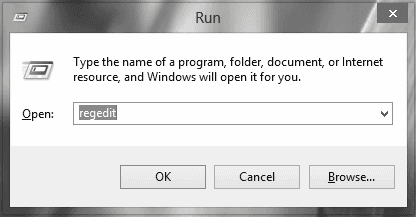
Step 1: Press Windows Key + R keys simultaneously, type "regedit" in Run dialog box and hit Enter to open the Registry Editor.
use regedit.exe to remove write protection usb
Step 2: In the left pane, navigate here: HKEY_LOCAL_MACHINE\SYSTEM\CurrentControlSet\Control
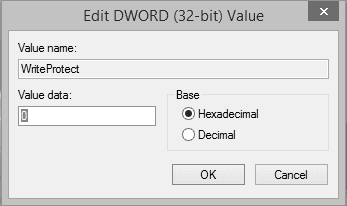
Step 3: In the left pane of this location, right click Control key and select New -> Key. Name the new sub-key so created as StorageDevicePolicies. Now come to the right pane of this sub-key i.e. StorageDevicePolicies, right click and select New -> DWORD Value. Name the newly created DWORD as WriteProtect. In some cases, you might find that this DWORD under the sub-key already exists and the DWORD has a Value set to 1. Double-click on the DWORD to modify its Value data.
set value data to remove write protection usb
Step 4: In the above-shown box, change the Value data to 0 from 1. Click OK. Close the Registry Editor and check if the issue is resolved by dragging a file to the drive or trying to format in Windows Disk Management or EaseUS Partition Master coming in the later part.
You can try those methods mentioned above and they may help you remove the Write Protected  error. Besides, if you have the need to  format a hard drive, memory card, sd card or external drive, we recommend you a reliable partition software -  EaseUS Partition  Master, which is a powerful yet user-friendly alternative for Windows 10/8/7 disk management program.

Source: https://www.easeus.com/partition-manager-software/the-disk-is-write-protected-windows-10.html

12/14/2018

6 Free Blu-ray Disc Burning Software Apps

Looking for a way to burn Blu-ray discs? After Blu-ray won the battle with HD DVD, more and more people are starting to buy computers with Blu-ray burners built-in or buying external burners. Either way, as Blu-ray becomes more common like CDs and DVDs, the time is going to come when you are going to burn your first Blu-ray disc!
Note: You can also check out my other posts on how to burn CDs and DVDs on Windowsand how to burn a CD or DVD on a Mac.
You can also purchase commercial software to burn Blu-ray discs or you can use free open source Blu-ray burning software. In this article, I’ve written up a list of free apps you can download to burn Blu-ray discs. There are a lot of freeware apps out there, but only a couple are high quality and time tested.

BurnAware

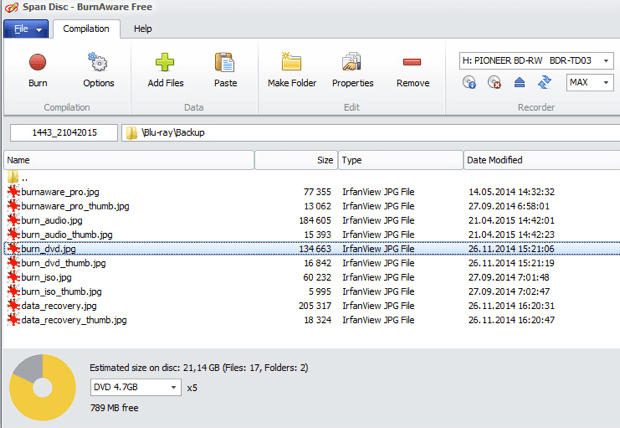
burnaware
BurnAware is a very simple and easy to use CD/DVD/Blu-ray disc-burning app. You can use it to create data backups, audio CDs and to create or burn ISO image files. The free version also lets you create bootable discs, which is really handy. Another really handy feature of the free version is the ability to burn across multiple CDs, DVDs or Blu-ray discs.

CDBurnerXP


CDBurnerXP is another good freeware app to burn CDs, DVDs, and Blu-ray discs. Like BurnAware, you can create and burn ISO images and you can create bootable discs. The only other unique feature it has is the ability to convert NRG/BIN image files to ISO format.

ImgBurn

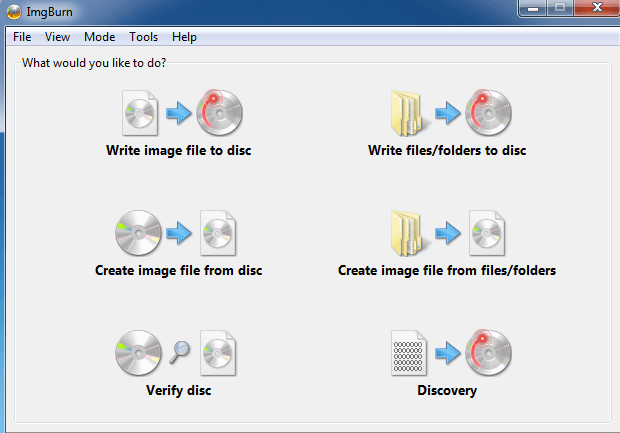
imgburn
ImgBurn has been one of my favorite CD/DVD burning apps for a long time and now it also supports Blu-ray discs, which makes it even better! It has a bunch of other features that make it popular, including supporting the latest drives, the ability to batch create images, support for a wide range of image file formats, and lots more. The other unique feature of ImgBurn is that it can be used to create playable DVD and Blu-ray discs from VIDEO_TS and BDAV/BDMV folders, respectively.

StarBurn

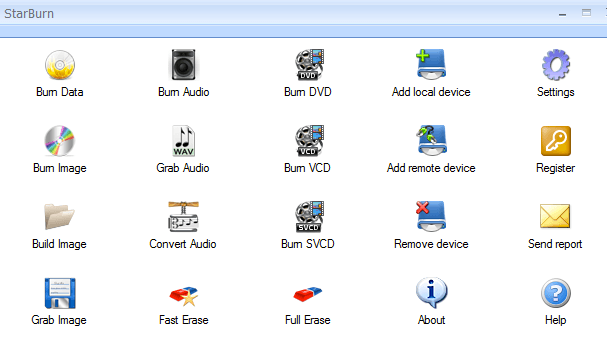
starburn
StarBurn is a nice full-featured CD/DVD/Blu-ray burning app. It has a nice GUI interface that splits your burning options into audio, video, and data. You can burn images and build ISO images also. Unique features include the ability to erase a disc and to compress audio.

Tiny Burner

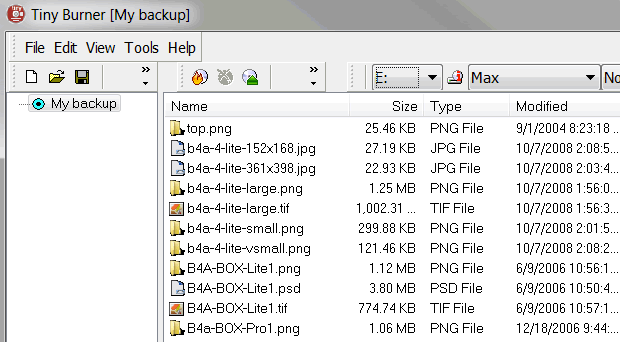
tiny burner
Tiny Burner is an excellent freeware app that works with CDs, DVDs and Blu-ray discs. The installer also comes with a 32-bit and 64-bit version and will install the appropriate version automatically. Just load your disc into the drive, drag and drop the files you want and click the Burn icon to burn the disc.

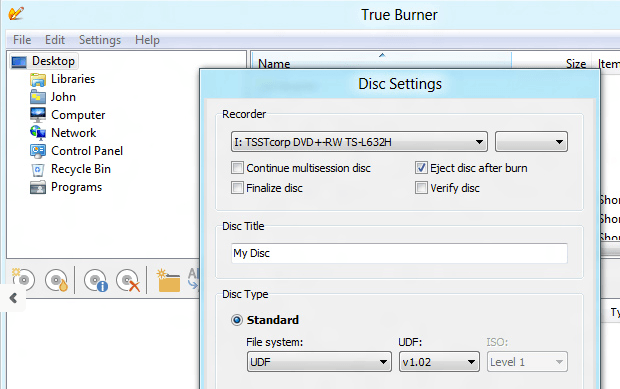
True Burner

true burner
True Burner can burn standard, multi-session and bootable CDs, DVDs and Blu-ray discs. It’s got a very simple user interface and not a whole lot of settings. It doesn’t have a lot of advanced features like ImgBurn, but it gets the job done and it works well.
If you know of any other free software that can burn Blu-ray discs, feel free to post them in the comments! Enjoy!


Source: https://www.online-tech-tips.com/free-software-downloads/free-blu-ray-burning-software/

12/01/2018

The New and Improved Windows 10 Notepad: Useful Tips and Features

Notepad finally got some much-needed attention in Windows 10 1809. It’s been around since the first version of Windows and has always been a very basic text editor.
Well, Notepad is still a basic editor, and the interface is pretty much the same. But Microsoft added new features, made performance improvements, and fixed some bugs in Windows 10 1809 to give it a long overdue boost.
Prior to Windows 10 1809, if you wanted to view bigger text in Notepad, you had to change the font size of the text.
Now, you can zoom in and out on the text without changing the font size.
Go to View > Zoom and select Zoom In or Zoom Out.
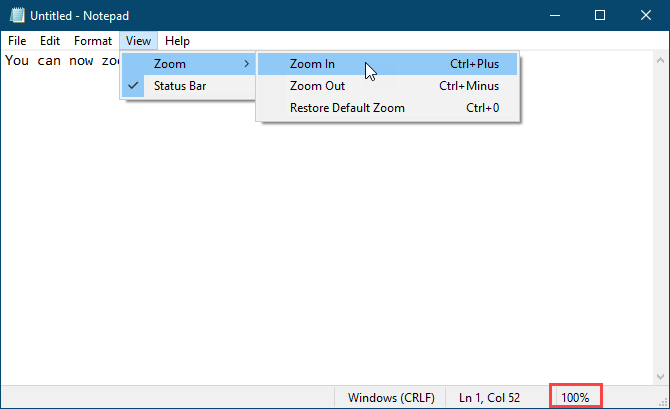

Zoom menu in Notepad


You can also use the Ctrl + + (plus sign) and Ctrl + – (minus sign) keyboard shortcuts to zoom in and out, respectively. To go back to the default 100% zoom level, press Ctrl + 0 (zero).
You can also use a combination of the keyboard and the mouse to quickly zoom in and out. Press and hold the Ctrl key and scroll up with the scroll wheel on your mouse to zoom in or scroll down to zoom out.
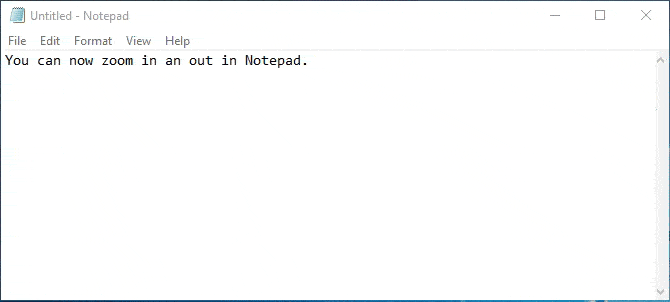

Zoom in and out on text in Notepad

Wrap Around, Find and Replace, and Search AutoFill

Previously, when you started searching in the middle of a text file in Notepad, the search would go to the end of the file or the beginning of the file (depending on the selected direction), but not search the whole file.
In the new improved Notepad, Microsoft added an option to wrap the search around so you can search the whole text file from wherever the cursor is in the file.
When you press Ctrl + F and enter a word or phrase in the Find what box, check the Wrap around box to search the whole file.
Notepad also remembers the options you select now, so when you check the Wrap around box, it will stay checked the next time you use the Find dialog box to search.
Microsoft also added another handy feature—Search Autofill.
Say you want to find other occurrences of specific text in your file. Select the text you want to find and press Ctrl + F. Notepad automatically inserts the selected text into the Find what box on the Find dialog box, allowing you to quickly start your search.
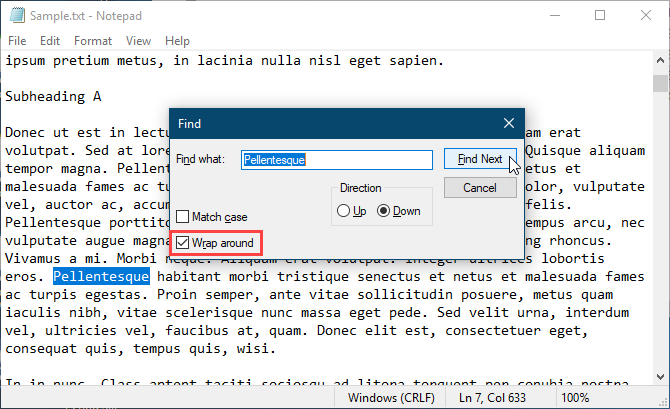

Wrap around search in Notepad

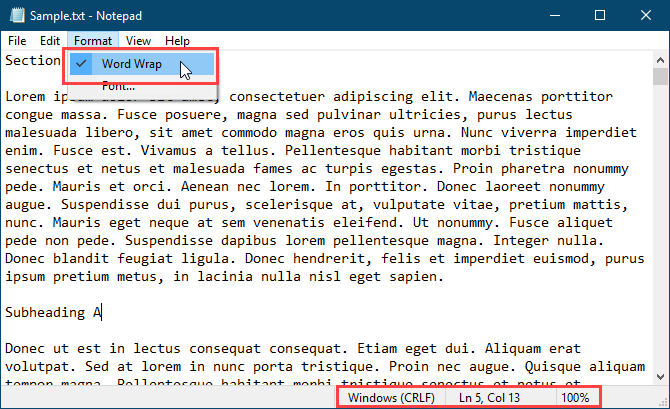
Display the Status Bar with Word Wrap Enabled

Previously, when you enabled Word Wrap on the Format menu in Notepad, the status bar would disappear if you had it enabled. You couldn’t display both at the same time. When Word Wrap was enabled, the Status Bar option on the Viewmenu was grayed out and unavailable.
Now you can enable Word Wrap and display the Status Bar at the same time. And you can disable both if you want.
Word wrap enabled with Status Bar showing in Notepad

Support for Text Files from Linux and Mac

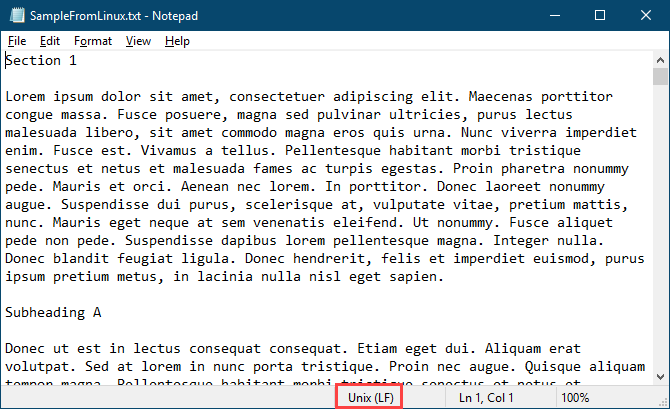
Before Windows 10 1809, Notepad only supported Windows Carriage Return (CR) and Line Feed (LF) (CRLF) line endings for text files. When you opened text files created on Unix, Linux, or Mac, the line endings wouldn’t display correctly. The file would be a mess and line endings occurred in unexpected places. You had to open the file in WordPad, save it there, and then reopen the file in Notepad.
Notepad still uses Windows Carriage Return (CR) and Line Feed (LF) (CRLF) line endings by default. But Microsoft finally added support in Notepad in Windows 10 1809 for line endings in Unix and Linux (LF) and Mac (CR). So text files created on Unix, Linux, or Mac will now display correctly when opened in Notepad.
When you edit and save text files created on Unix, Linux, or Mac, Notepad preserves the type of line breaks from the operating system it was created in.
Text file from Linux open in Notepad

Search Bing Directly From Notepad

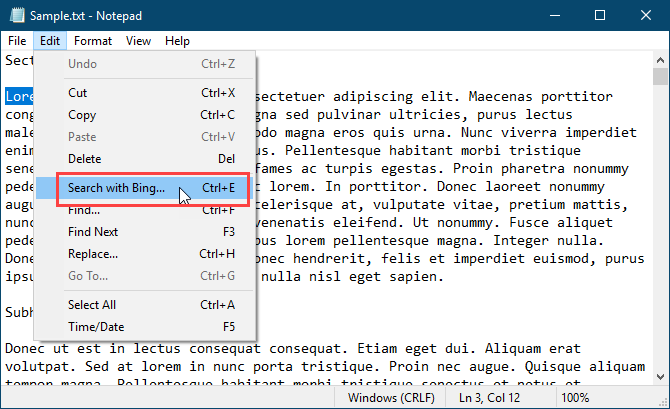
Notepad now allows you to search Bing directly from a text file.
Simply select a word or phrase and select Search with Bing from the Edit menu or press Ctrl + E. Notepad searches the web using Bing and opens the results in Microsoft Edge.
Unfortunately, you can only do searches from Notepad using Bing and Edge. There is no way to change to a different search engine or browser.
Search with Bing in Notepad

Other Changes, Improvements, and Bug Fixes

Microsoft made other small changes and improvements to Notepad. And they fixed some bugs.

Use a Keyboard Shortcut to Delete the Previous Word

Notepad already supports the Ctrl + left arrow and Ctrl + right arrow keyboard shortcuts to move through whole words at a time. You can also use the Shift + Ctrl + left arrow and Shift + Ctrl + right arrow keyboard shortcuts to select whole words at a time.
Now you can also use Ctrl + Backspace to delete the previous word.

Using Arrow Keys on Selected Text

Previously, when you had some text selected and you used the left or right arrow key to move the cursor and deselect the text, the cursor would jump ahead or back one character.
Now, when you move the cursor with the arrow keys while some text is selected, the first key press deselects the text and puts the cursor right after or before where the selection was. The cursor is not advanced an additional character away from the selected text.

Improved Performance When Opening Large Text Files

If you often work with large text files, you’ll be glad to know that Microsoft promises improved performance when opening large files in Notepad.

Some Display Bugs Fixed

Microsoft also fixed some display bugs.
Although we haven’t noticed this bug, Notepad now correctly displays lines that don’t fit entirely on the screen.
Also, when saving a file, the line and column numbers on that status bar don’t reset to 1. They continue showing the correct position of the cursor in the text file.

Increase Your Productivity With the New Notepad

Although there are good Notepad alternatives out there with many more features, Notepad is there by default and still useful for tasks like taking quick notes, editing configuration files, writing scripts and code, and more. There are also some cool tricks you can do with Notepad. And now, with the new features and improvements, you can be more productive in Notepad.
If you still want a text editor with more features than even the improved version of Notepad has, we offer a list of Windows Notepad alternatives.
The 6 Best Windows Notepad Alternatives The 6 Best Windows Notepad Alternatives Windows Notepad is too simple, but Microsoft Office is overkill? If you're looking for a Notepad replacement, here are the leading alternatives. One will be perfect for you. Read More

Source: https://www.makeuseof.com/tag/new-improved-windows-10-notepad/